

Opening Thoughts
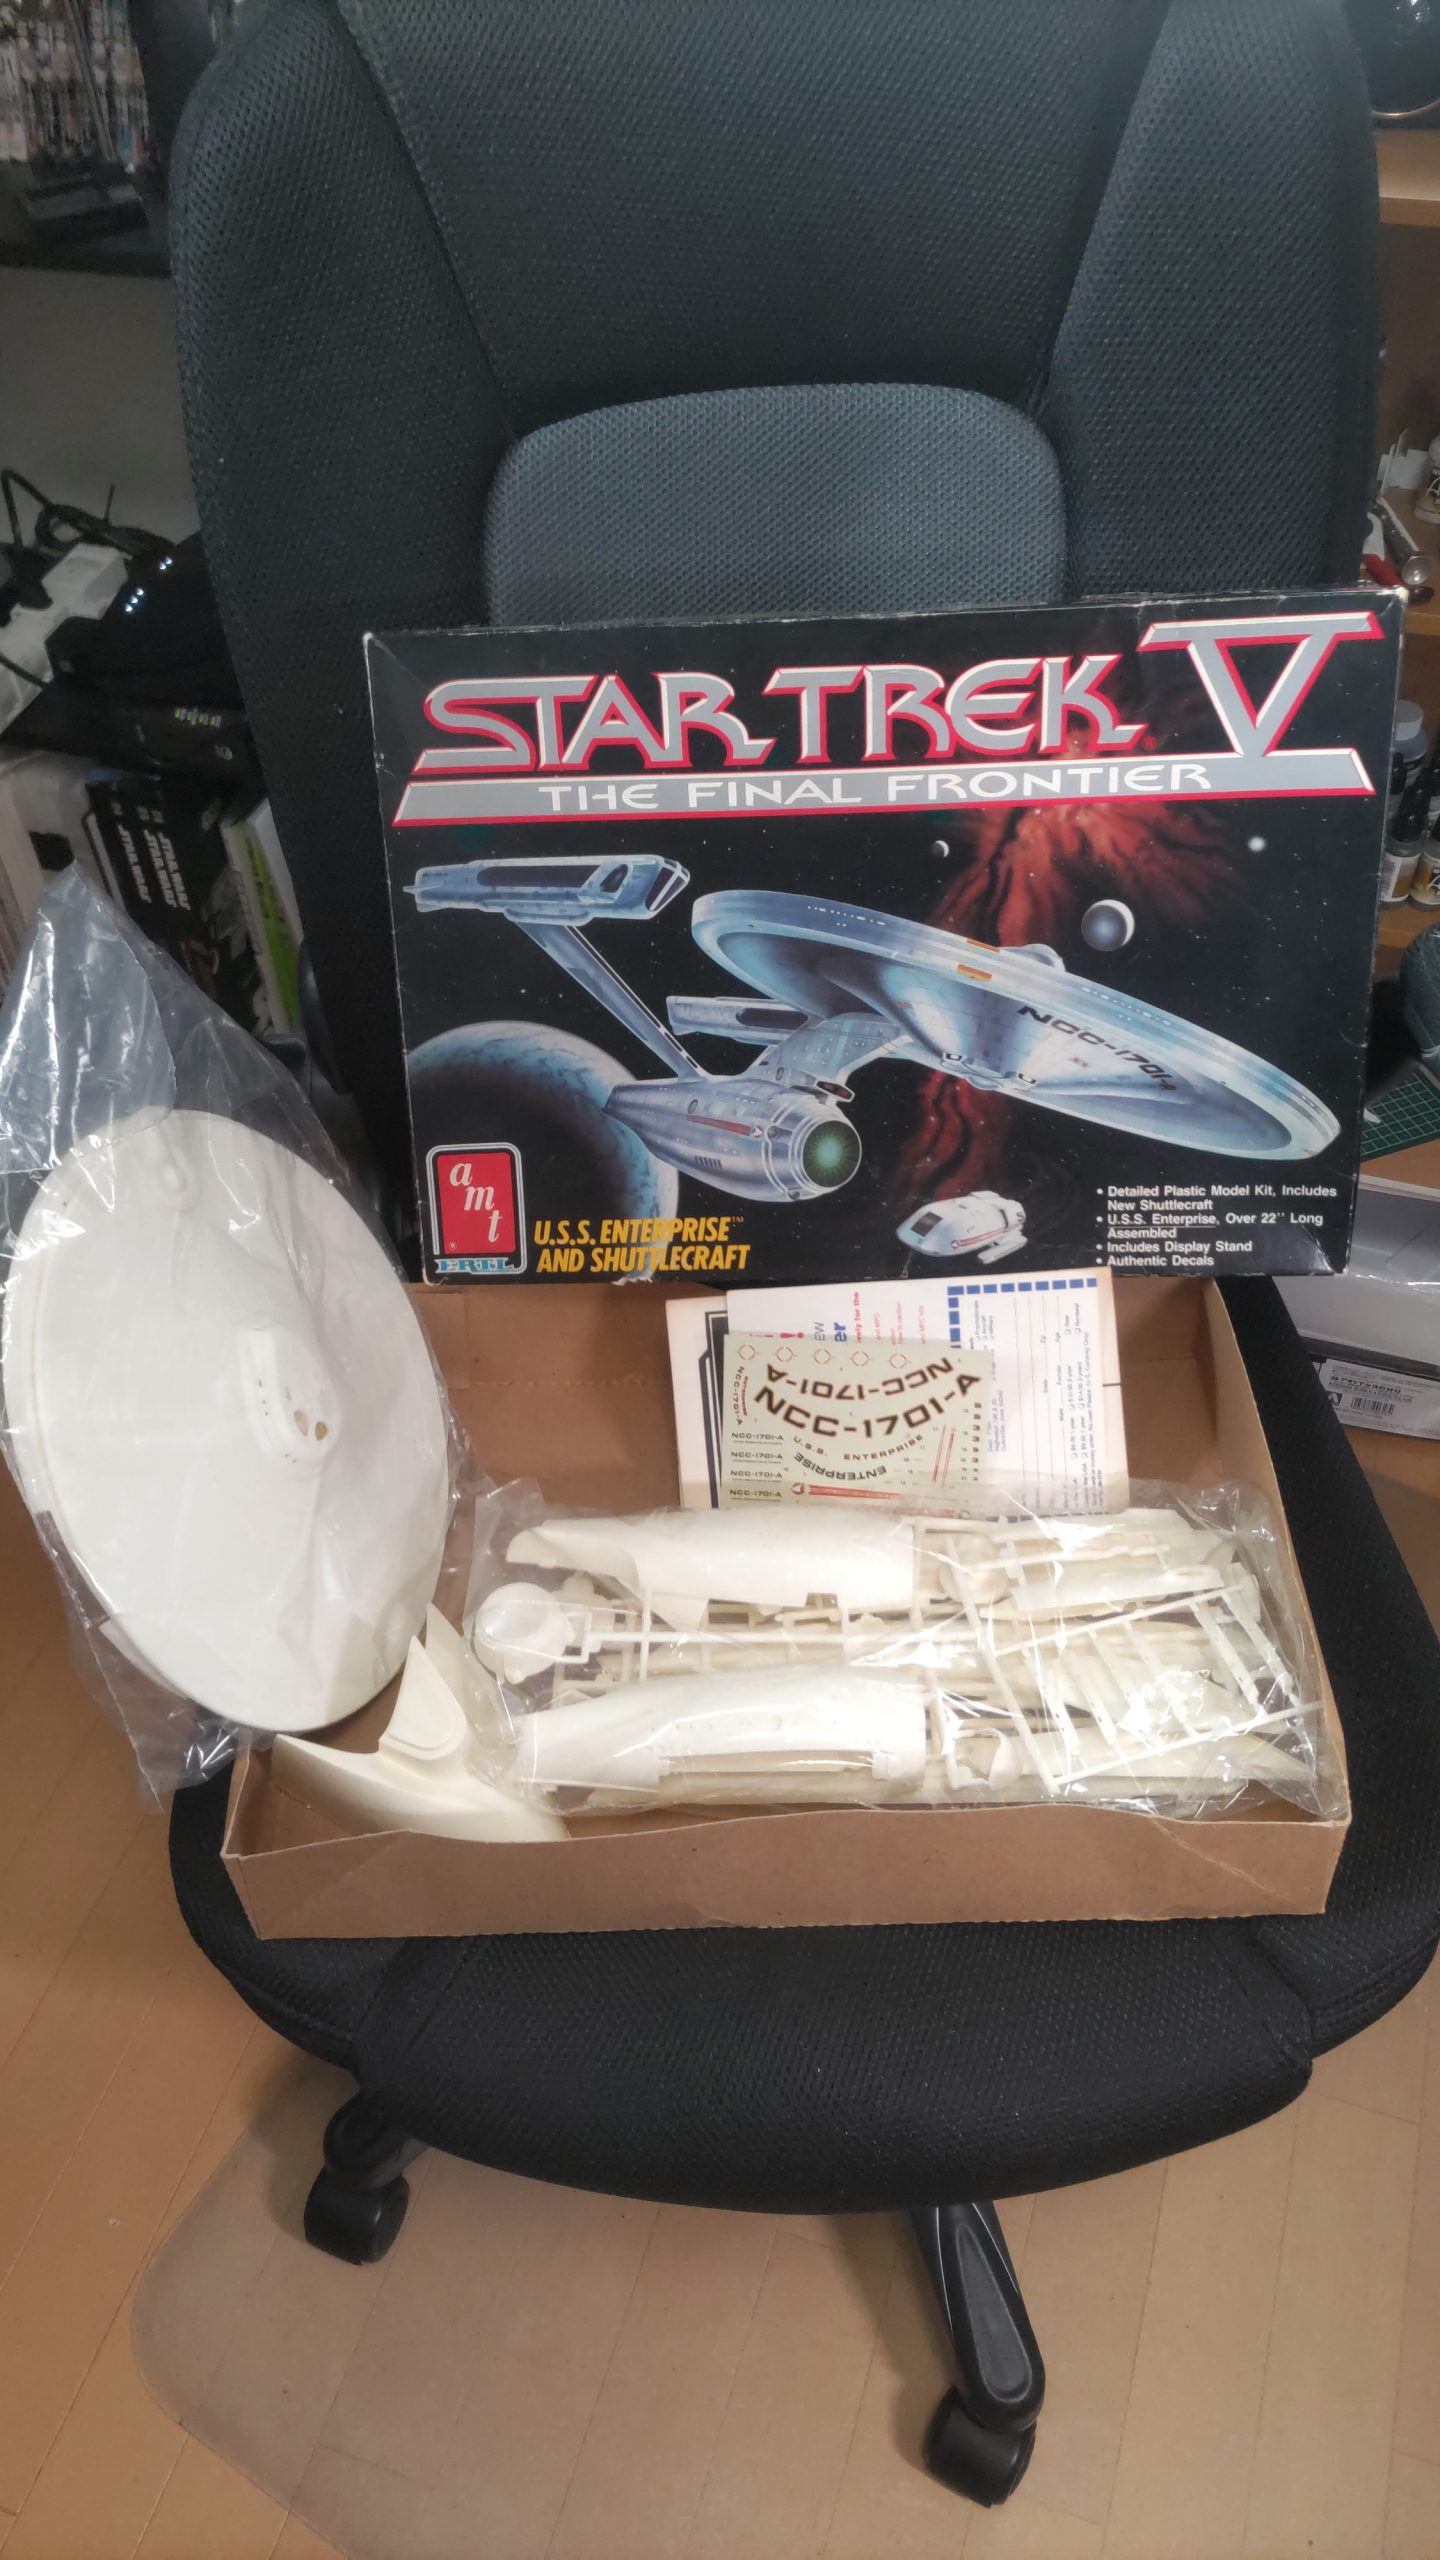
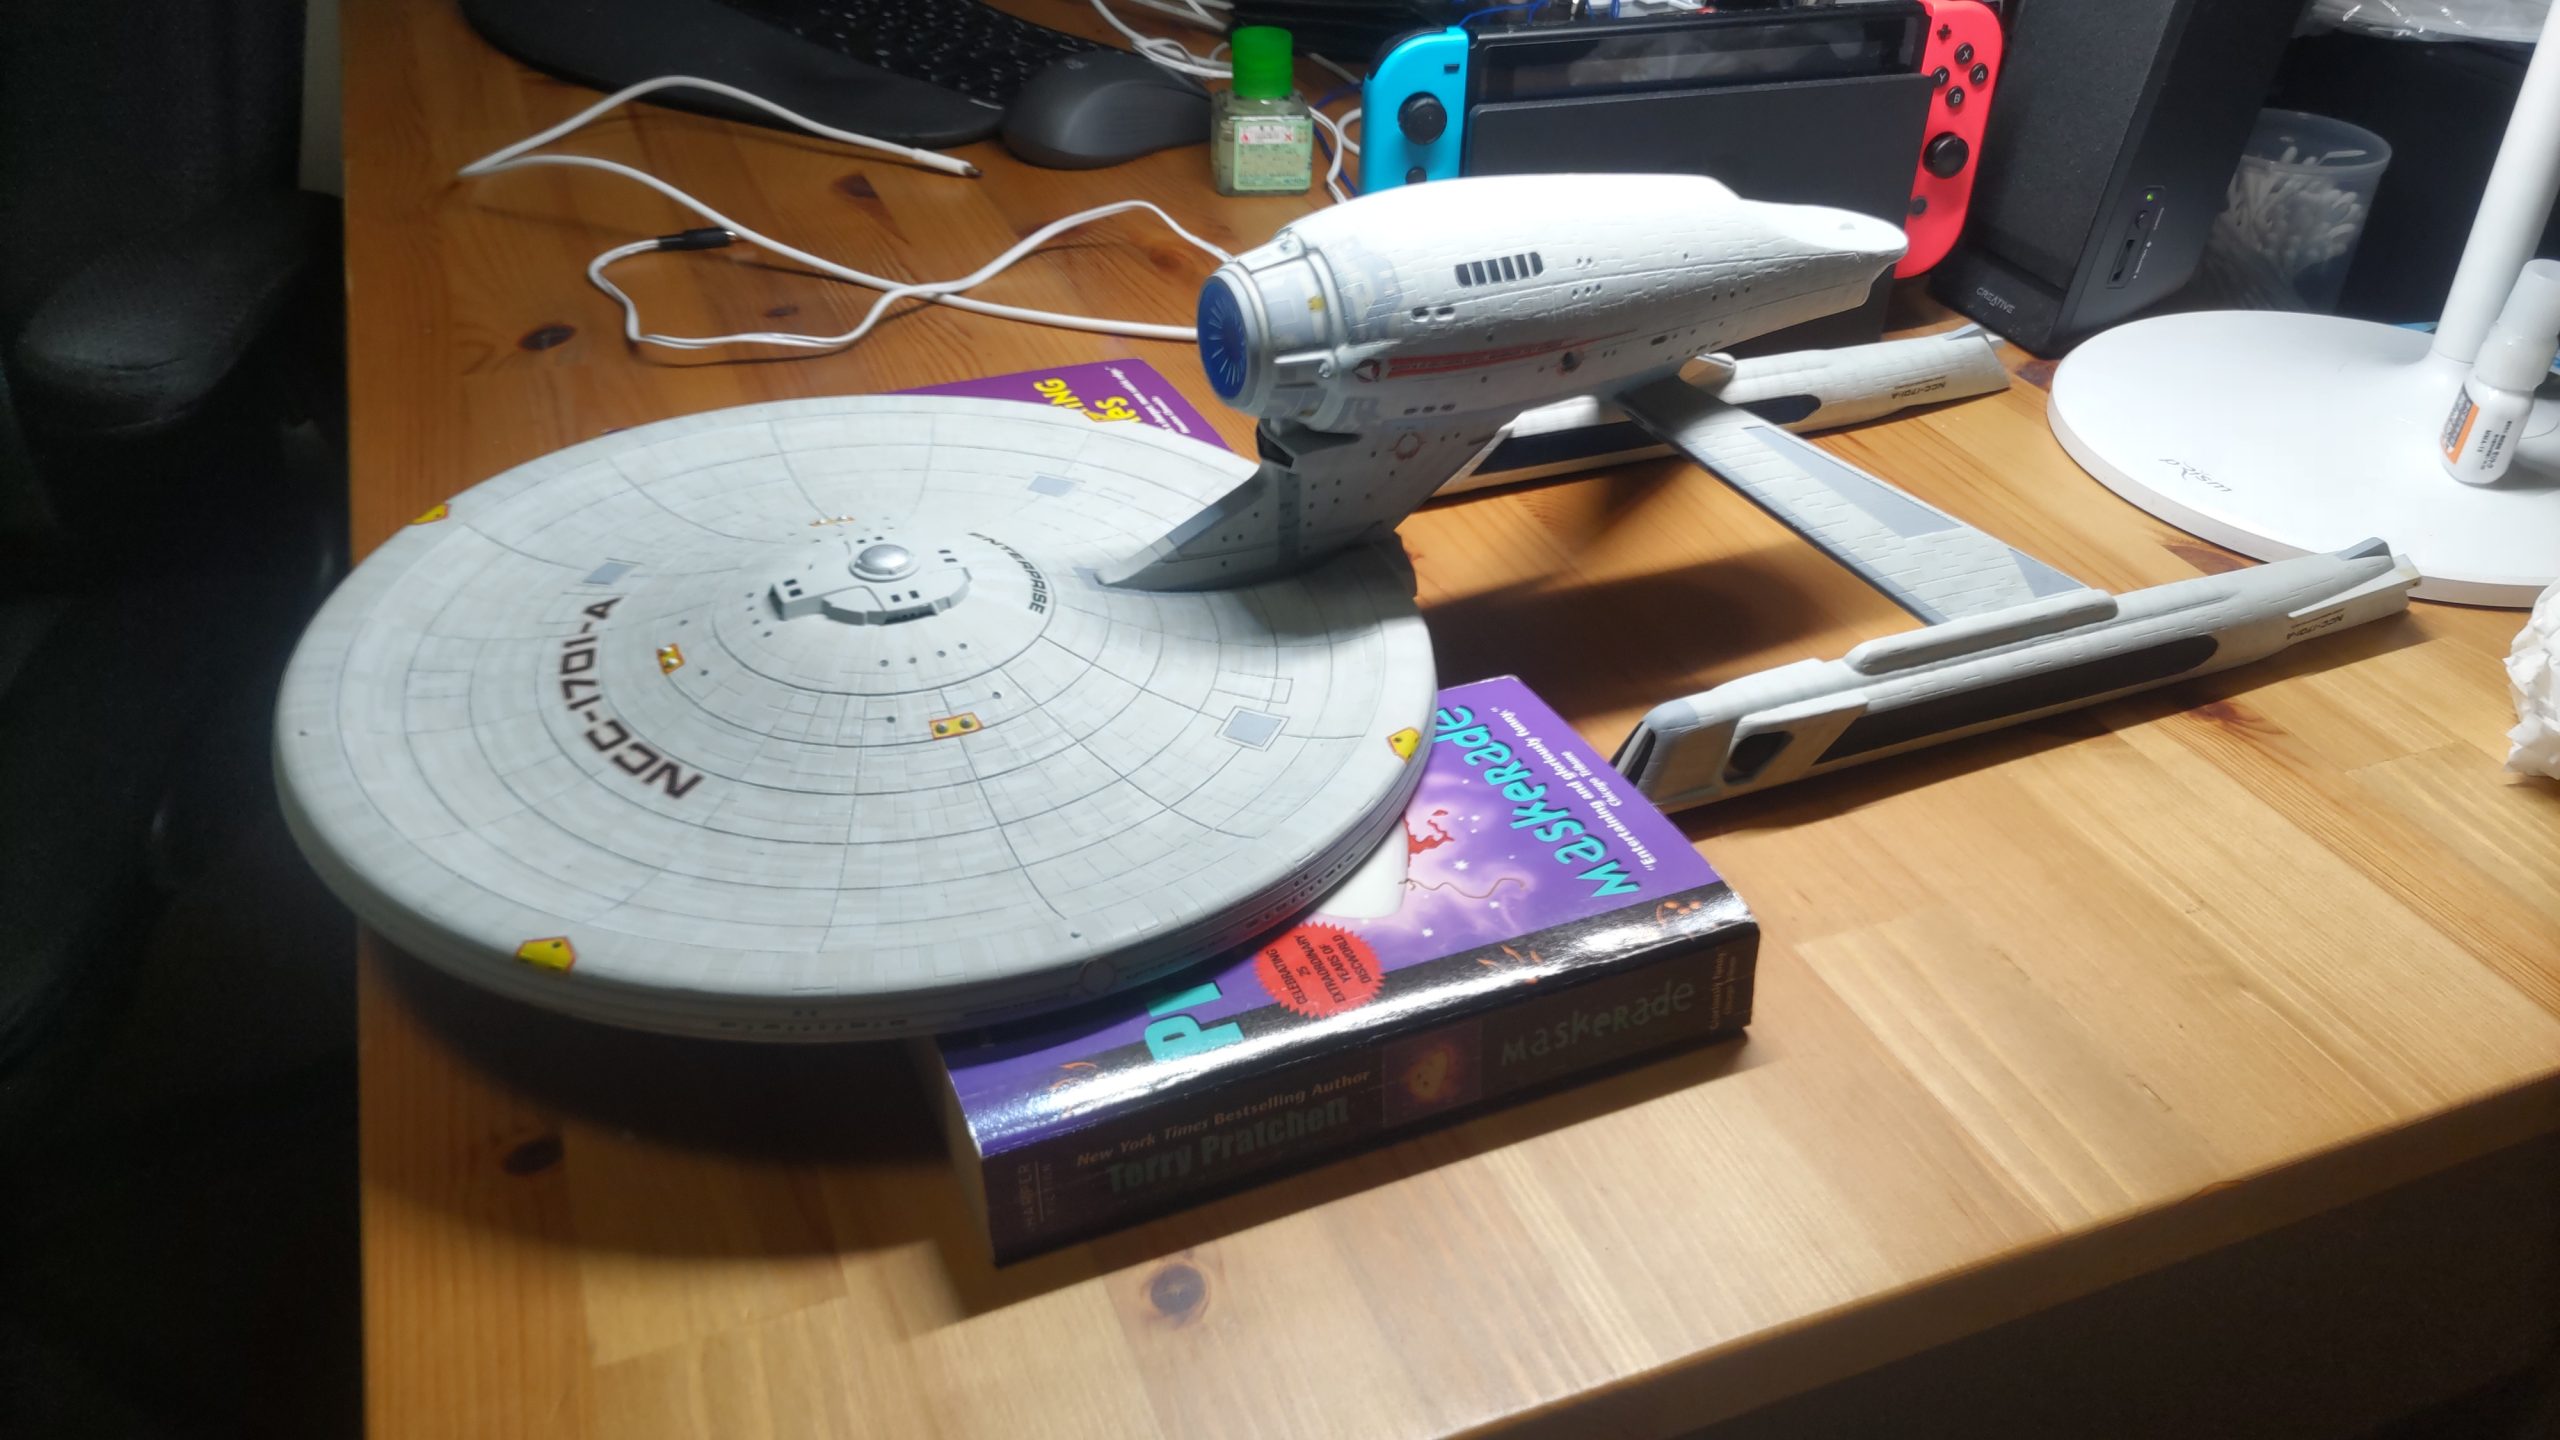
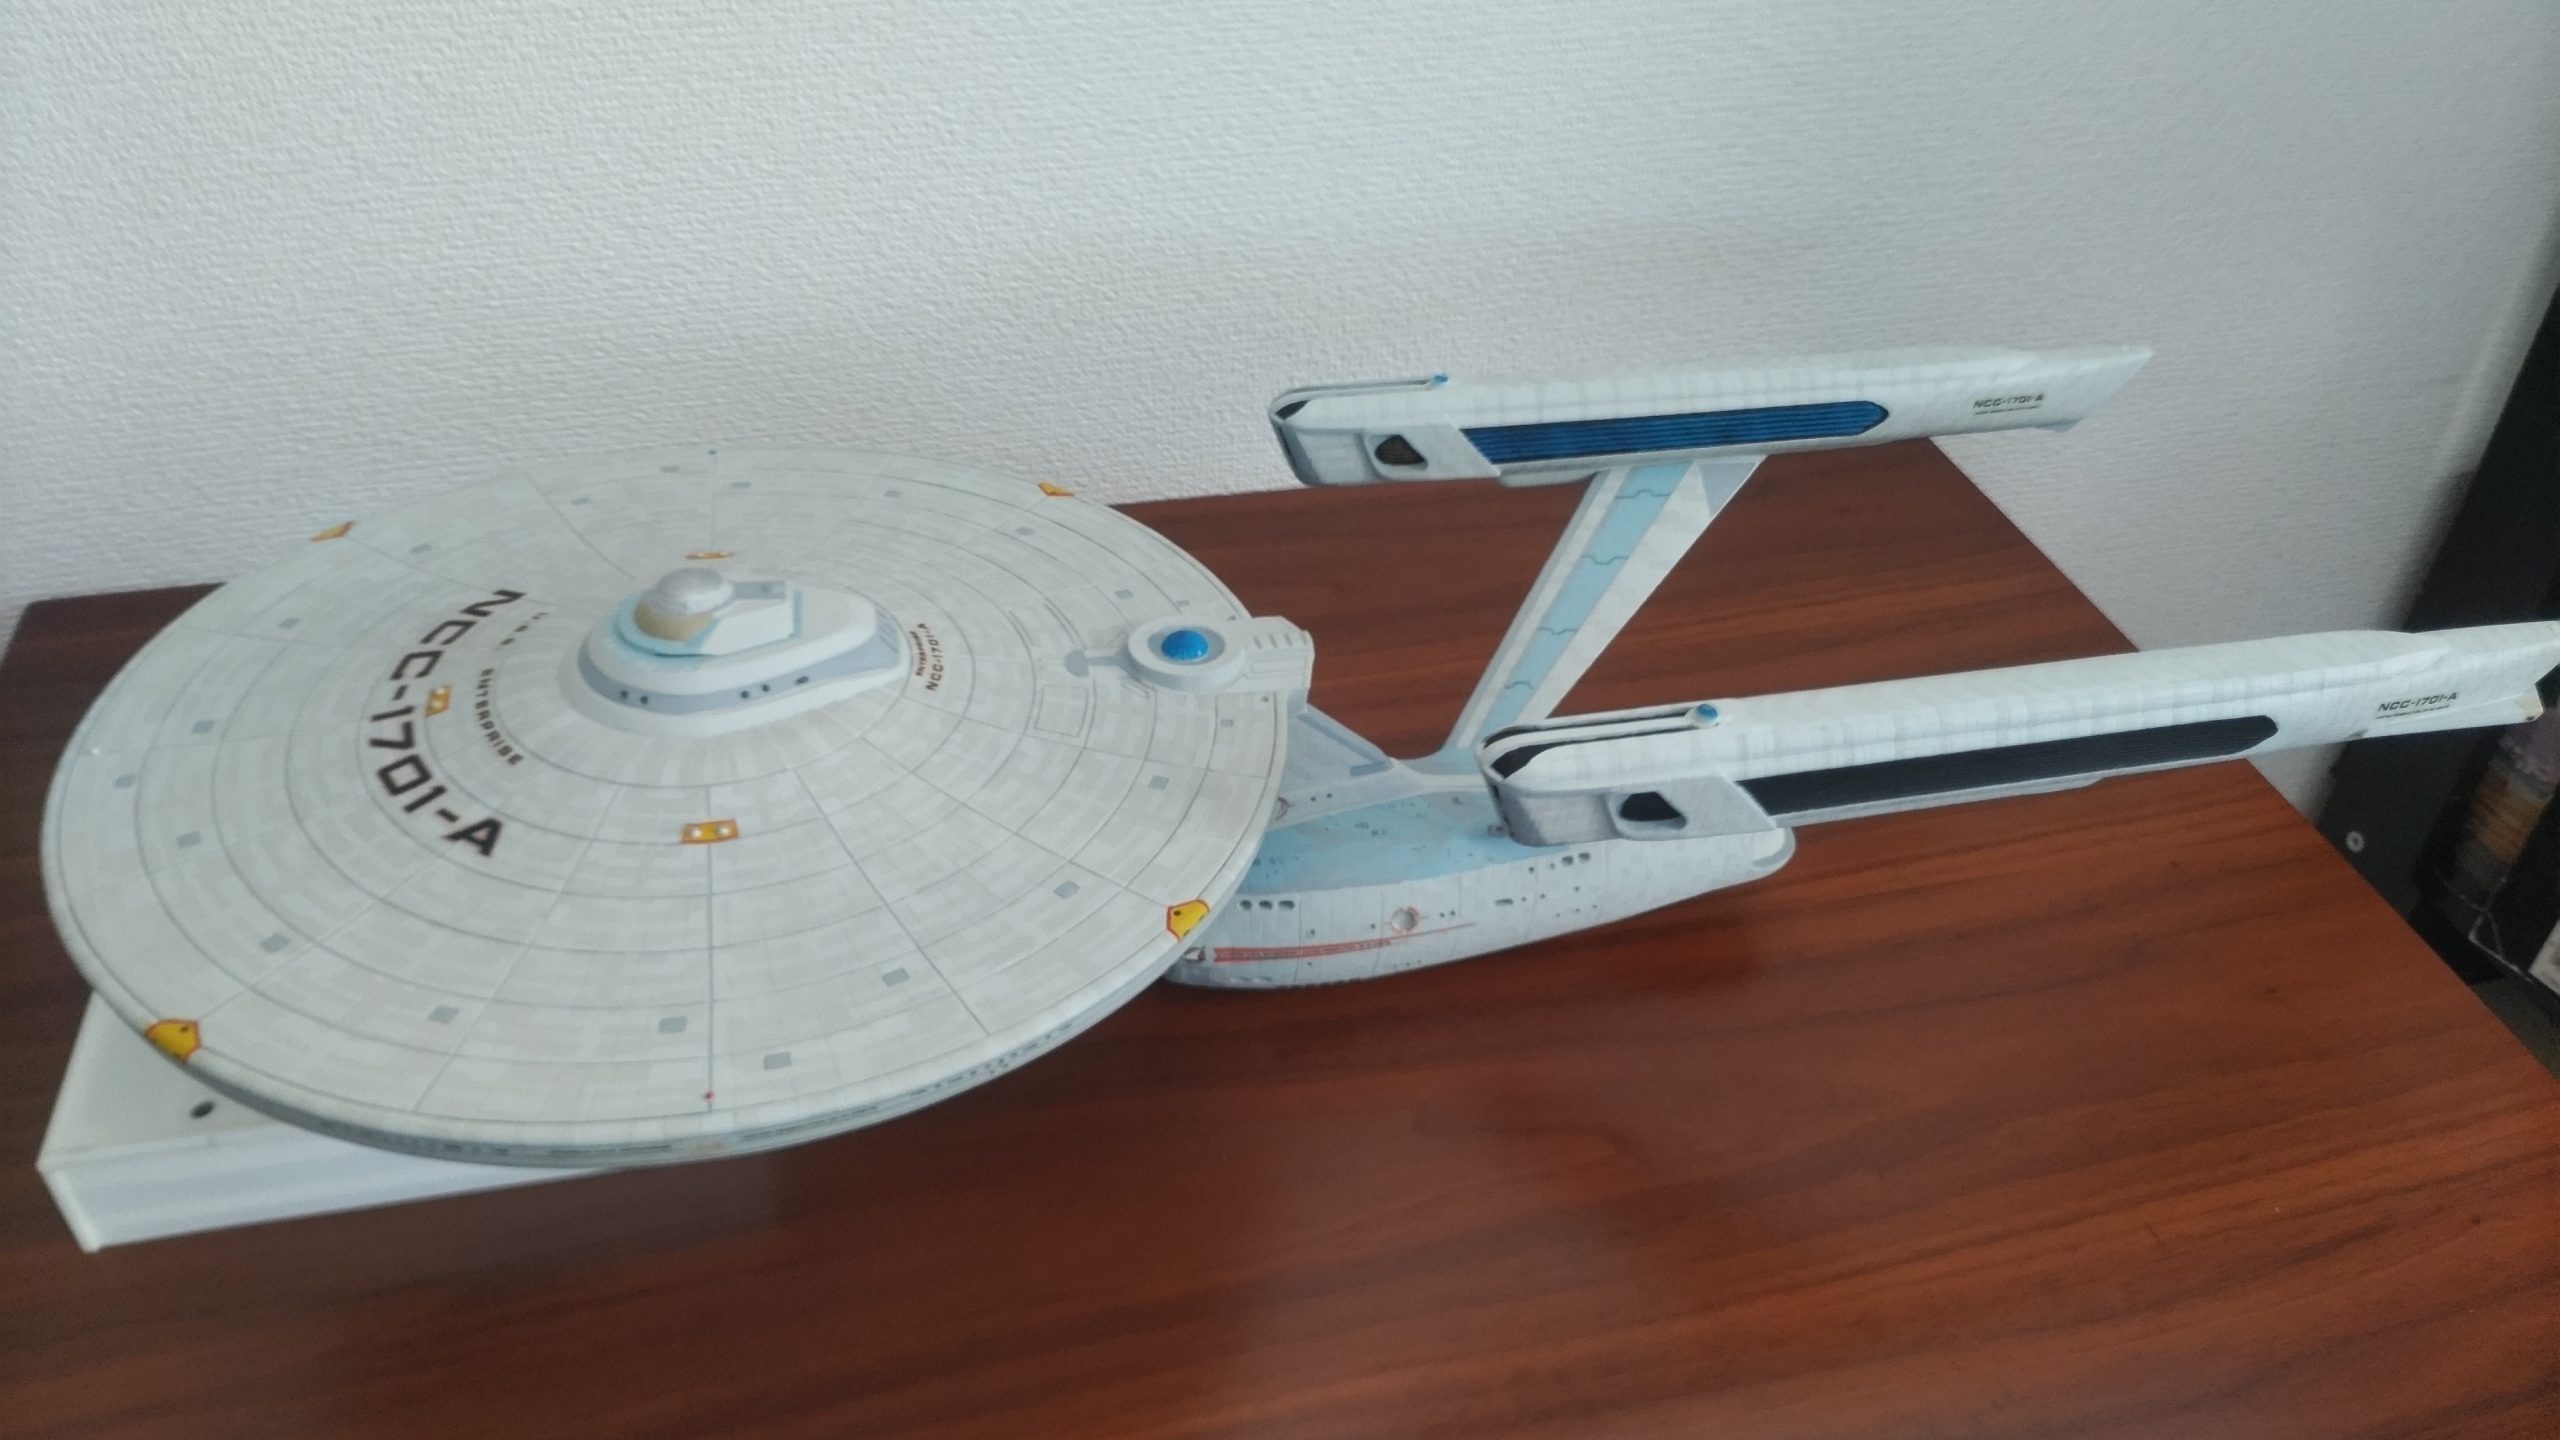
The 1/537 USS Enterprise is one of those kits that stalked me since I was young. I remembered seeing it in various iterations through the years, basically re-released after every new Star Trek movie. Yet, my budget and available space never quite lined up, and when I finally hit the point of having the money, space and time to build it, it was the early 2000s when it became hard to find so many of the old 80’s and 90’s Star trek kits. Still, the movie version of the Enterprise is one of my favorite sci-fi ships of all time, and as such it was always tempting me.
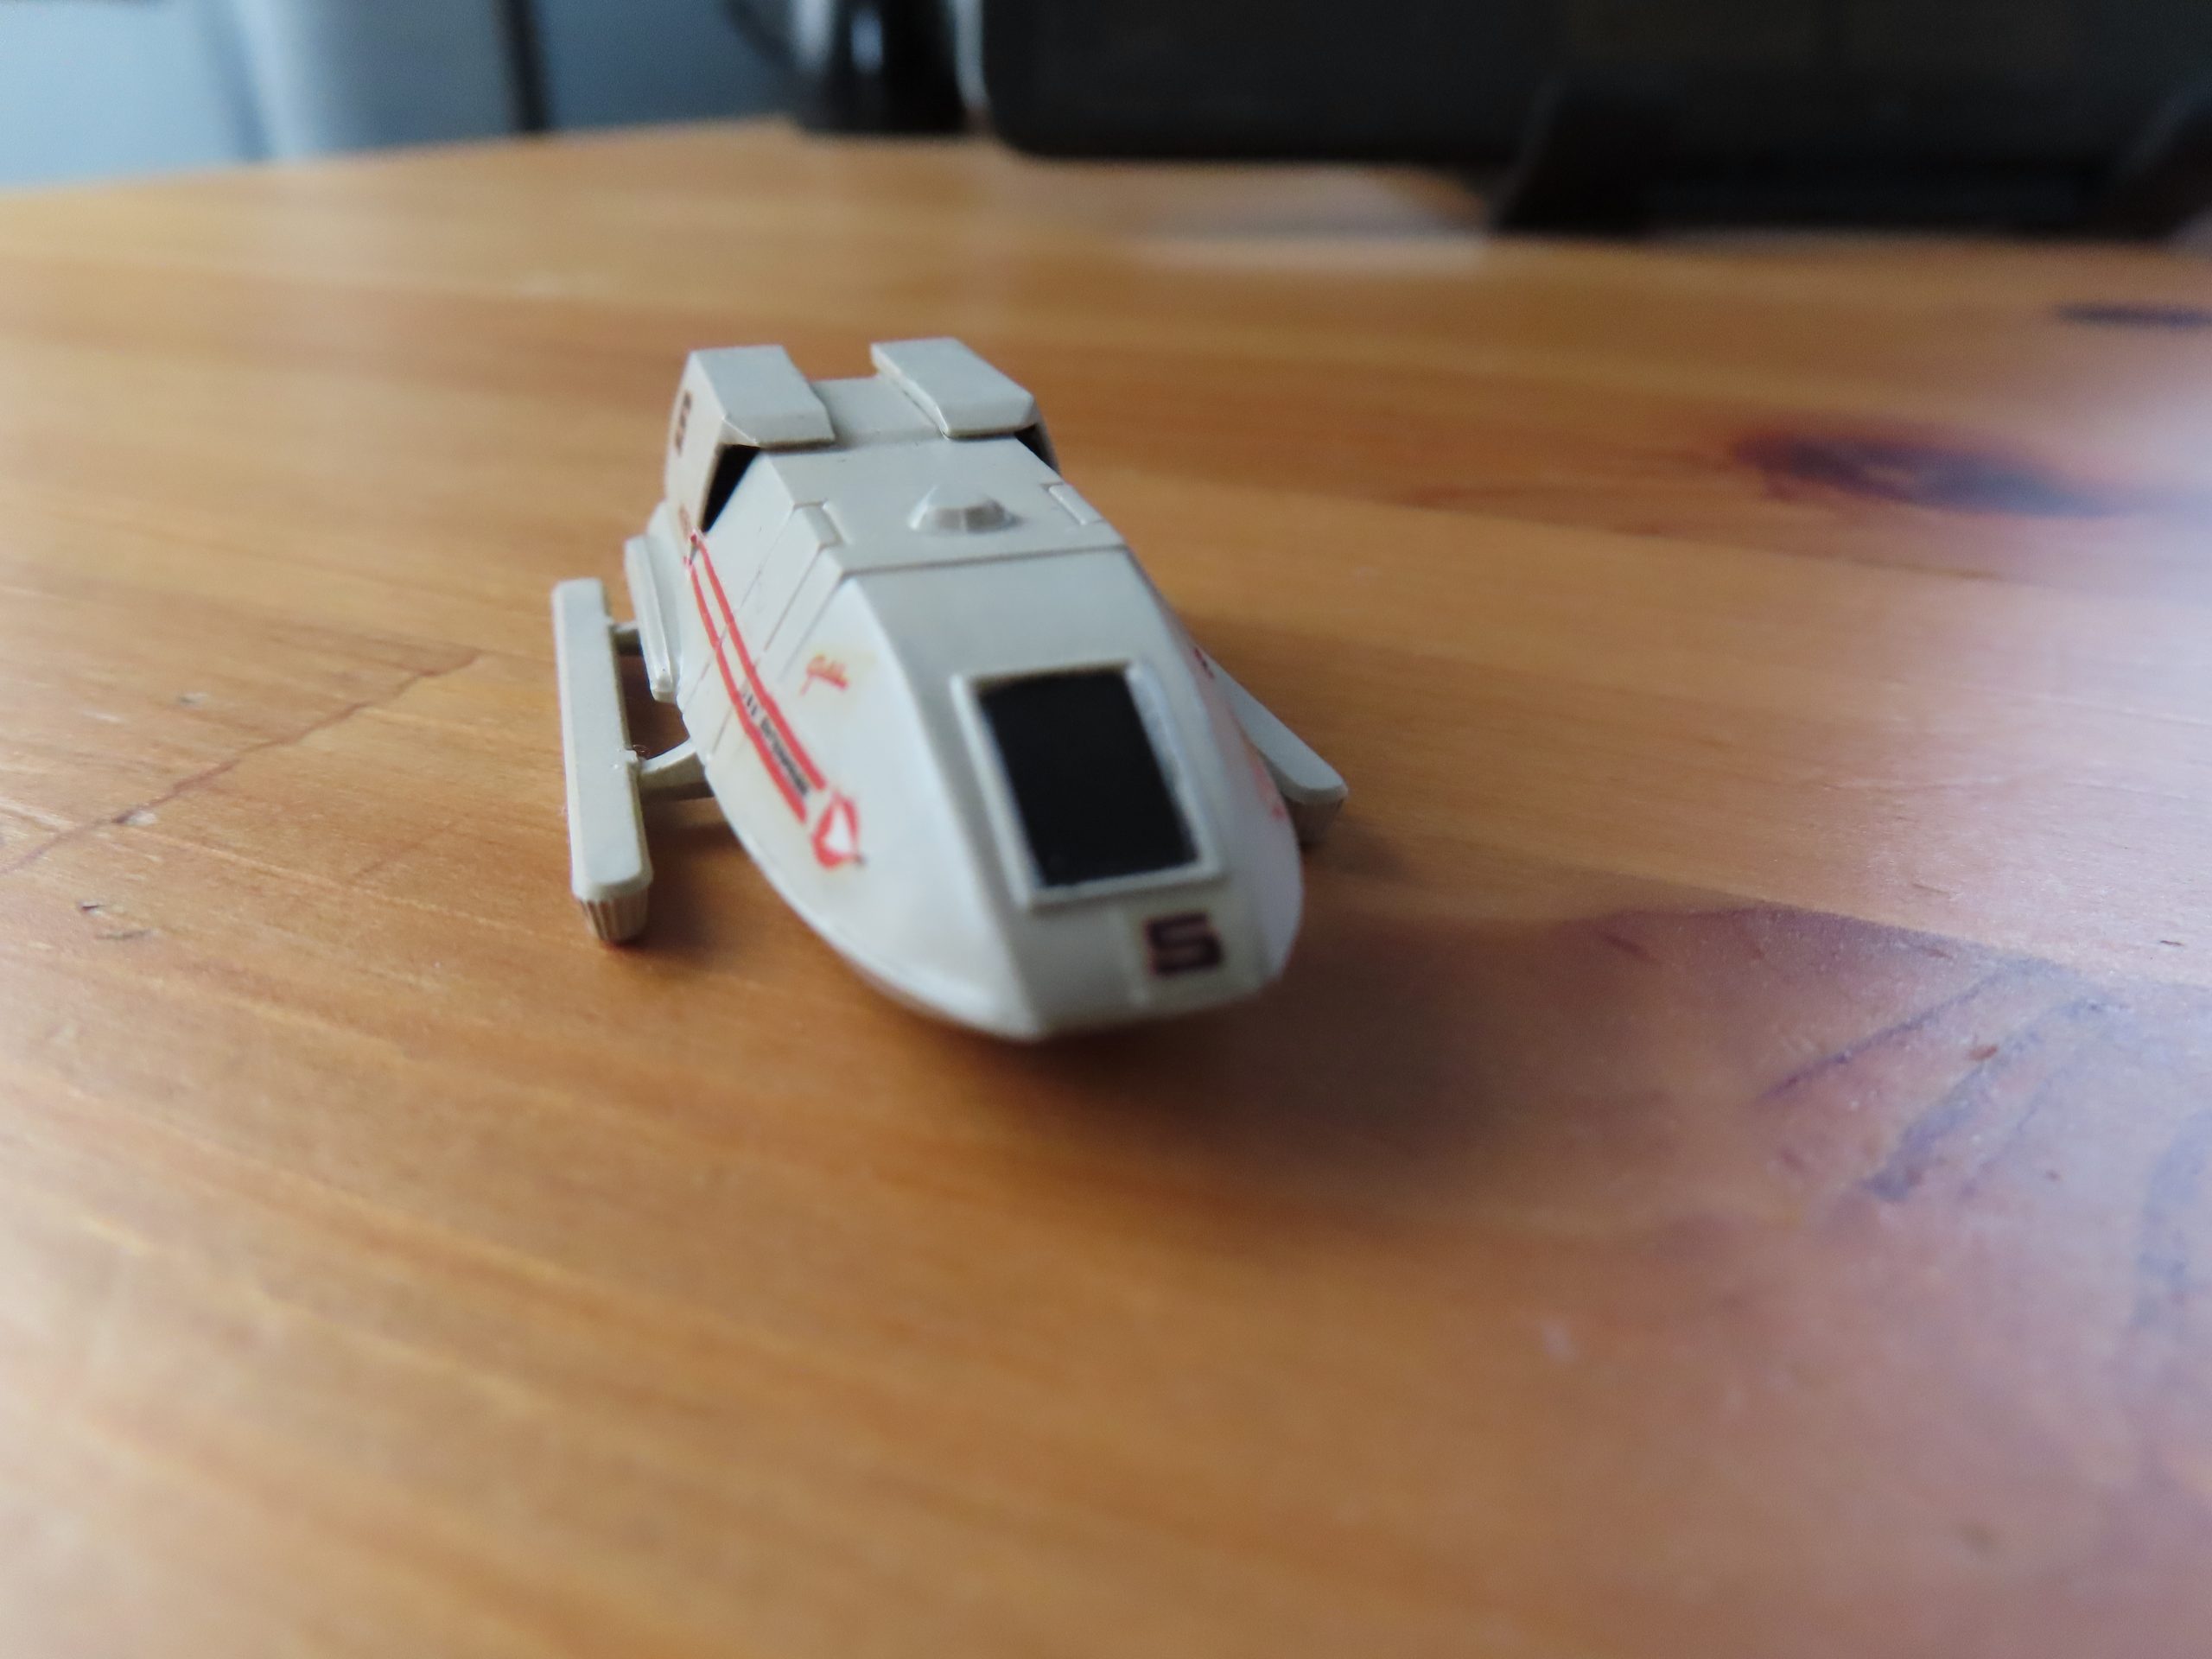
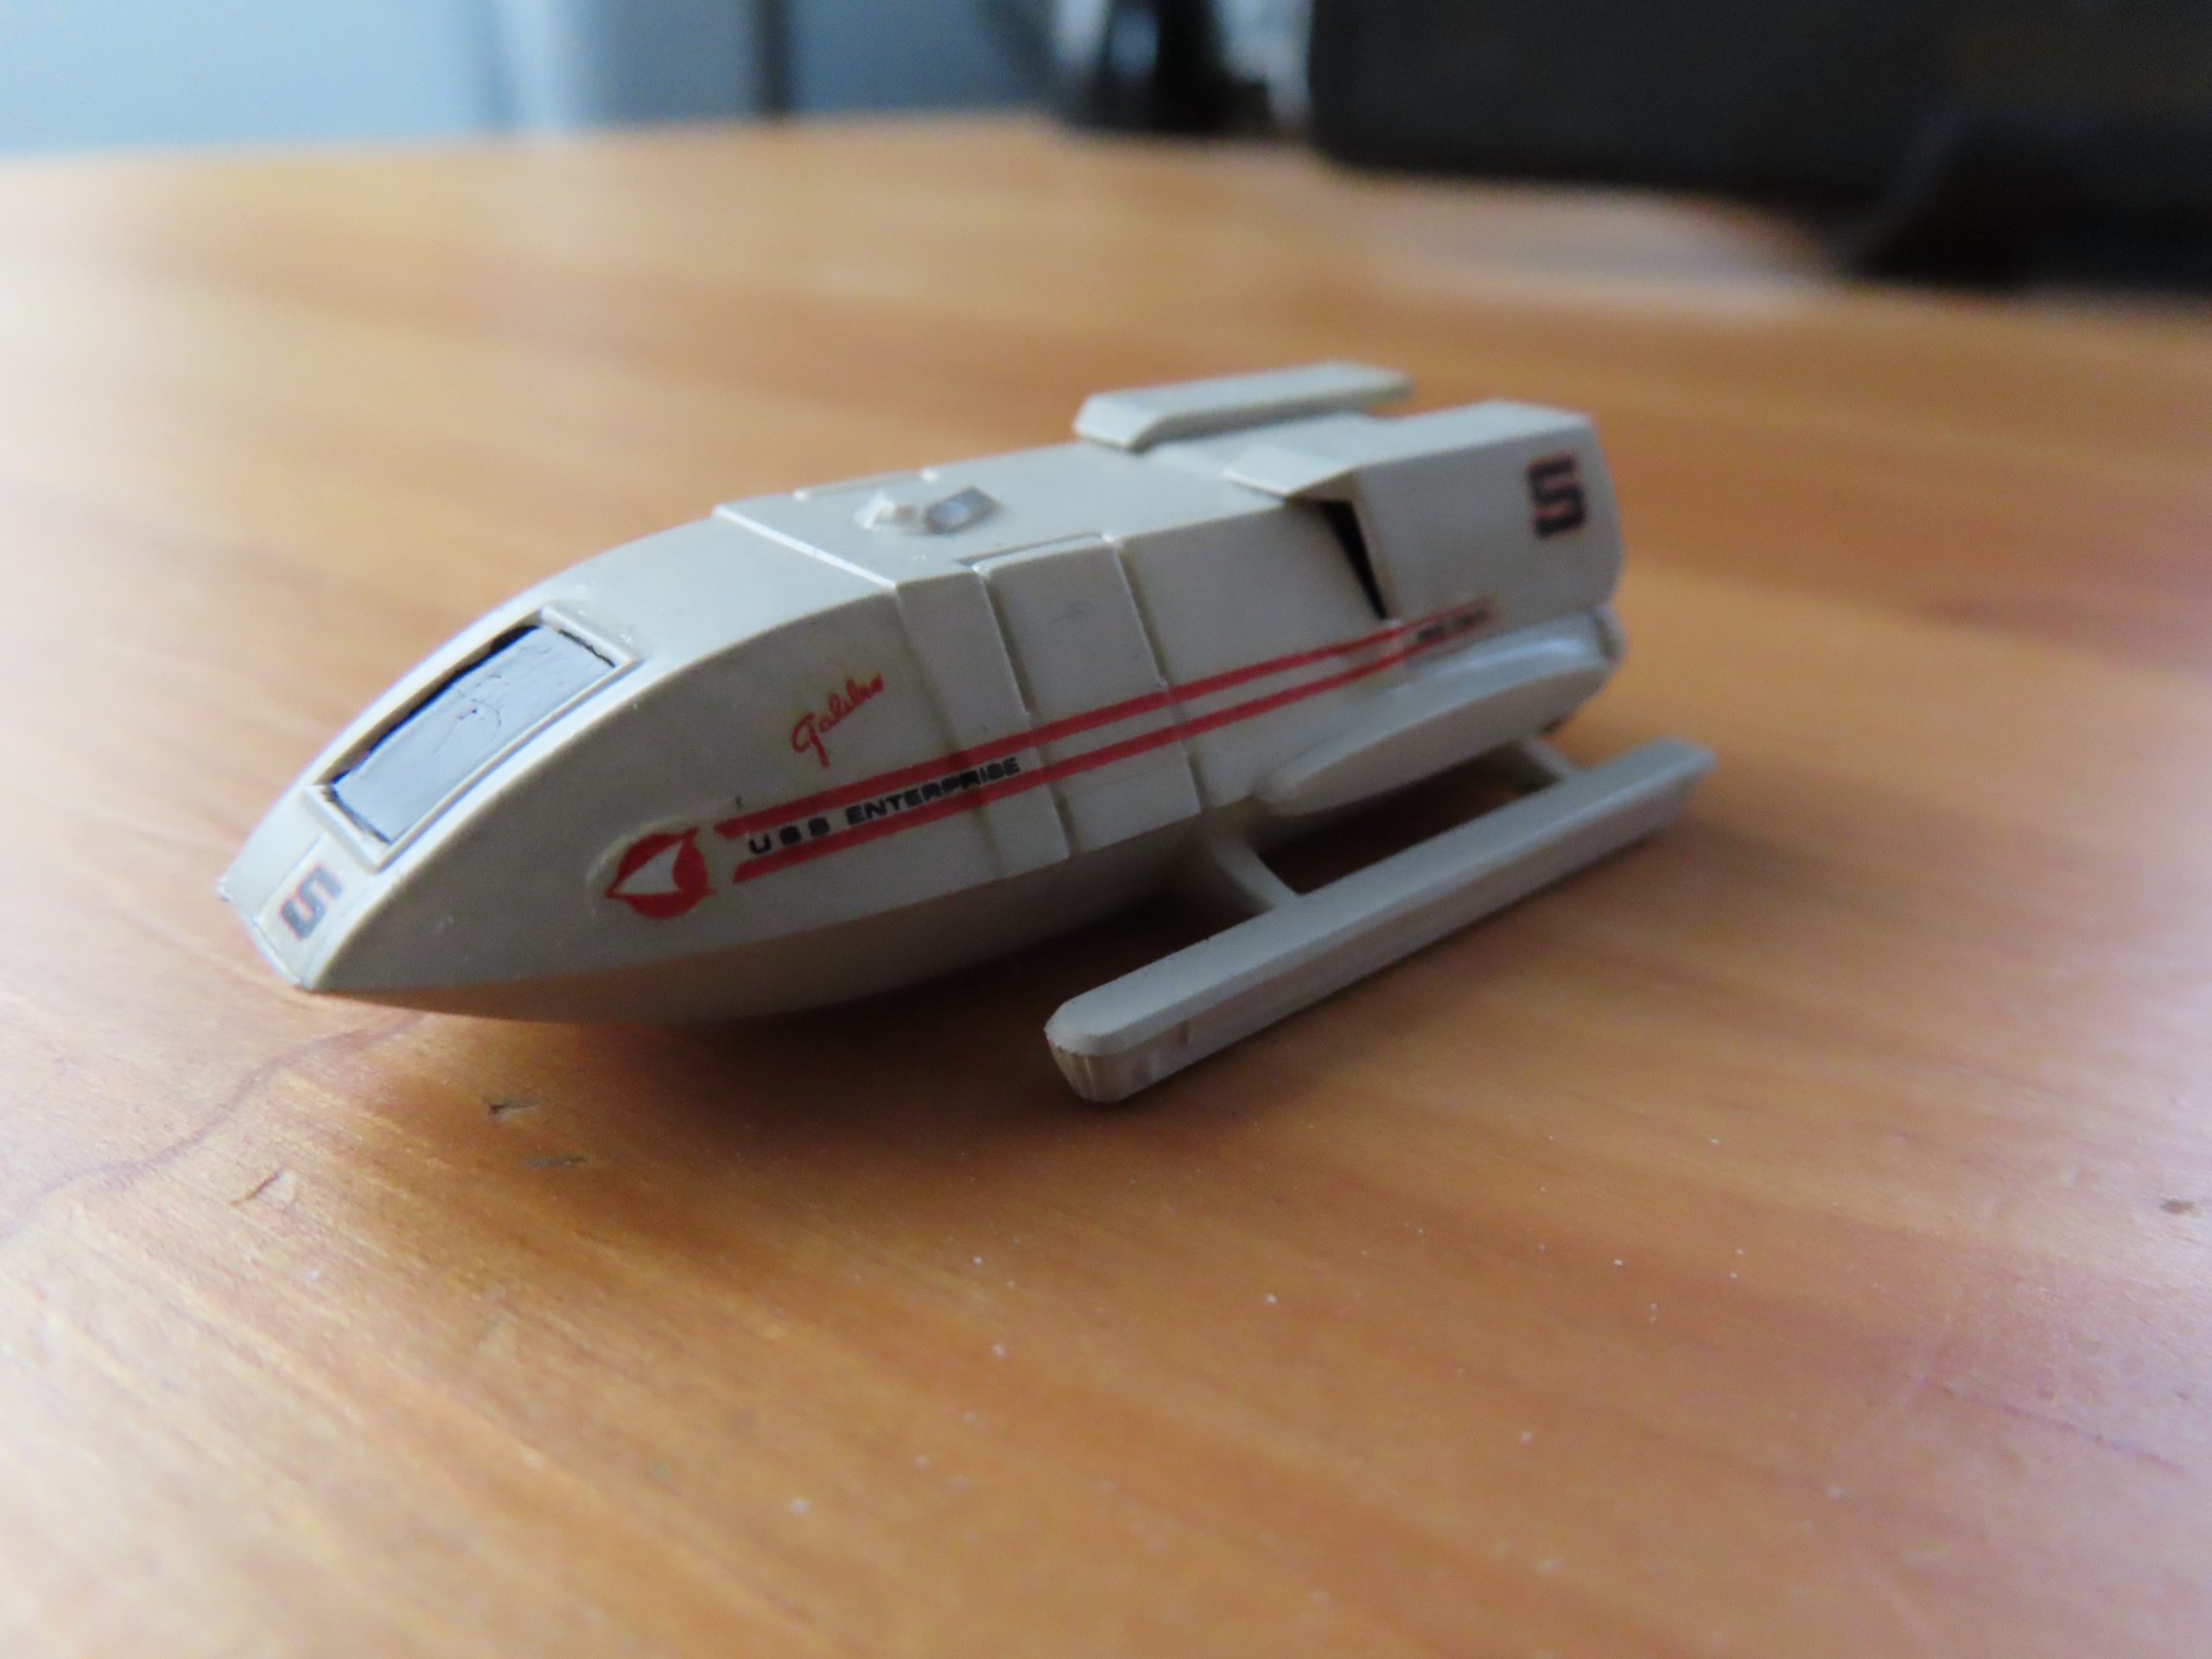
So when I found this kit at one of my local collectible shops in Kyoto for essentially $25 ( 3500 Yen ), I couldn’t resist. I am stuck back at the point of not having the room though, so I compromised and decided to build this kit for a friend of mine to put up in his bar/ live house. This is also the Star Trek 5 version, so it has the etched in ‘aztek’ pattern that was done by the manufacture after the original release. Those are pretty horrible, both as an idea and as executed, since they don’t in any way match the aztec patter that was painted on the actual filming model. I do have an original ‘smoothie’ version of the kit that I am saving to put together later. So this one is my ‘practice’ kit to put together, try out techniques and see what issues and tricks I need to learn before tackling the one I’ll build for myself, someday…
Materials
Paints
I used a variety of Vallejo Model air paints and a few Tamiya acrylics for the various work.
Vallejo Mecha Primer – 73.642 – Black Primer – Interior light blocking
Vallejo Surface Primer – 73.615 USN Light Ghost Grey – Exterior primer and accent color
Vallejo Model Air – 71.296 USAAF Light Gray – Aztec accent color
Vallejo Model Air – 71.276 USAF Light Gray – Hull Primary Color
Vallejo Model Air – 71.337 Flanker Blue – Strong back and pylon stripe color, Bridge accent
Vallejo Model Air – 71.057 Black – Exterior Black
Vallejo Model Air – 71.308 Dark Grey – Pylon Accent Color
Vallejo Model Air – 71.075 Sand – Nacelle thruster area
Vallejo Model Air – 71.003 Red – Saucer Phaser and Thruster outline
Vallejo Model Air – 71.002 Yellow – Phaser and Thruster blocks
Vallejo Model Air – 71.065 Steel – Saucer caps
Vallejo Mecha Varnish 26.701 Gloss – Under coat for Decals
Vallejo Mecha Varnish 26.702 Matt – Final sealing coat
Tamiya Acrylic Clear Blue – X-23 – Deflector Dish, Impulse Crystal, Warp Crystal
Tamiya Acrylic Clear Red – X-27 – Navigation light, Impulse Engines
Tamiya Acrylic Clear Green – X-25 – Navigation Light
A few drops of Vallejo Metal Color 77.725 Gold mixed with Vallejo Model Air 71.075 Sand – Sorry, no exact formula, but it’s the mix I used for the ‘gold’ part of the bridge dome.
Other Materials
Micro Kristal Klear – Filling for all the windows
Microscale Liquid Decal Film – Used on the old Decals and to seal printed decals
Tamiya Sticker Paper – Printed aztec and detail masks and cut out
Clear Inkjet Decal Paper
Prep work and lighting
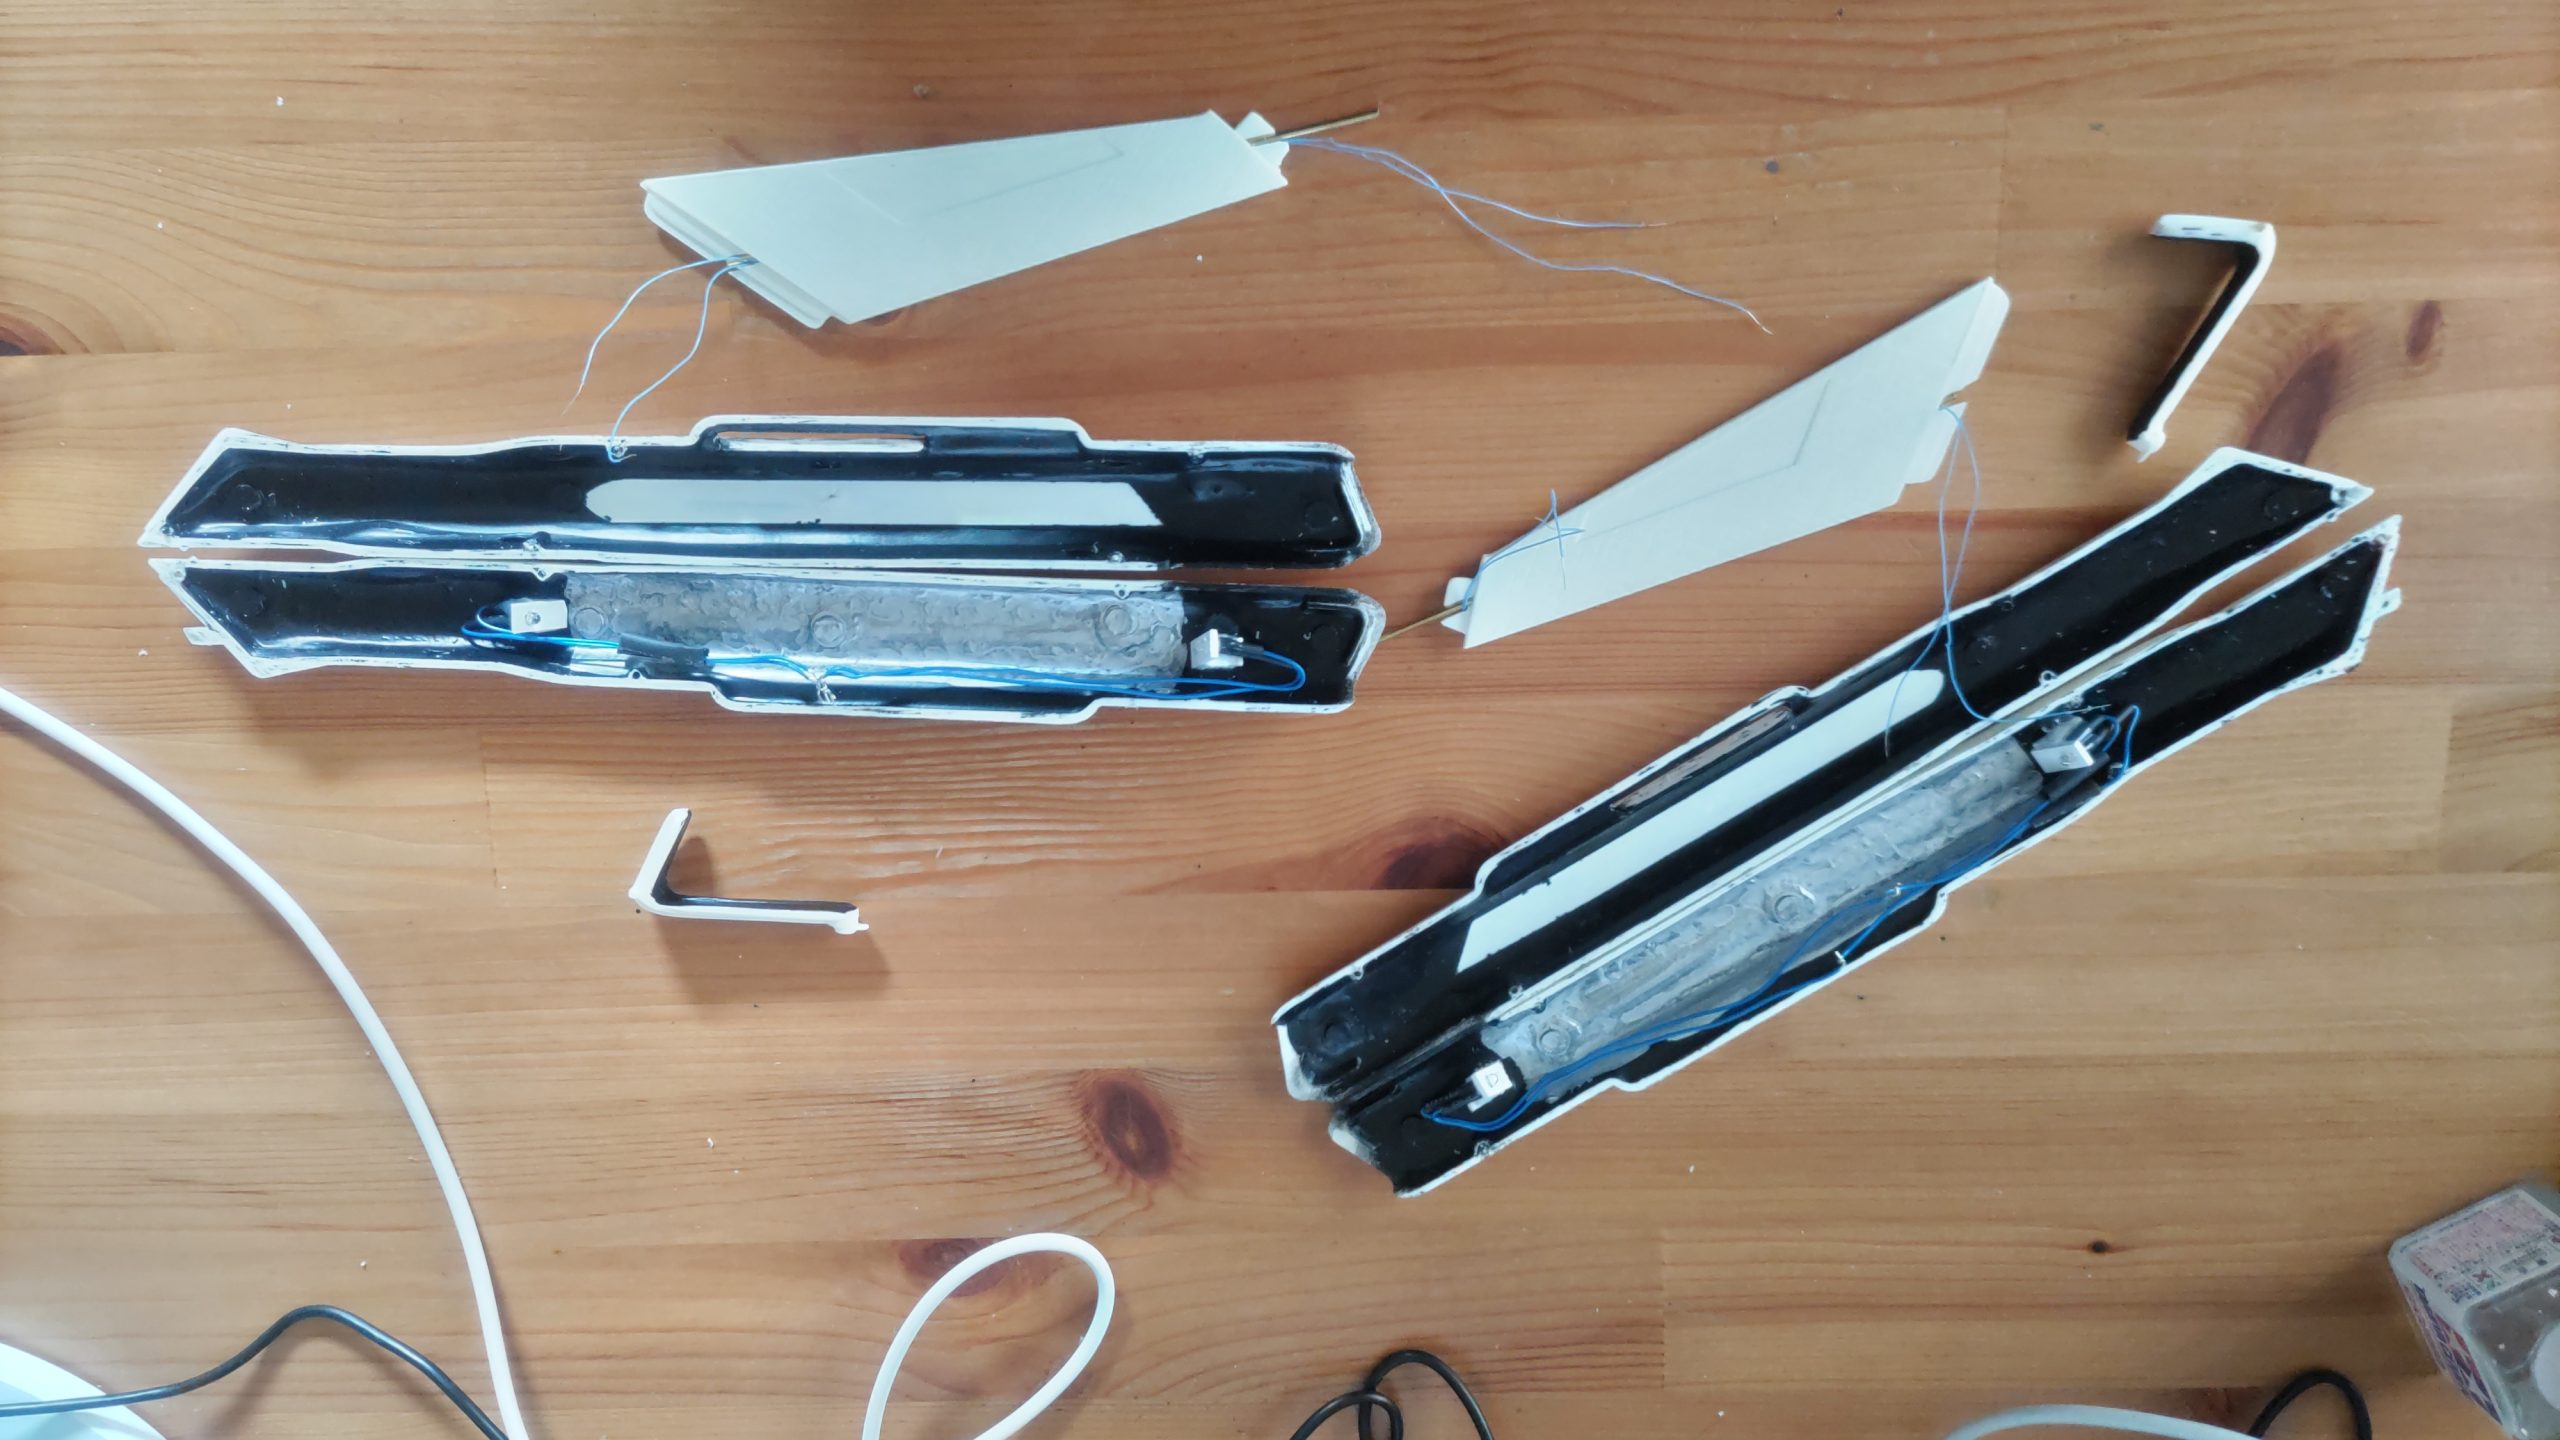
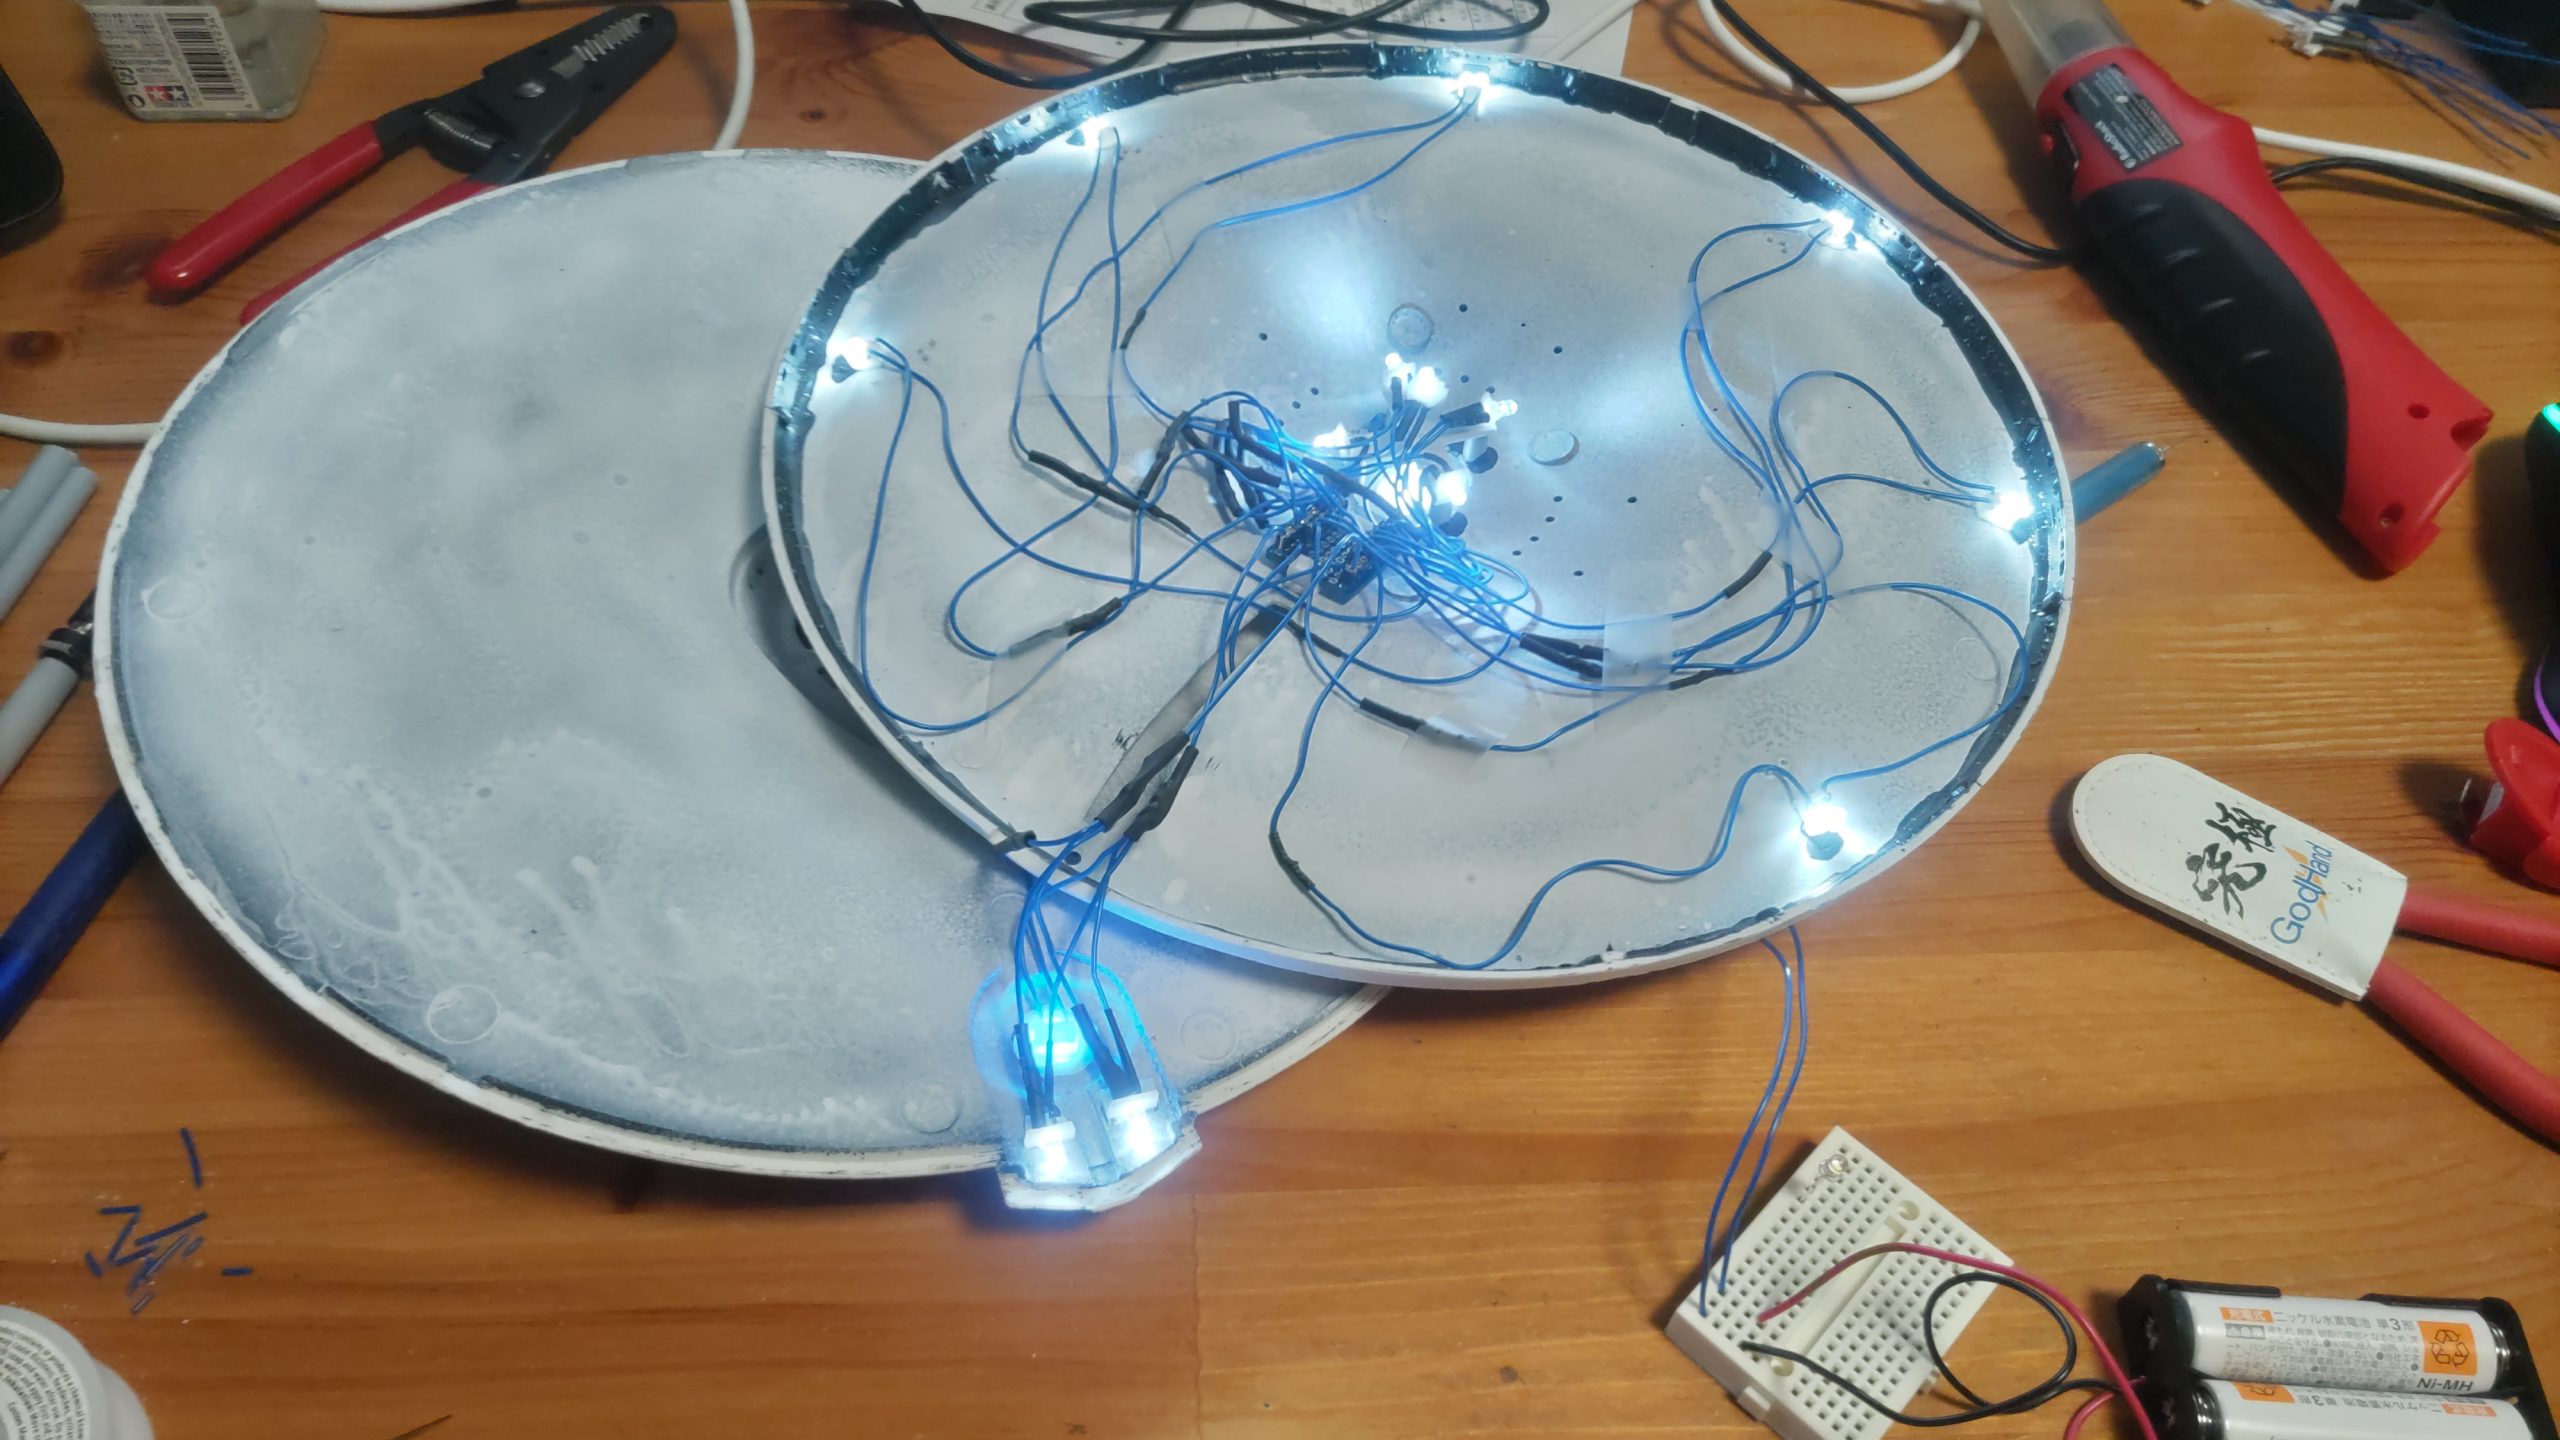
Aside from the standard washing of the kit in light soapy water, there wasn’t much to do before starting assembly type work. The big piece of prep work was far more to do with the lighting. All of the areas to be lit needed to get a good coat of black primer on the inside followed by a complimentary coat of white or steel. I did have some issues with the white, due mostly to my troubles working with my new airbrush. I needed to figure out how to clean it better to deal with what I thought were issues with the white paint.
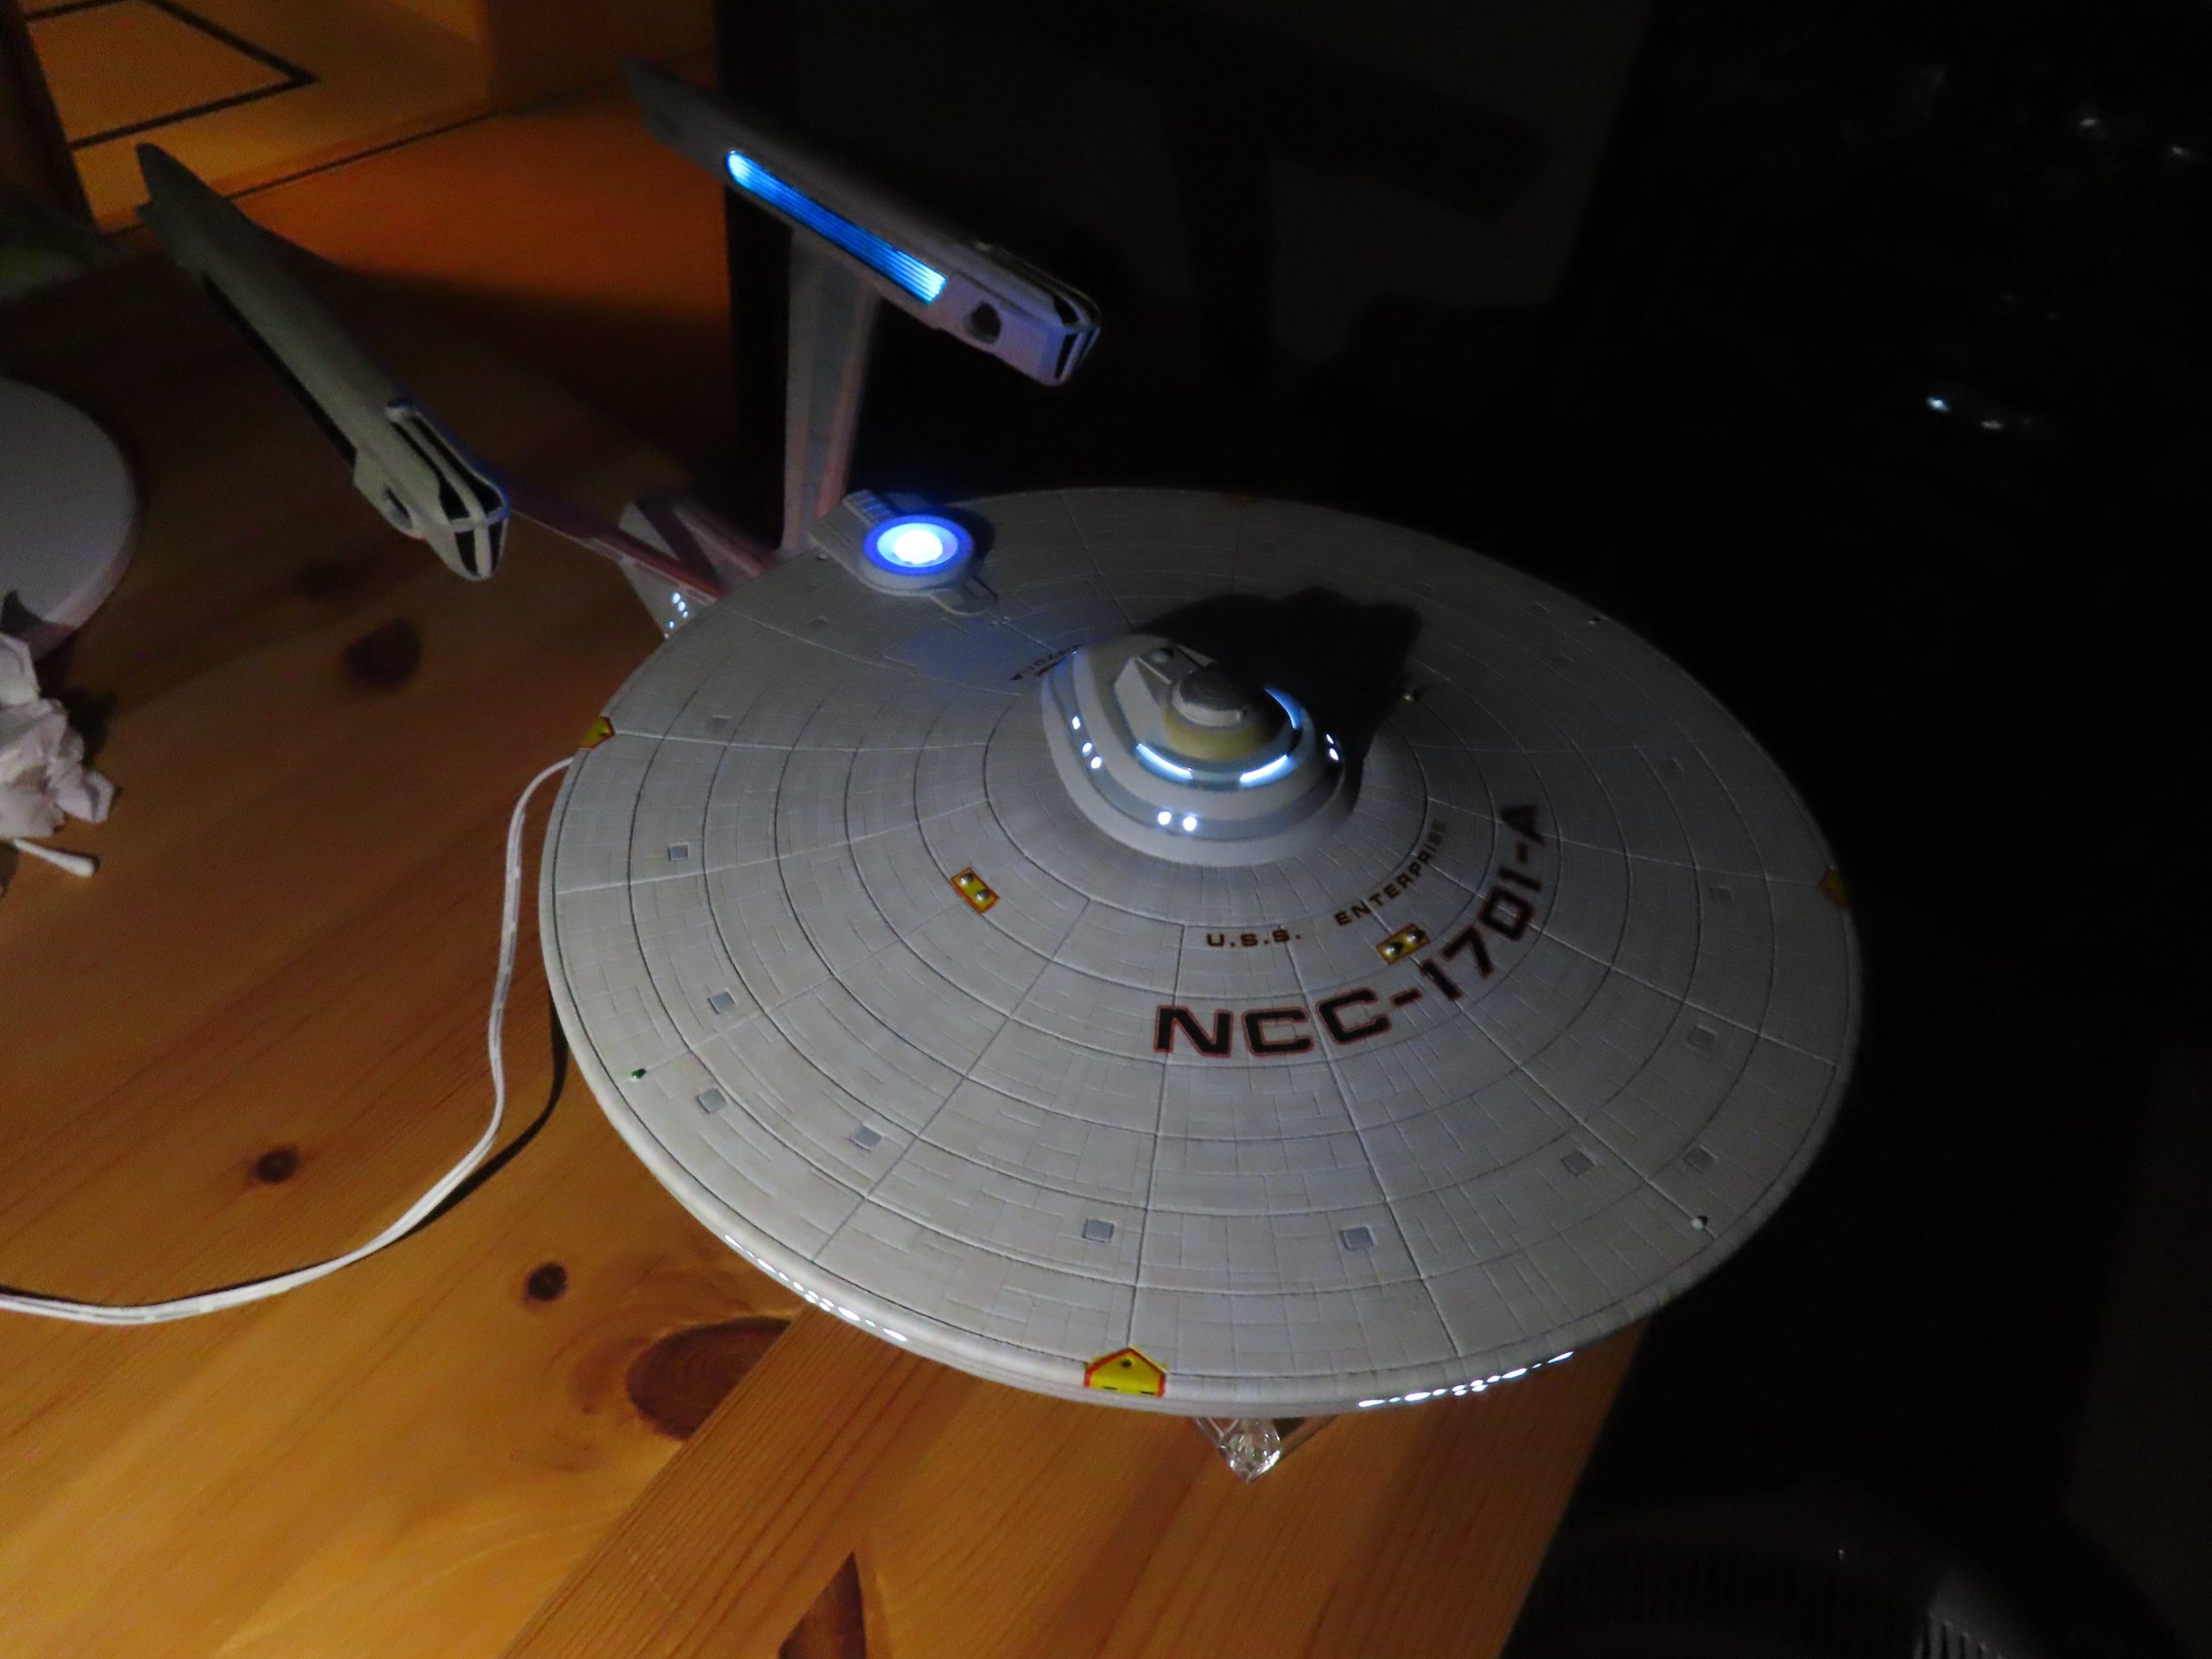
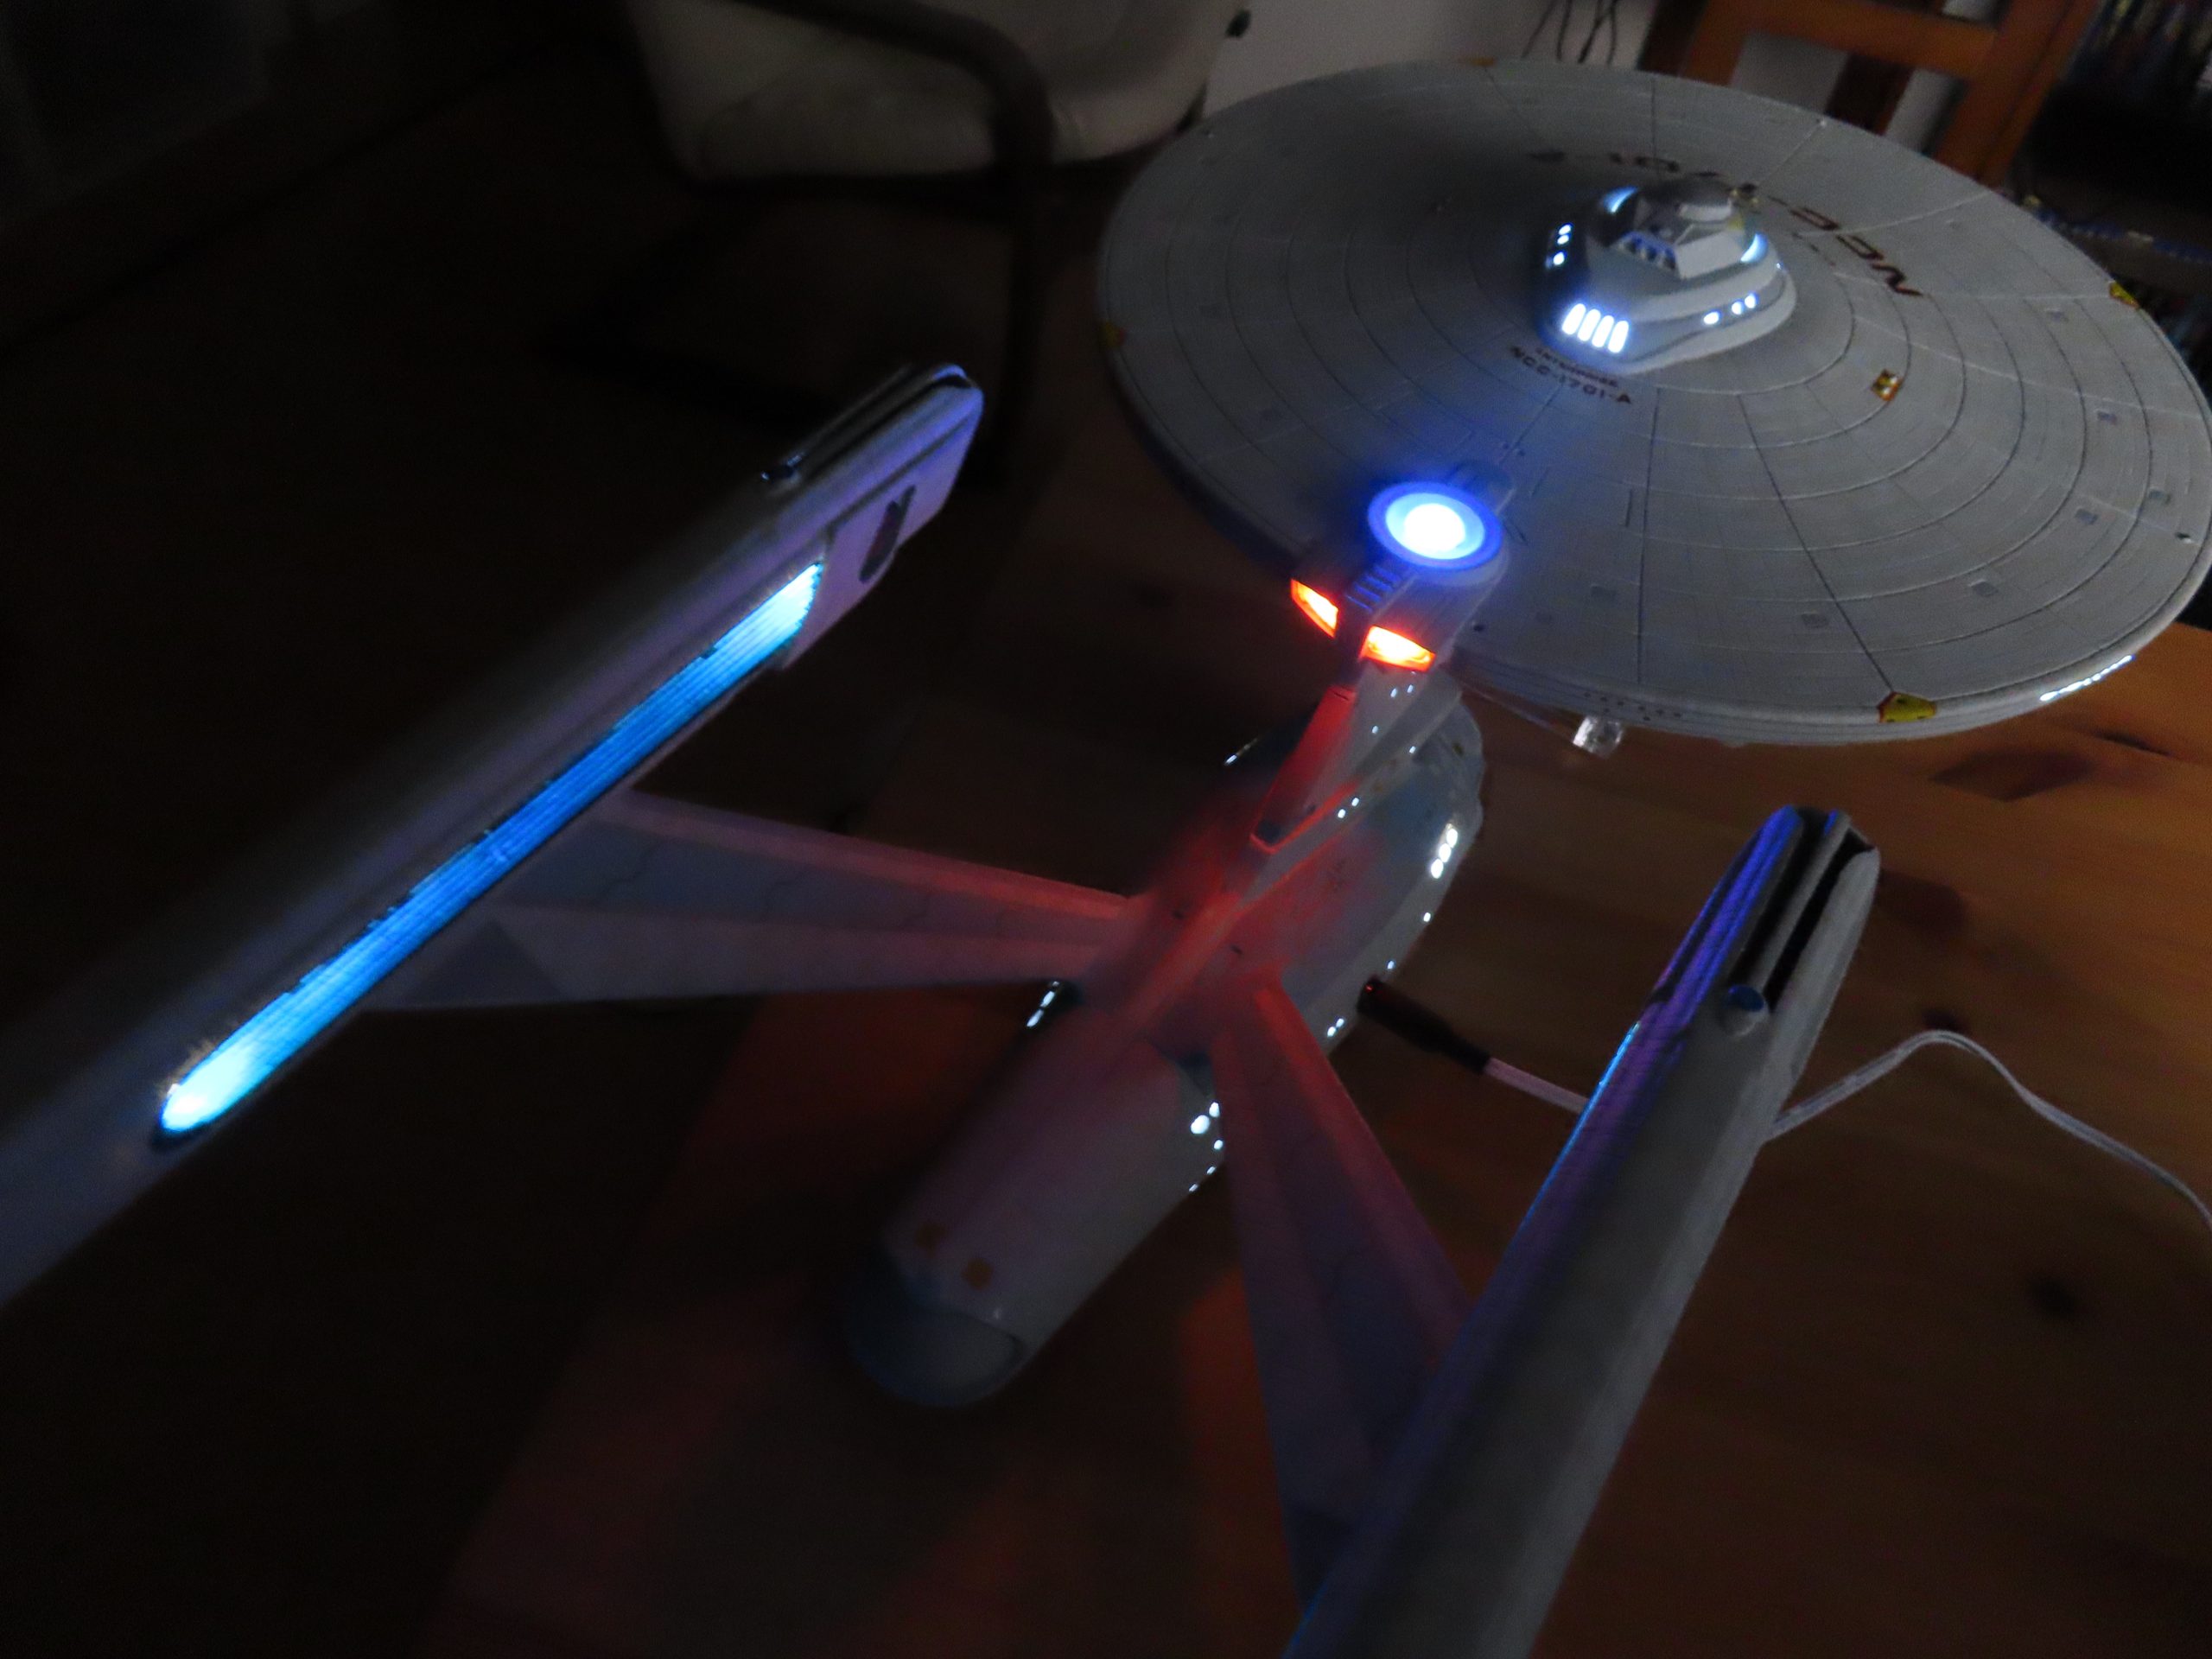
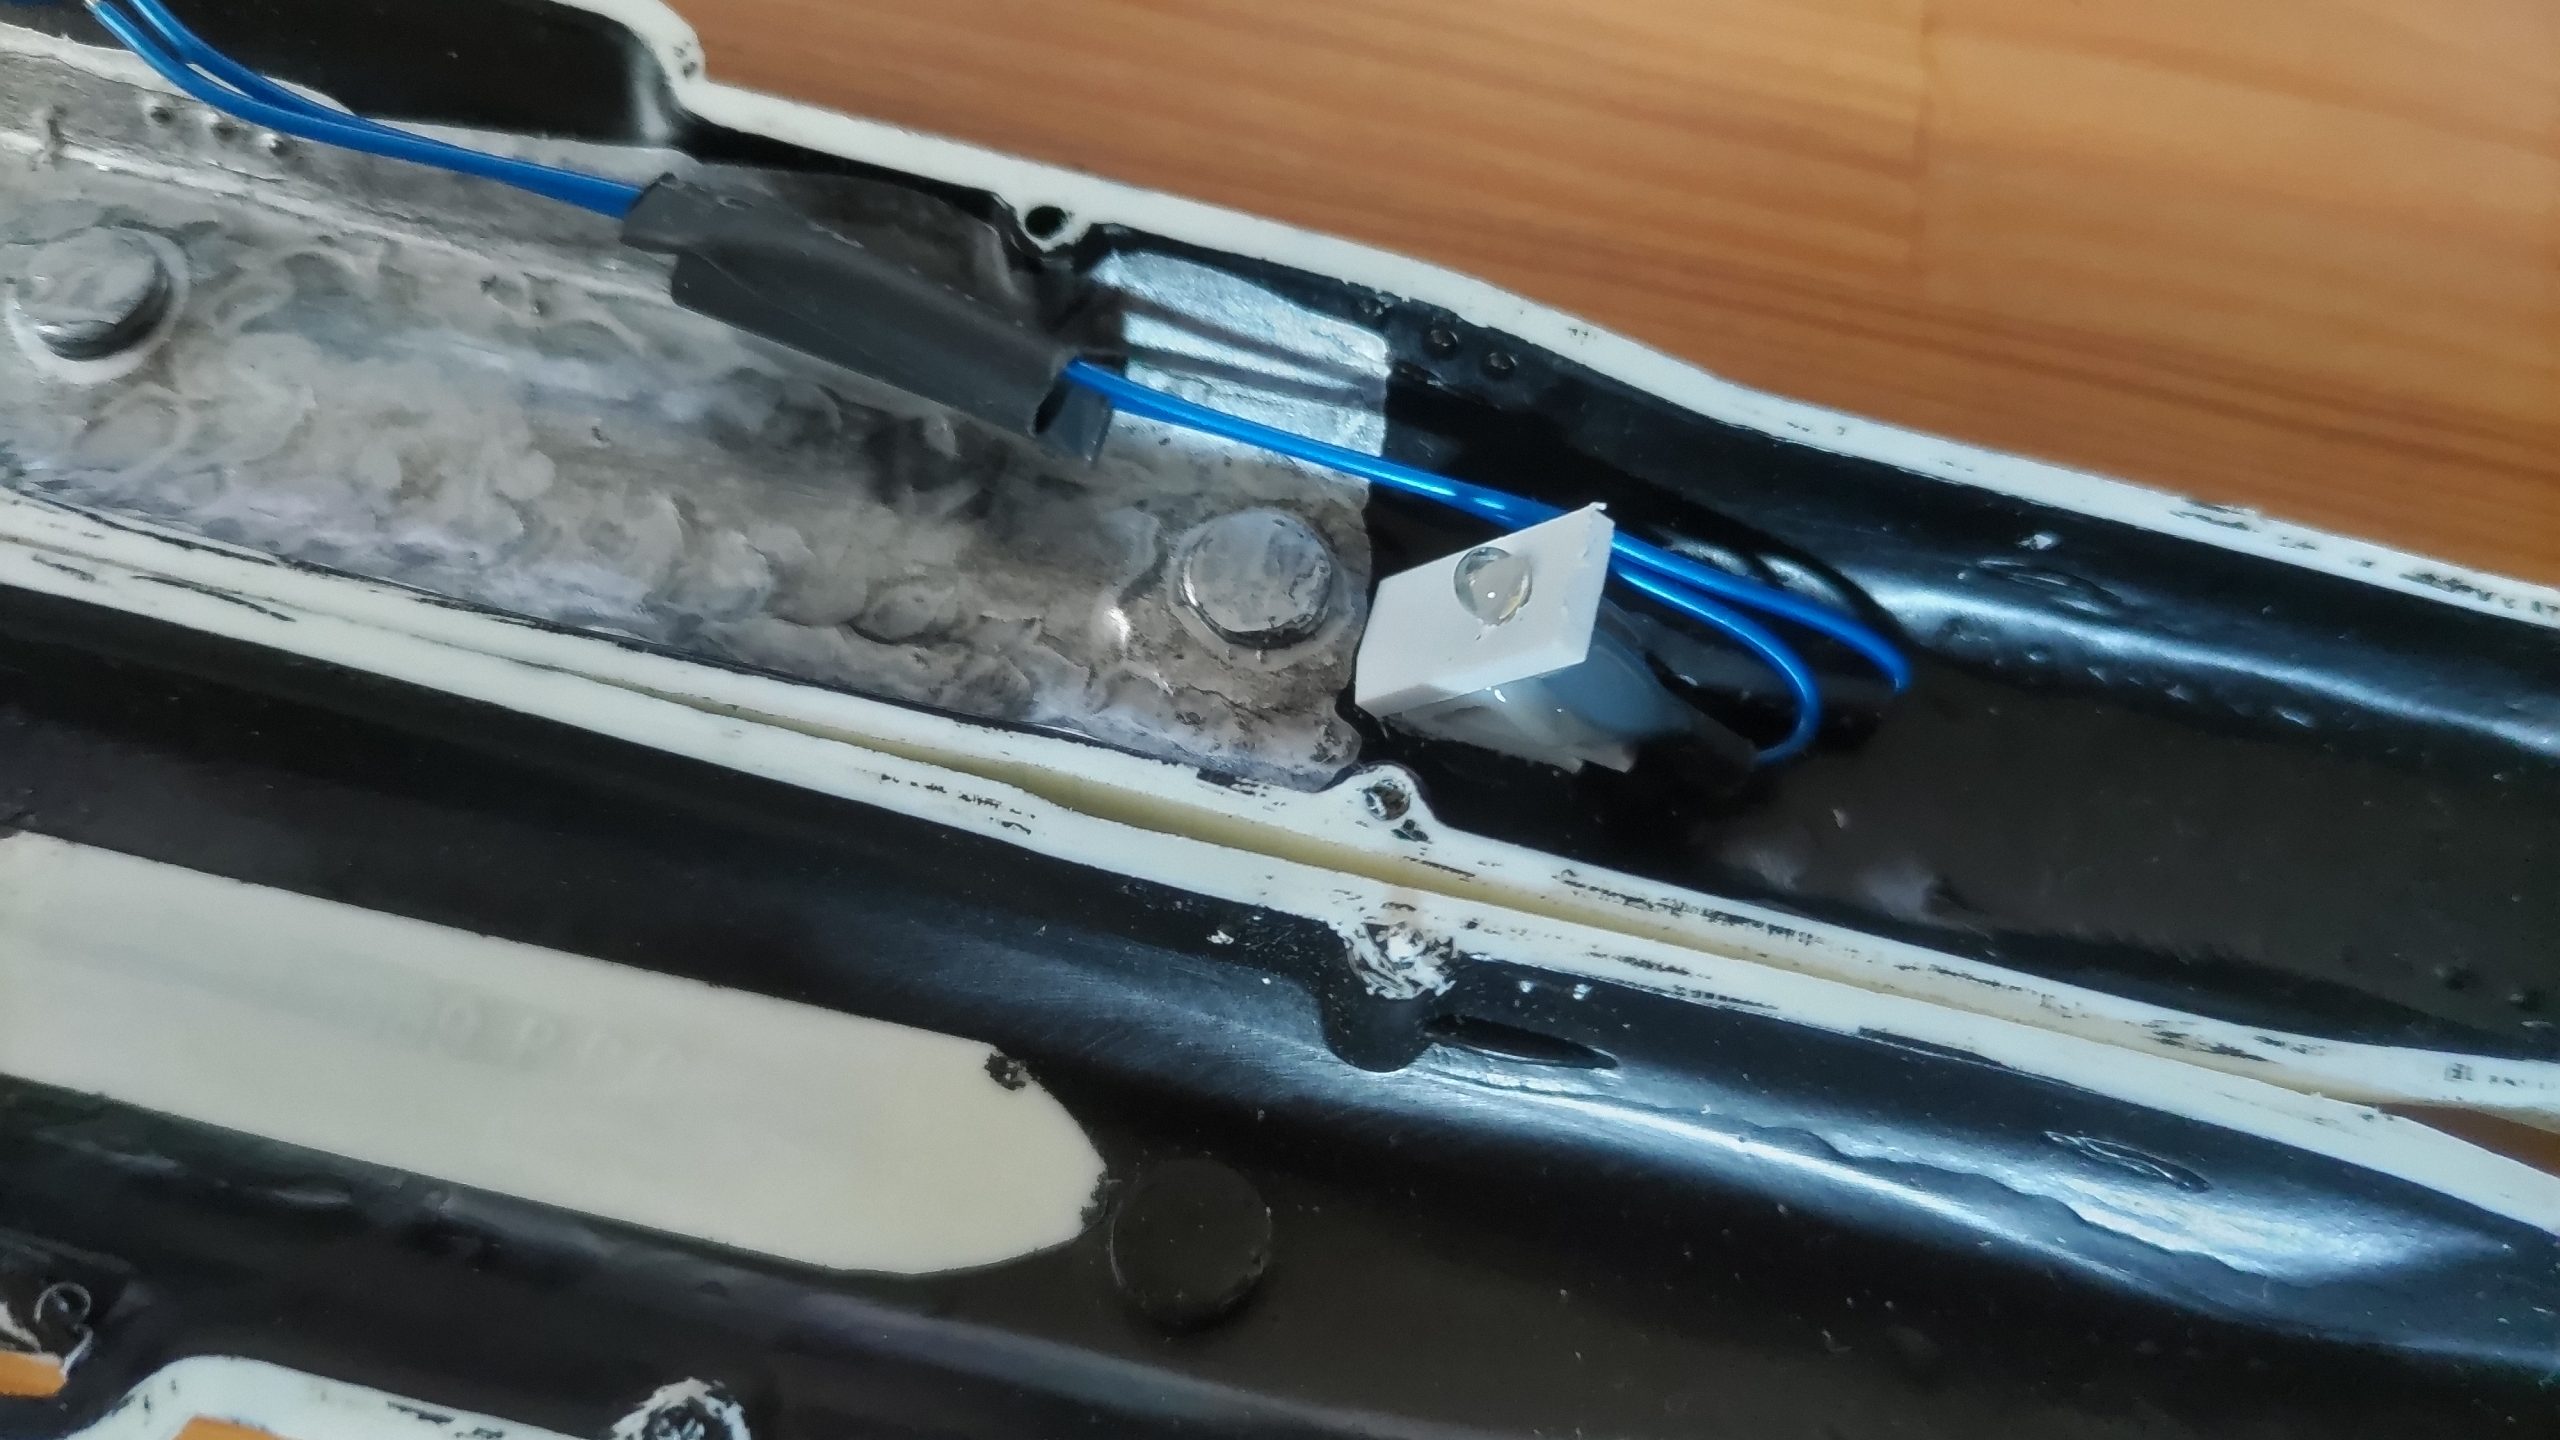
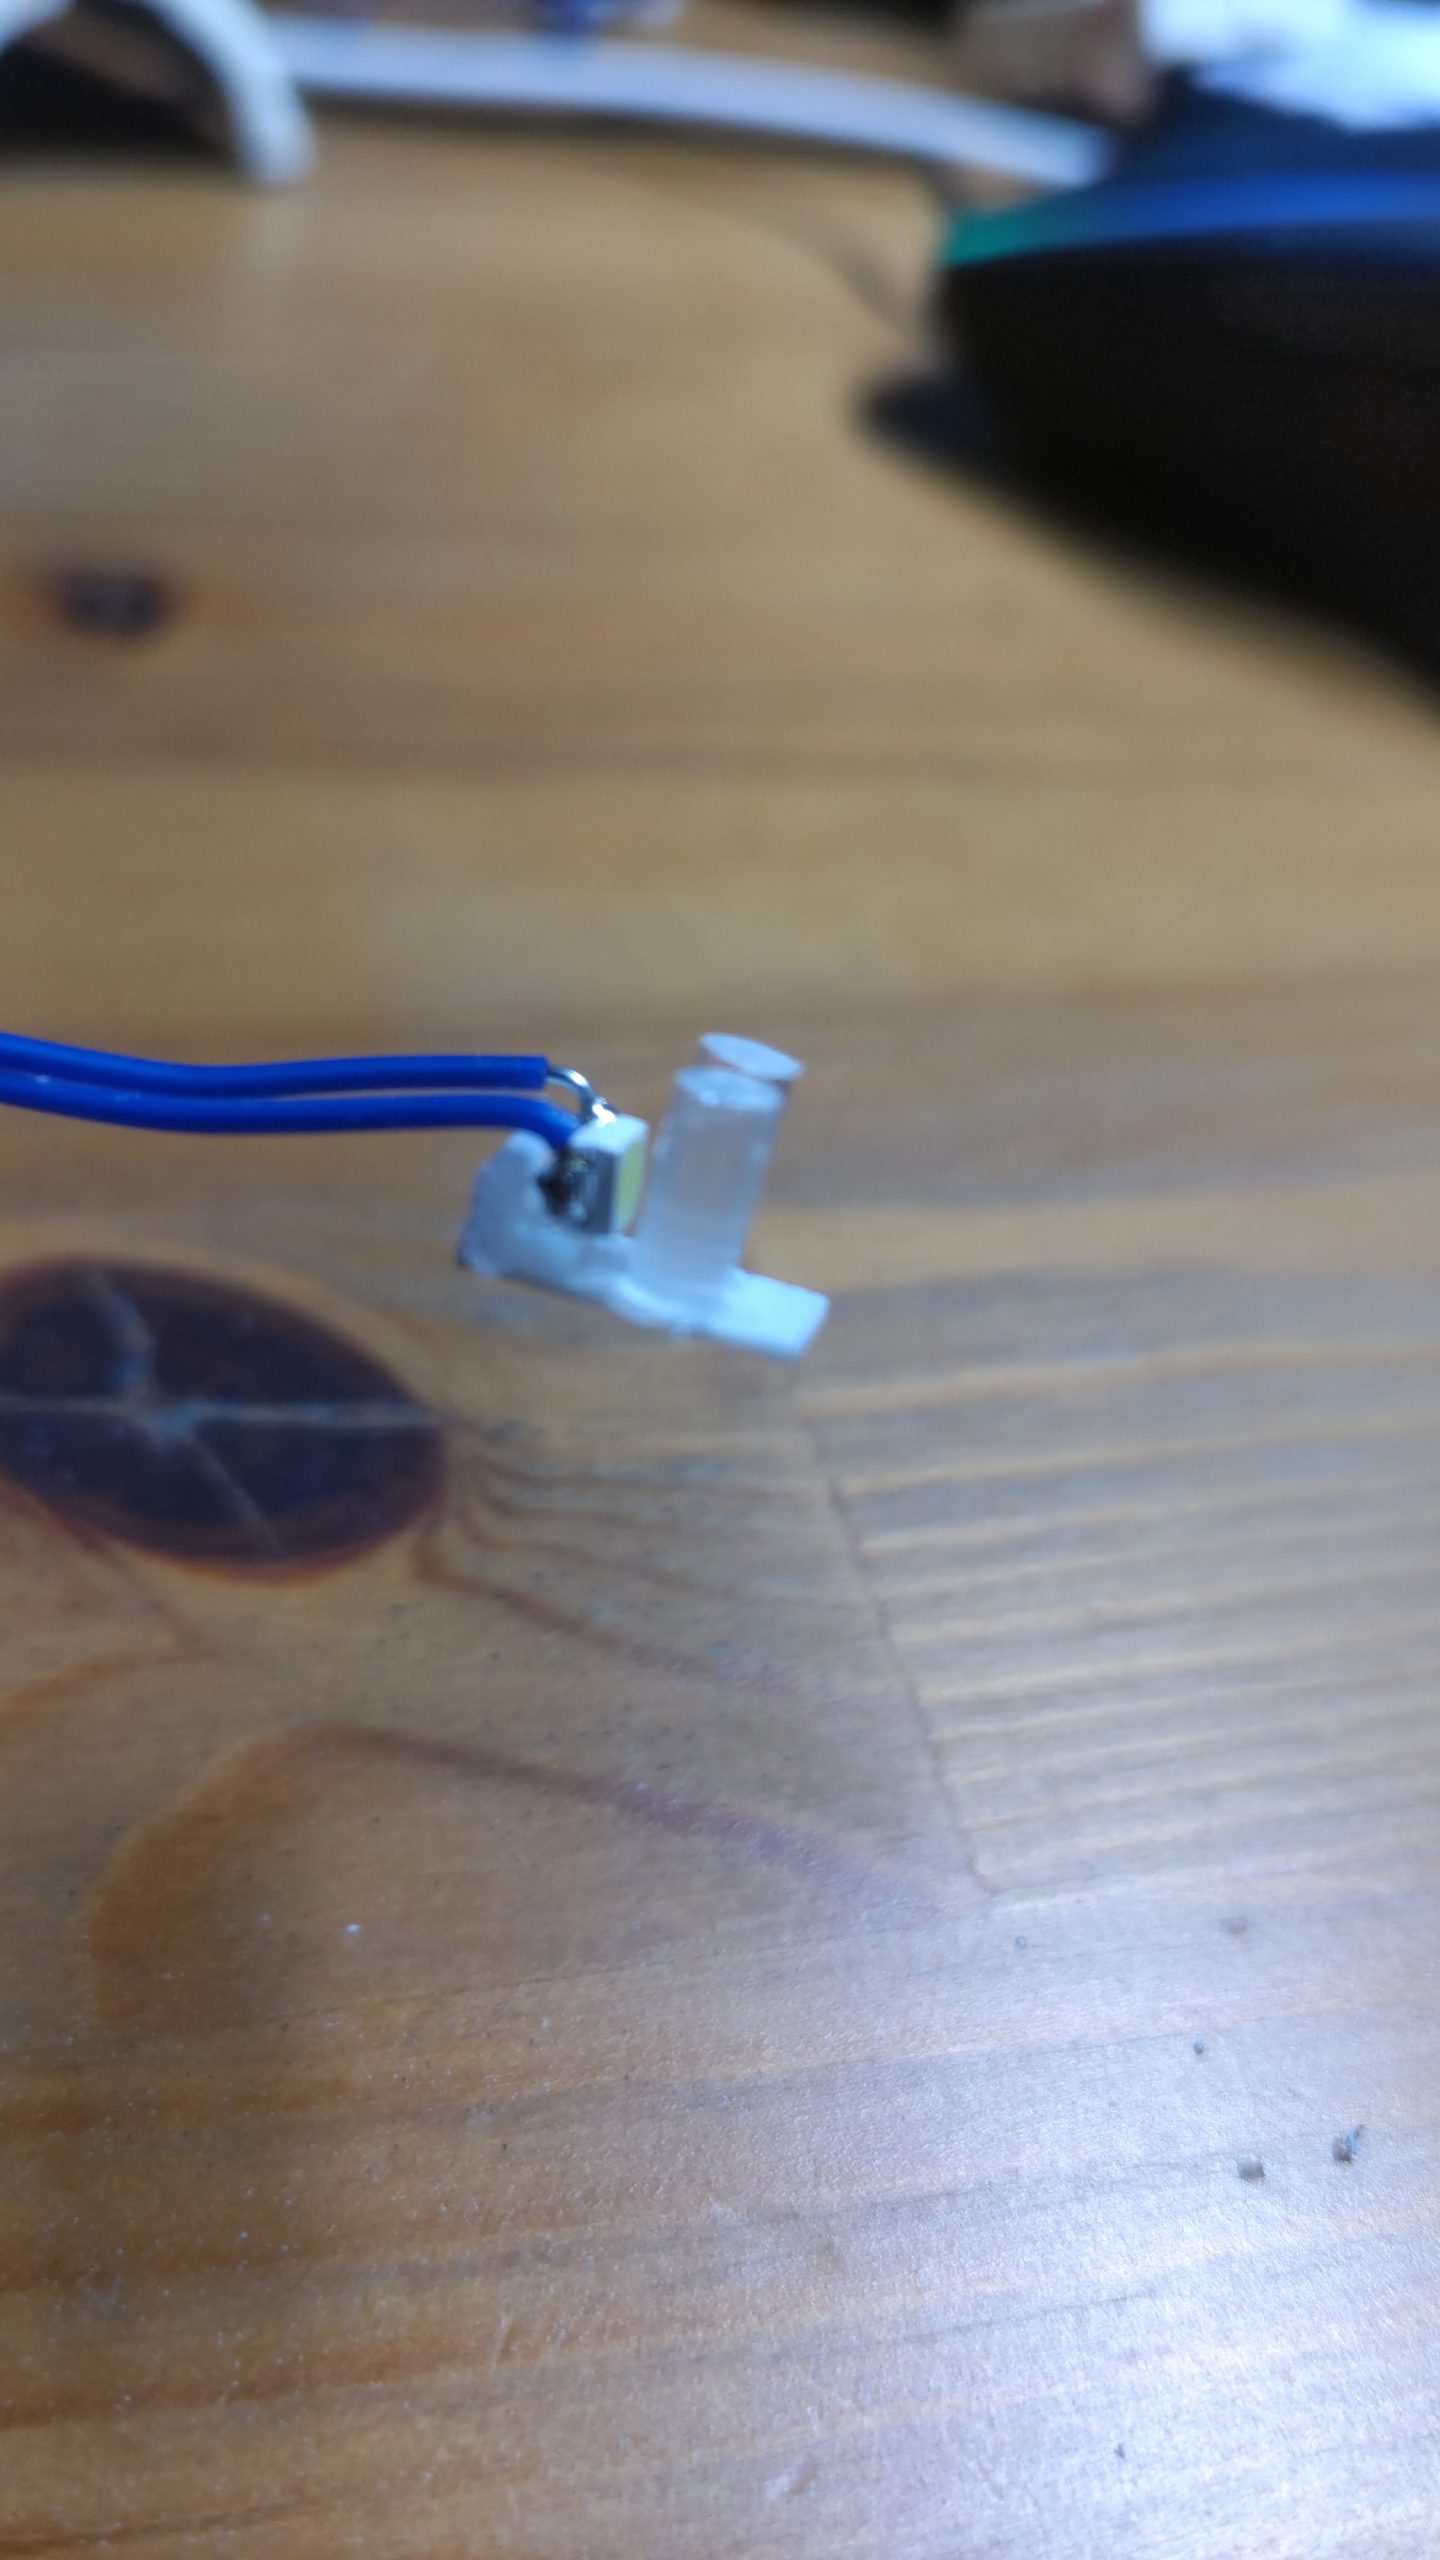
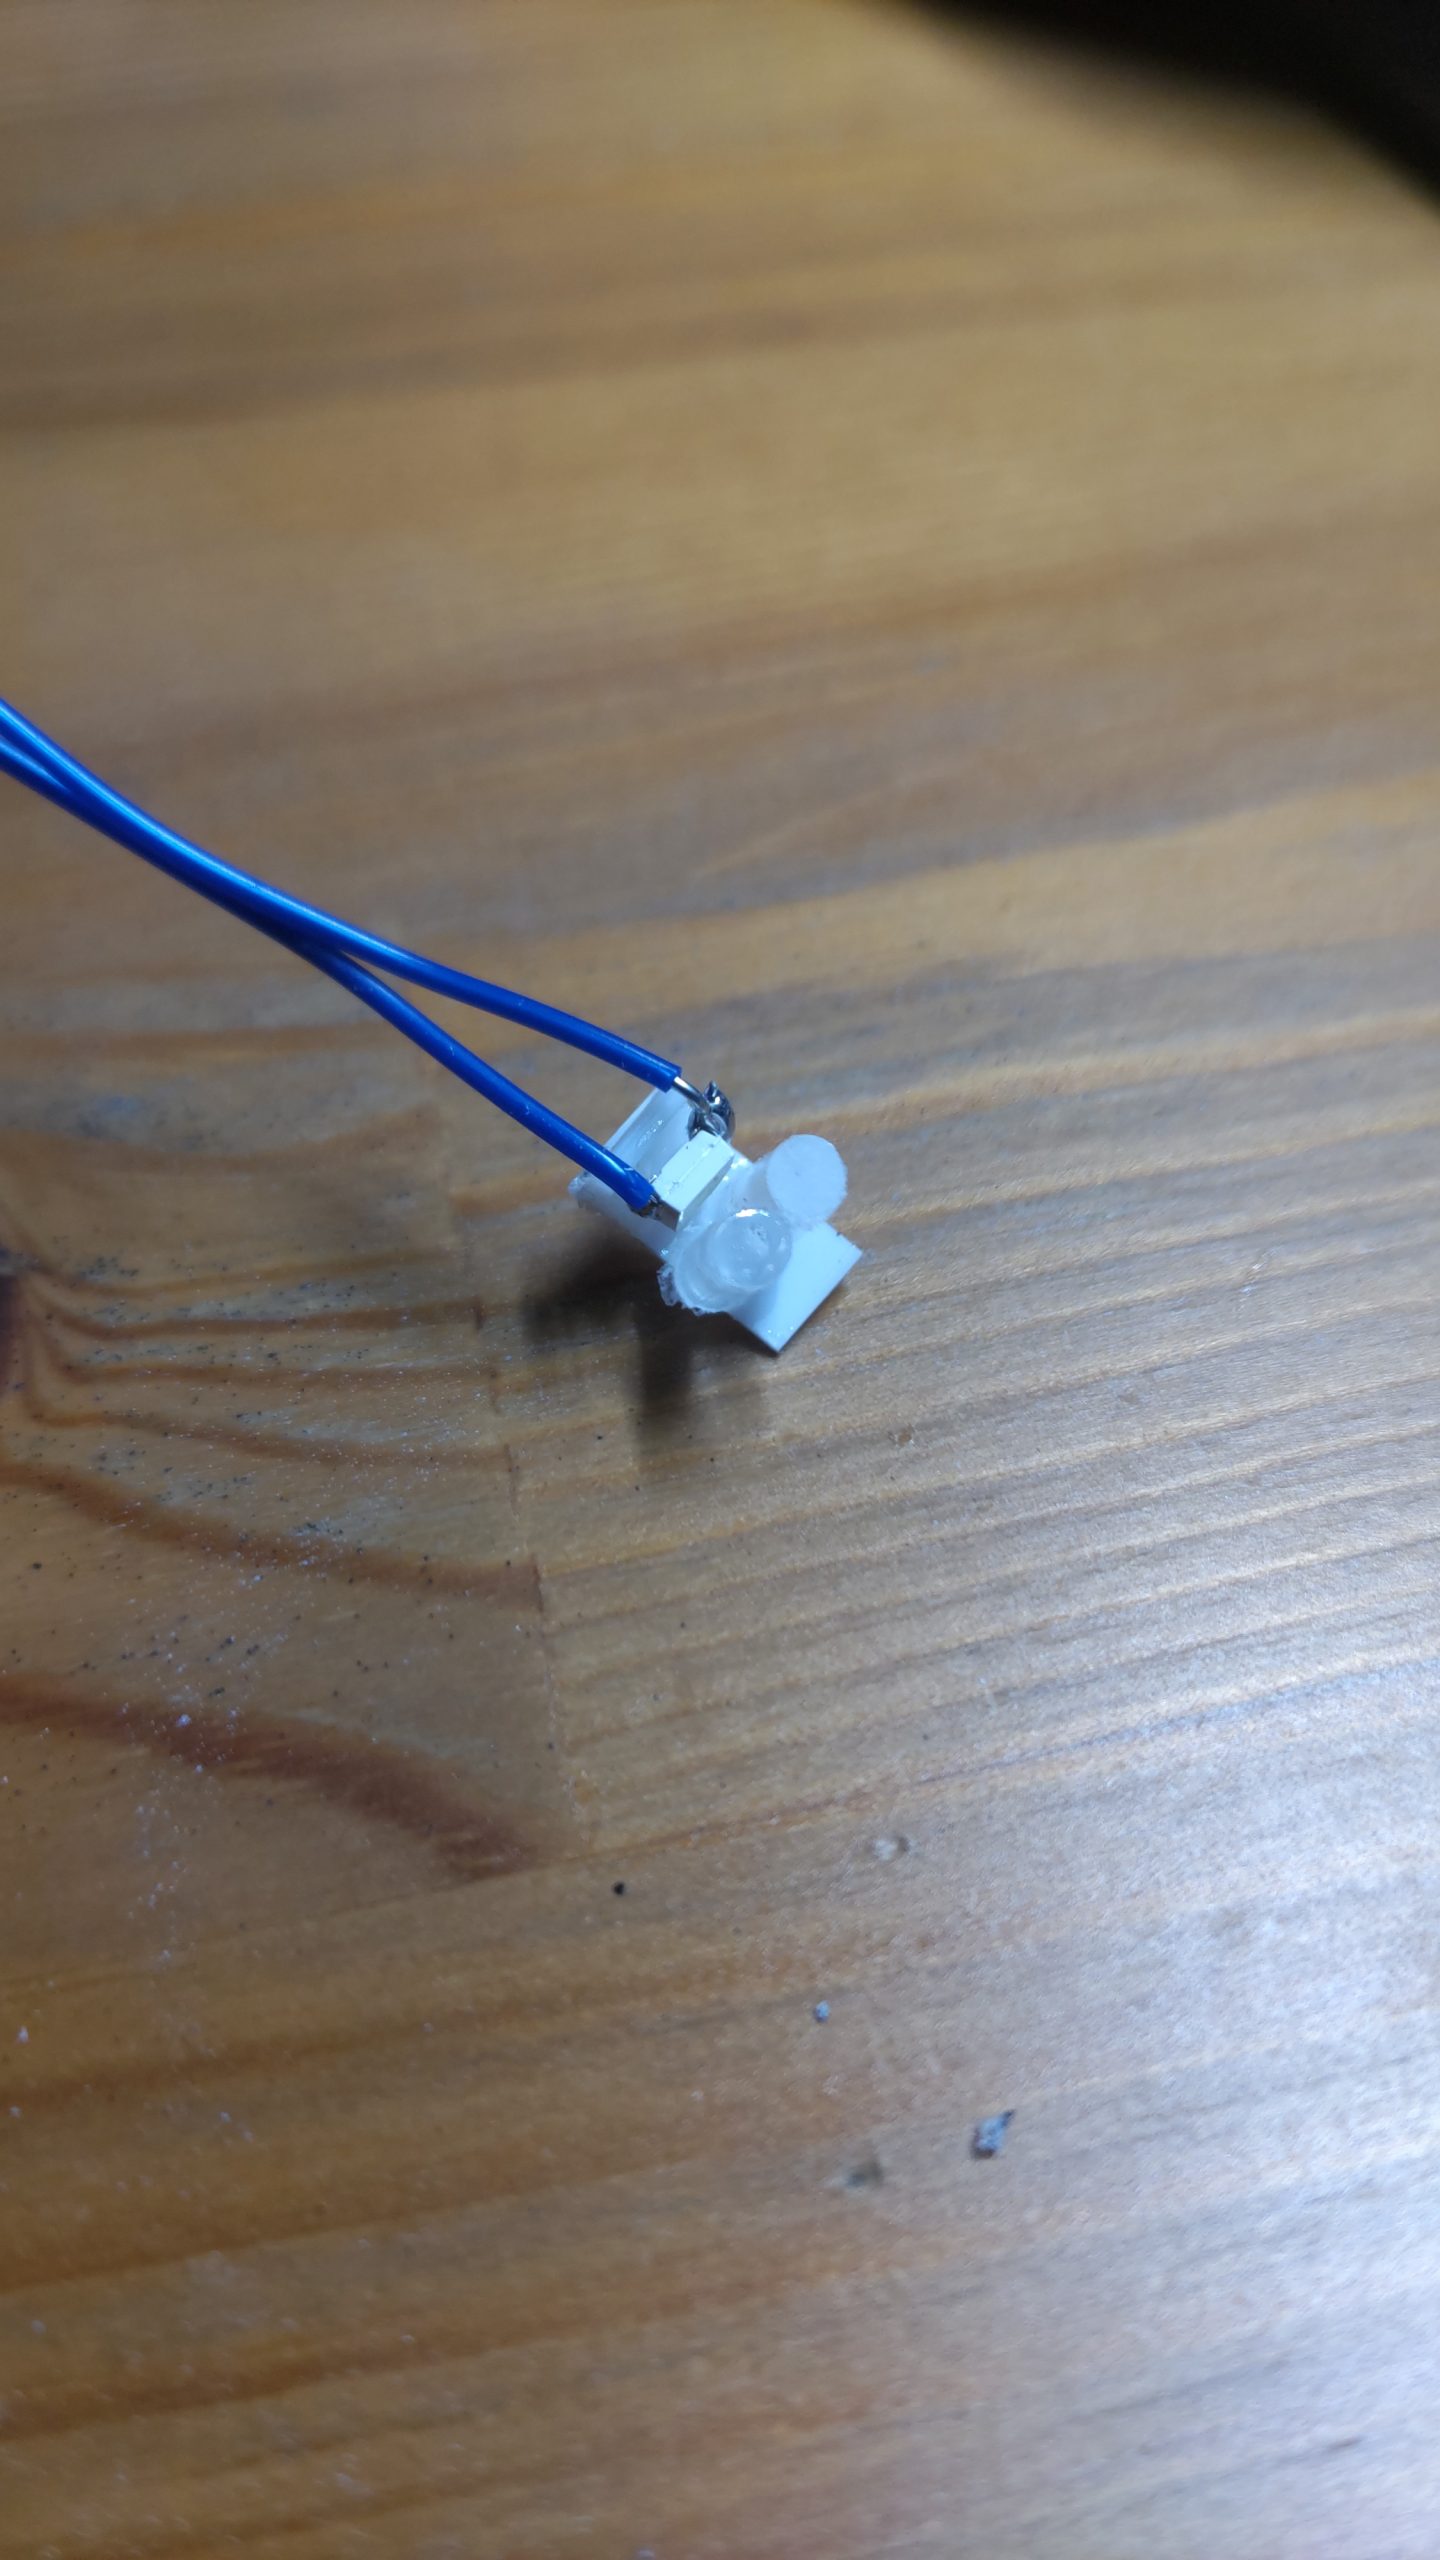
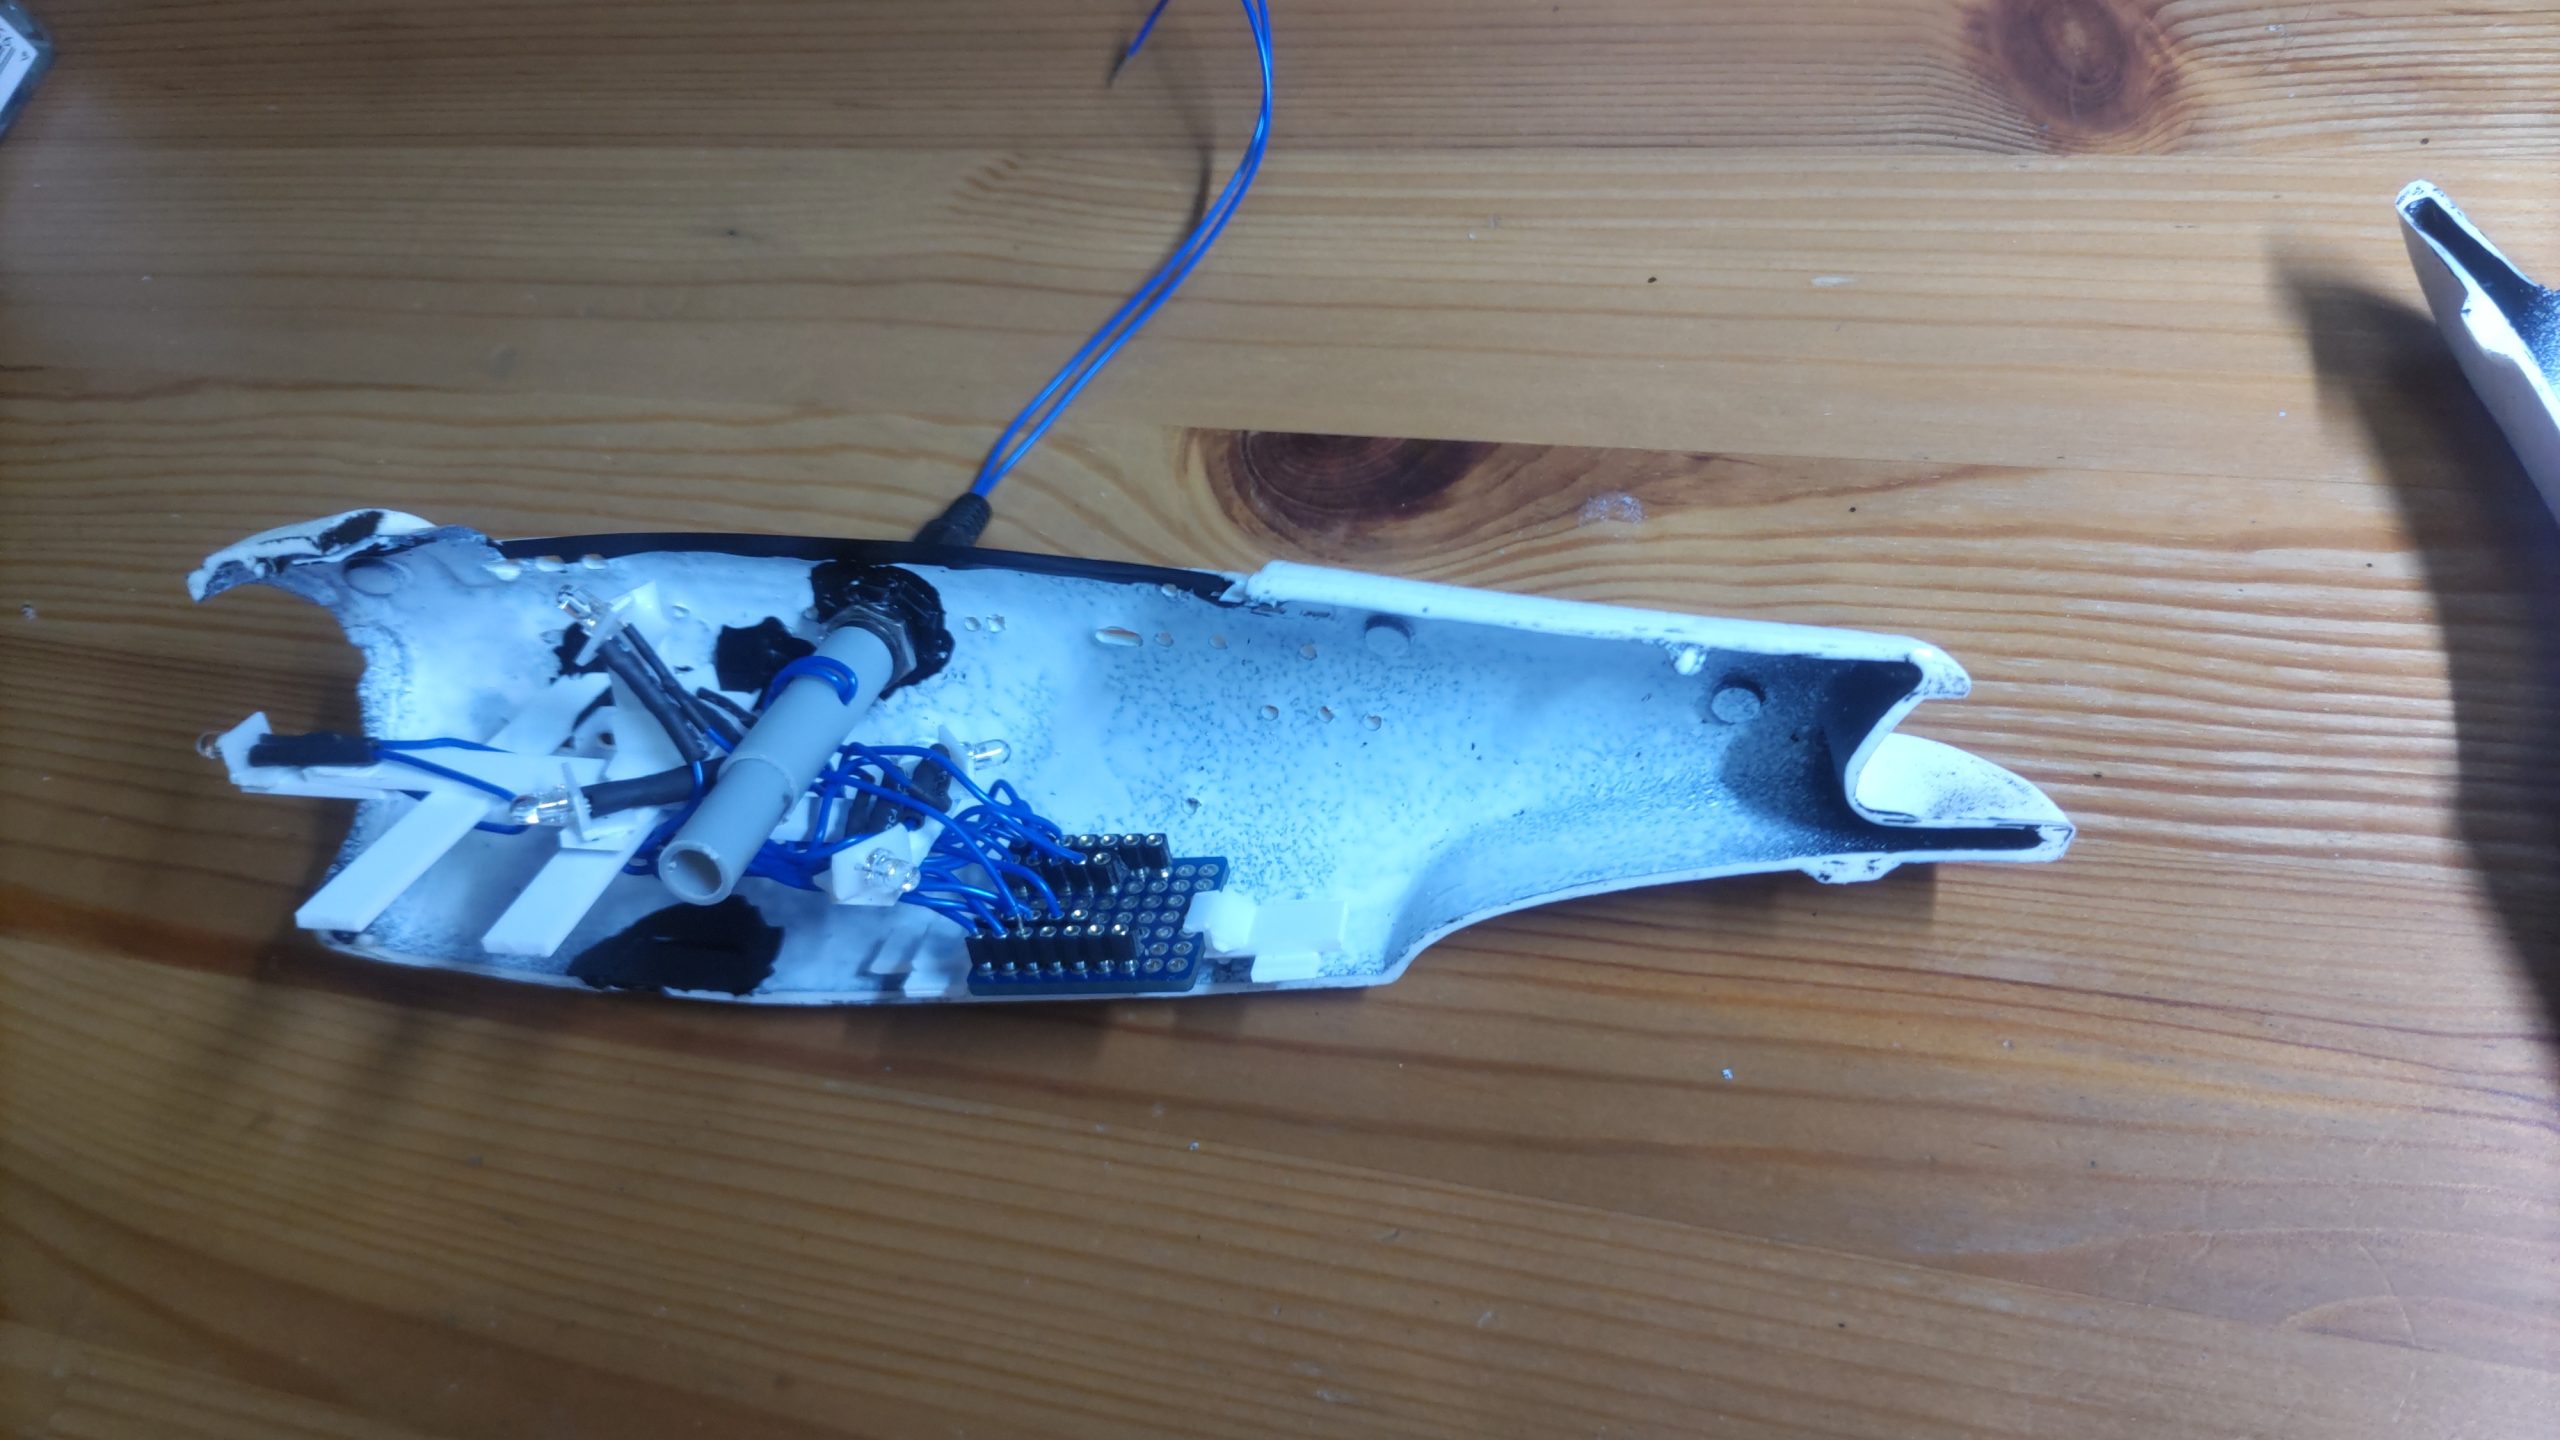
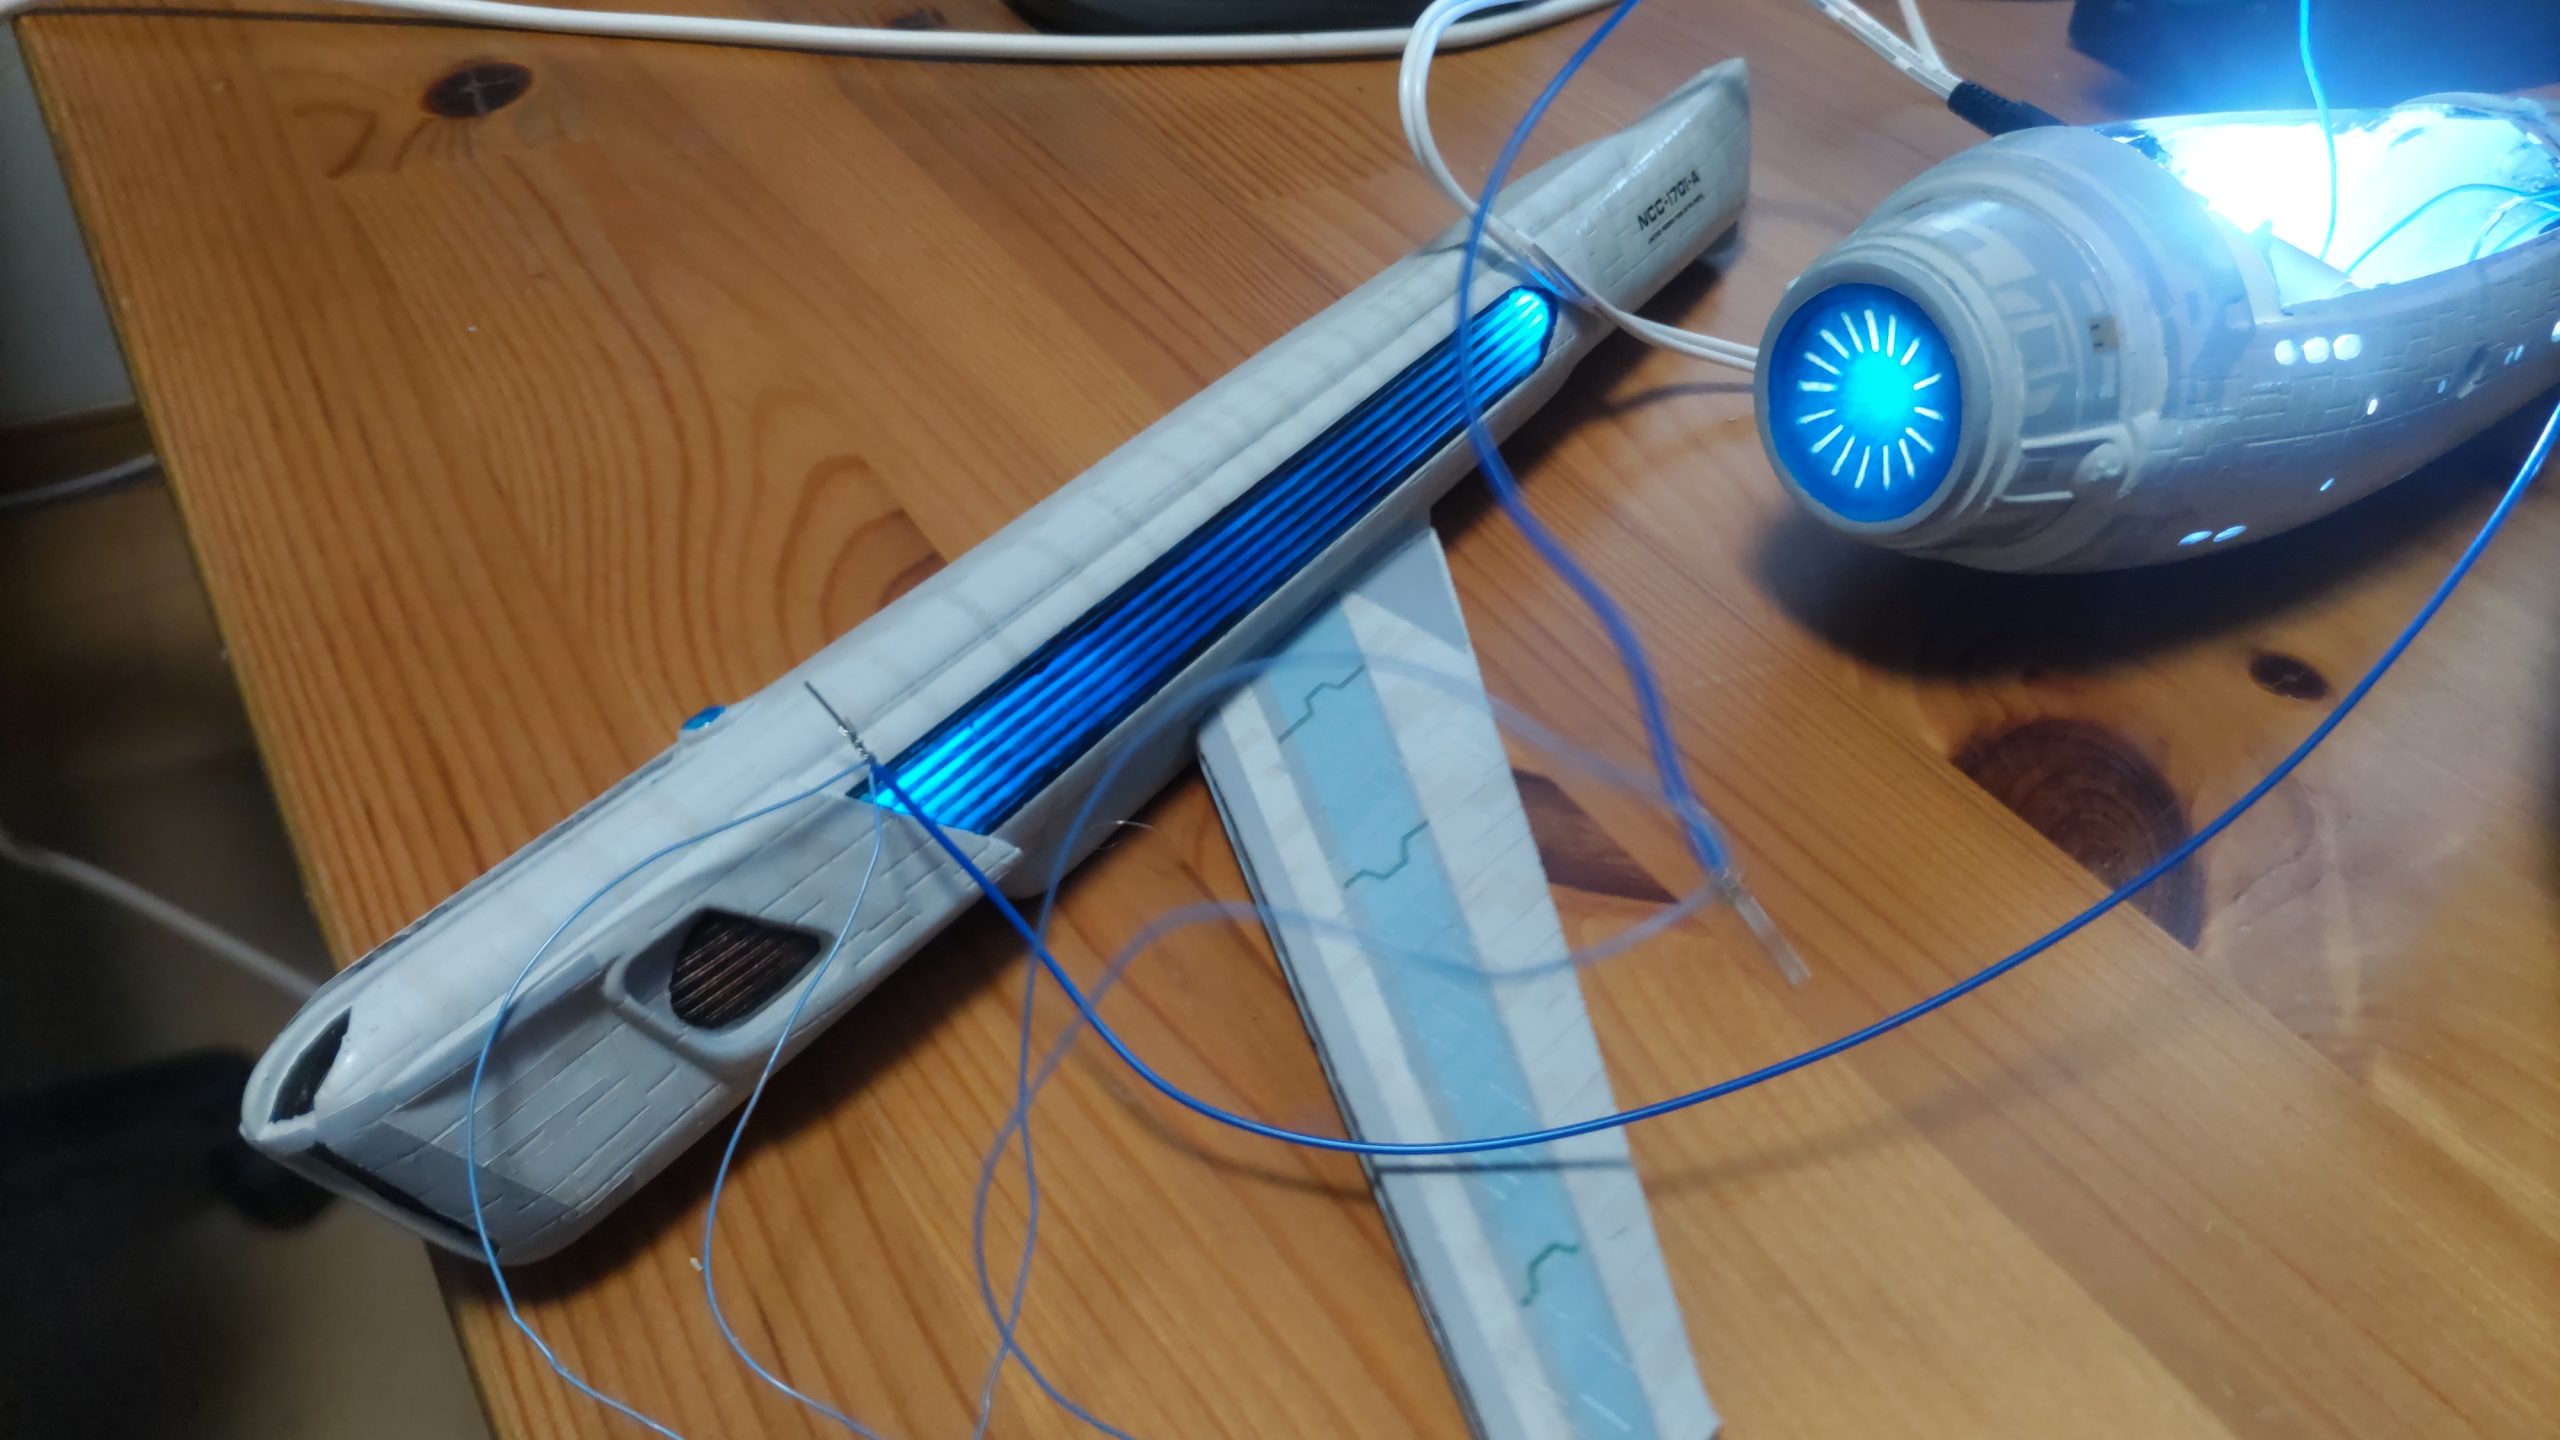
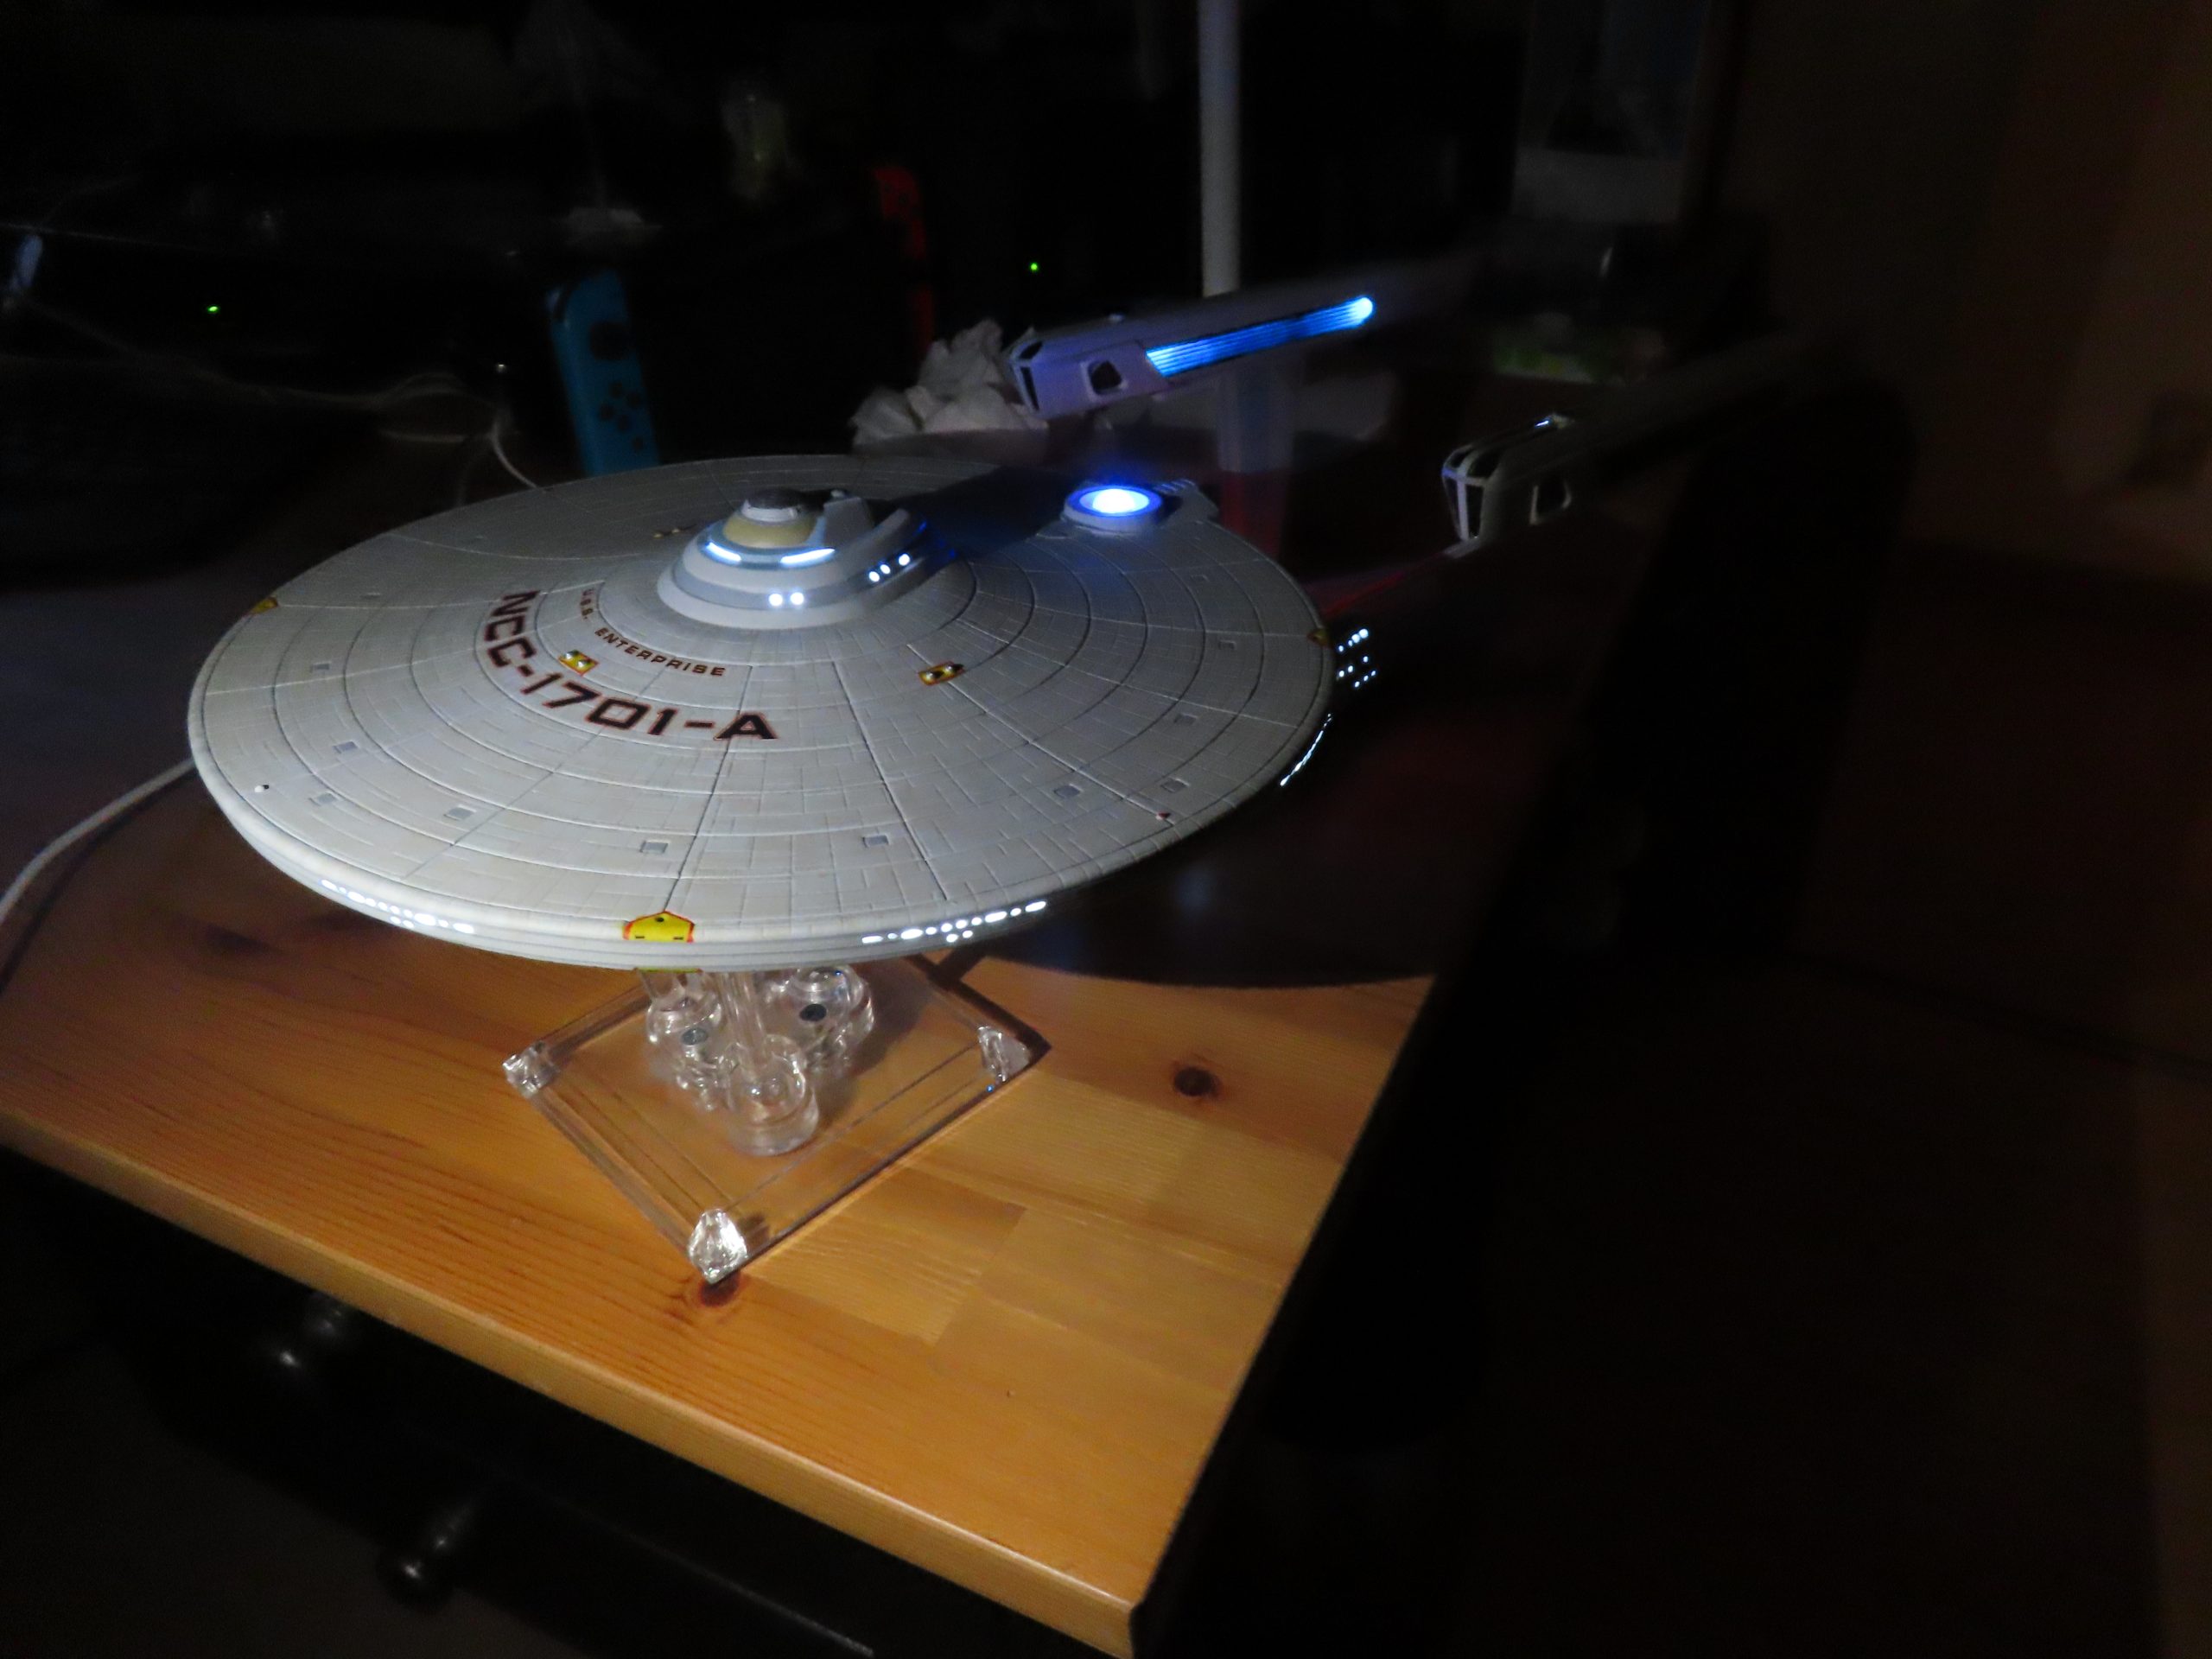
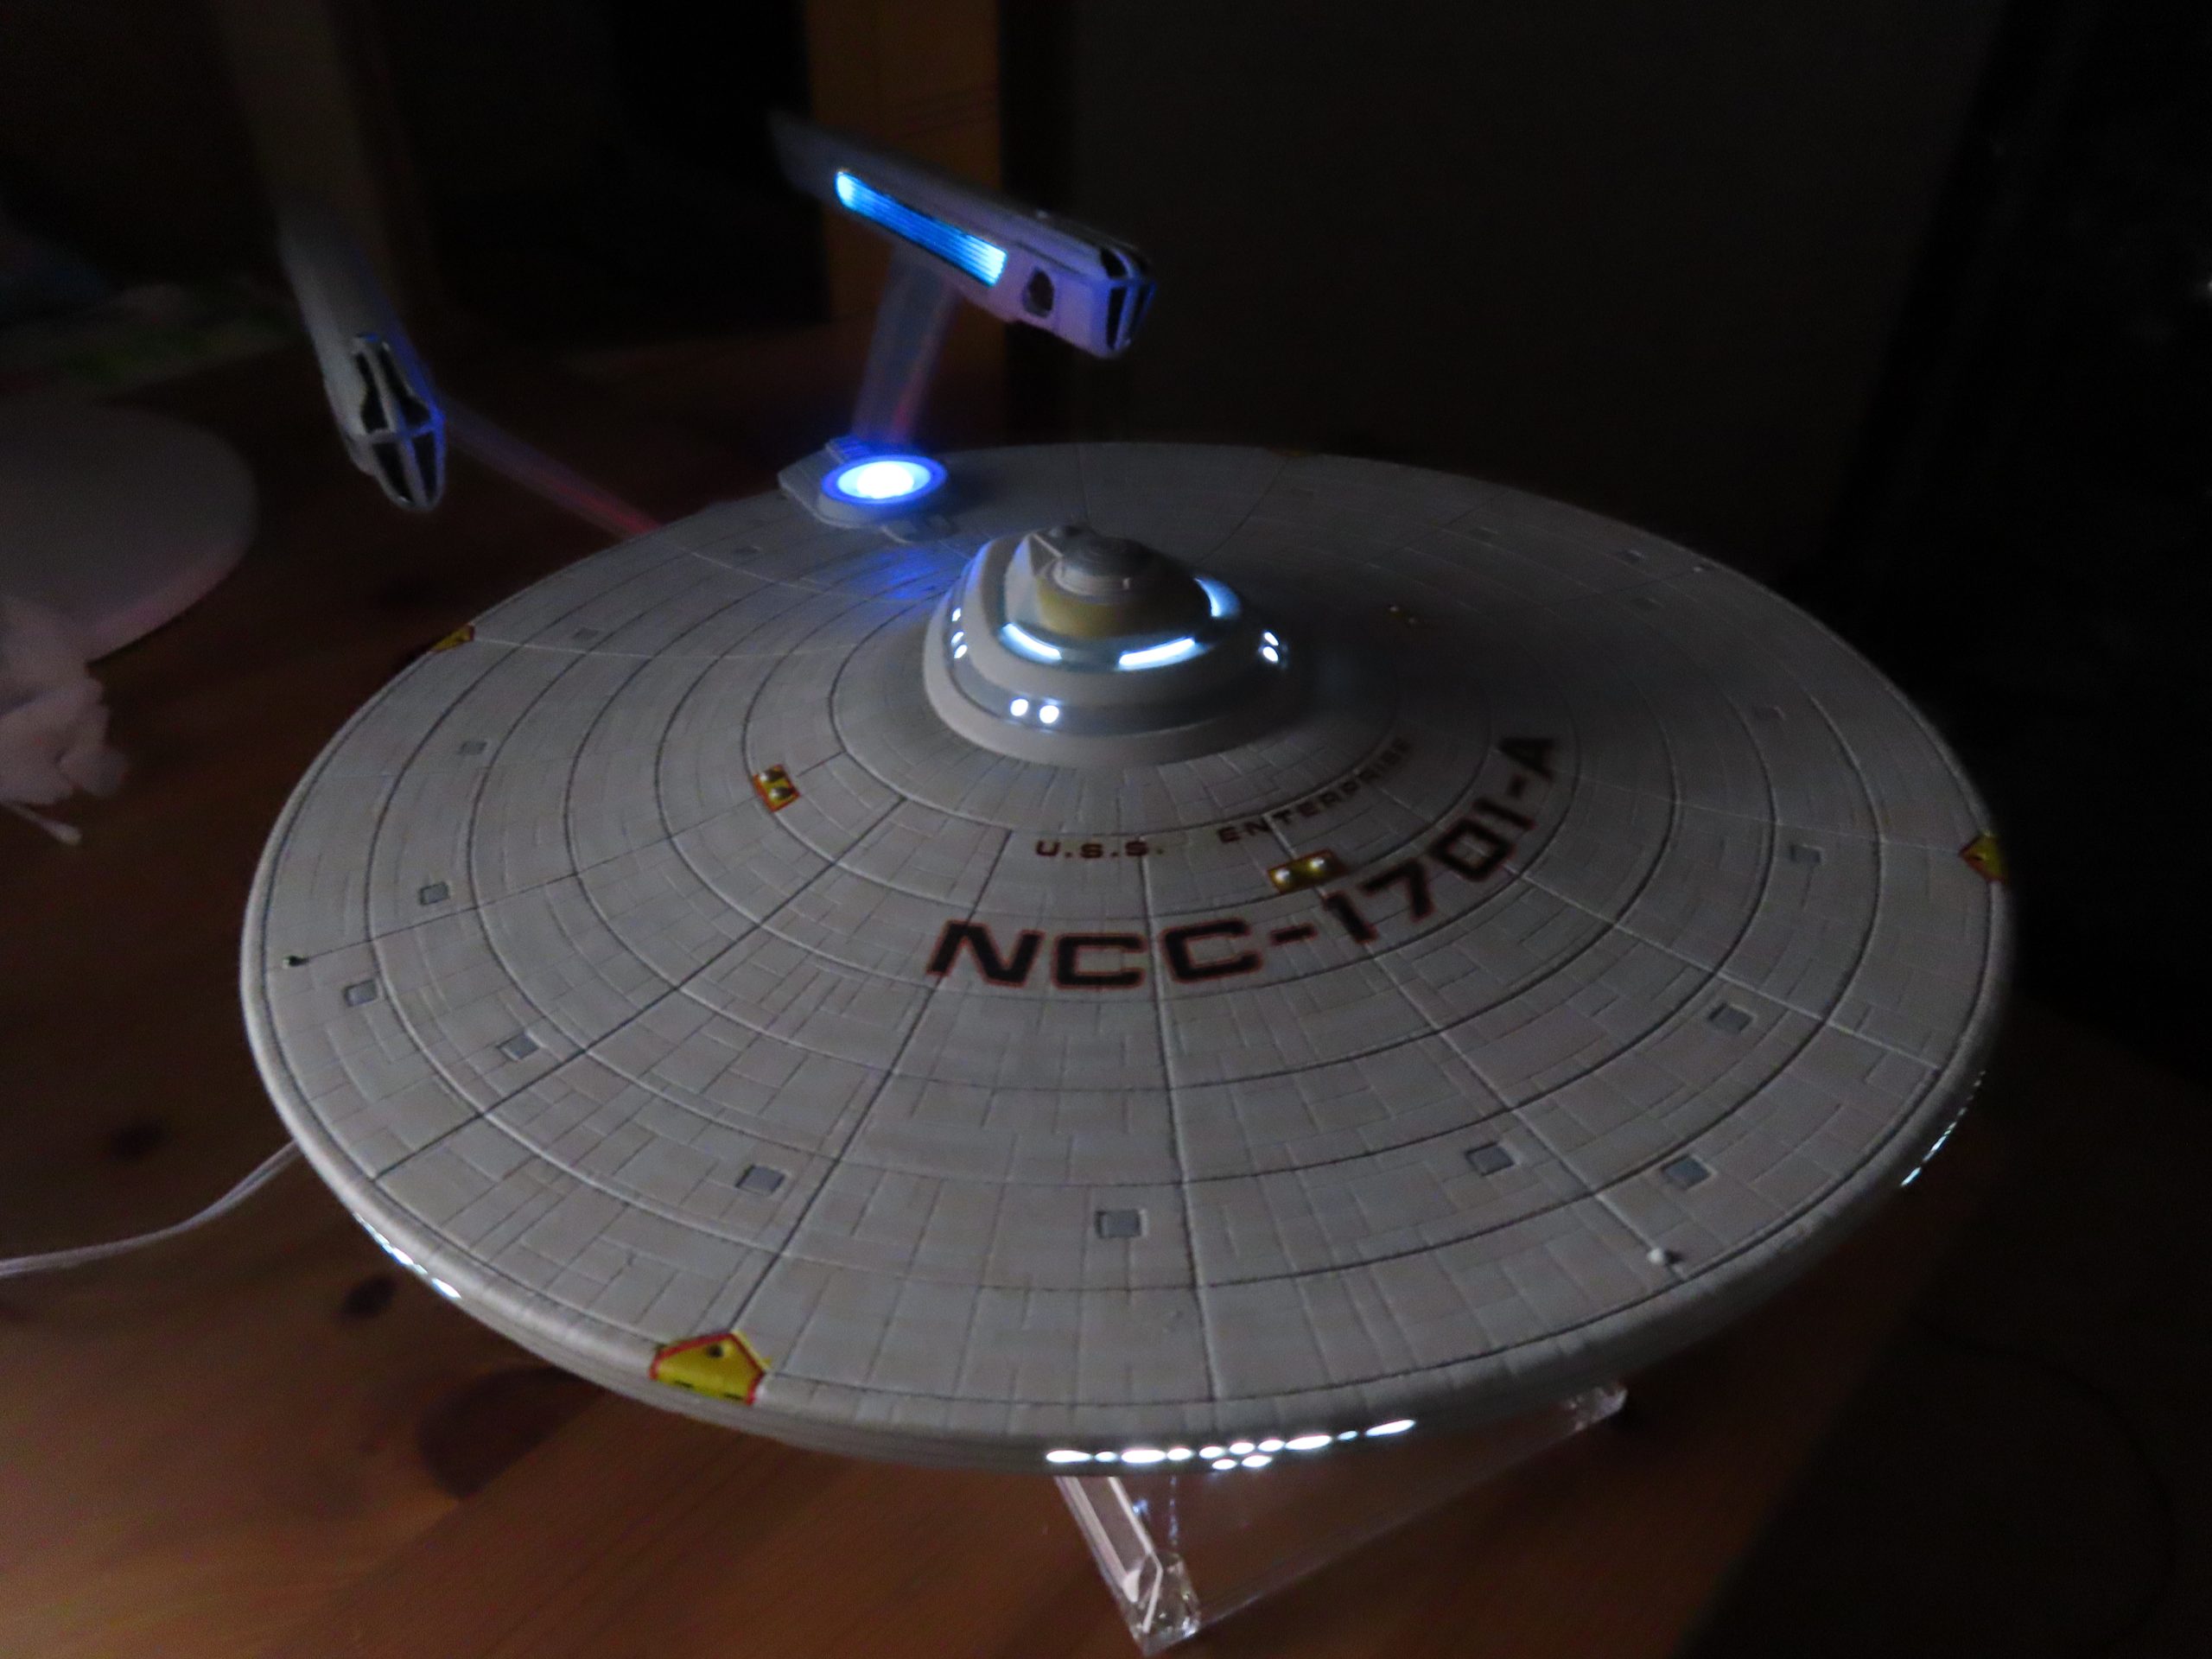
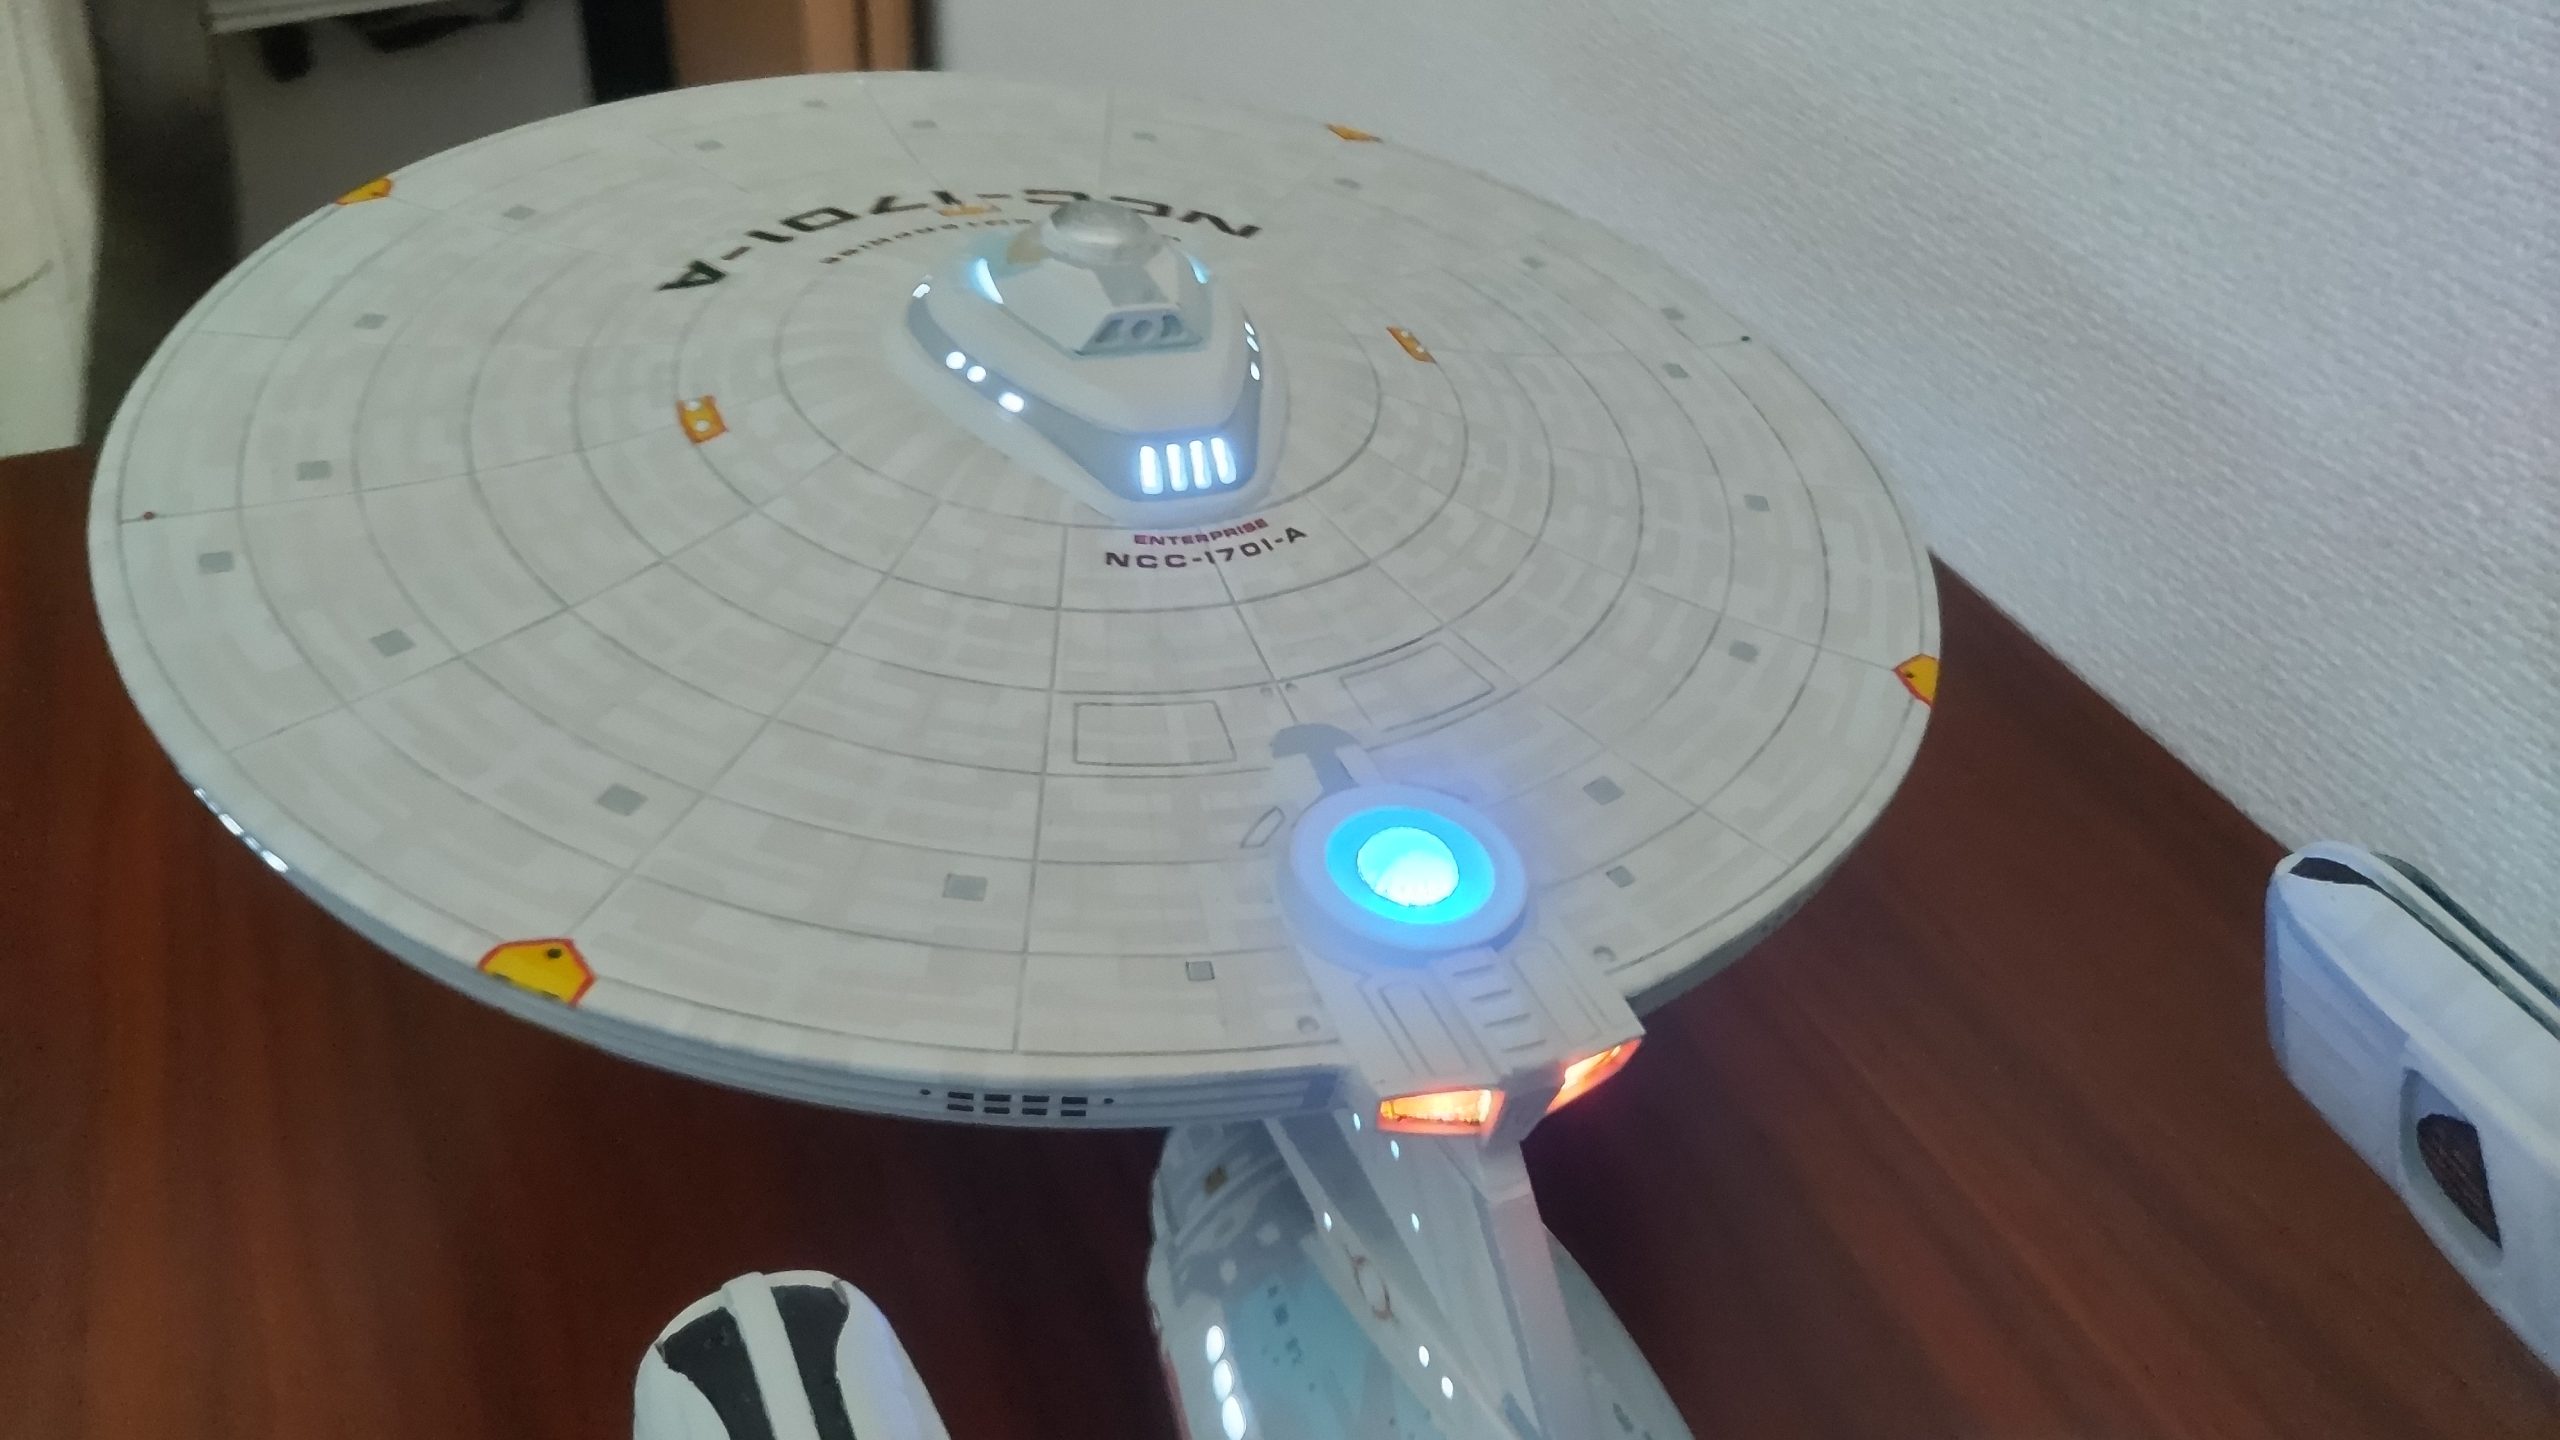
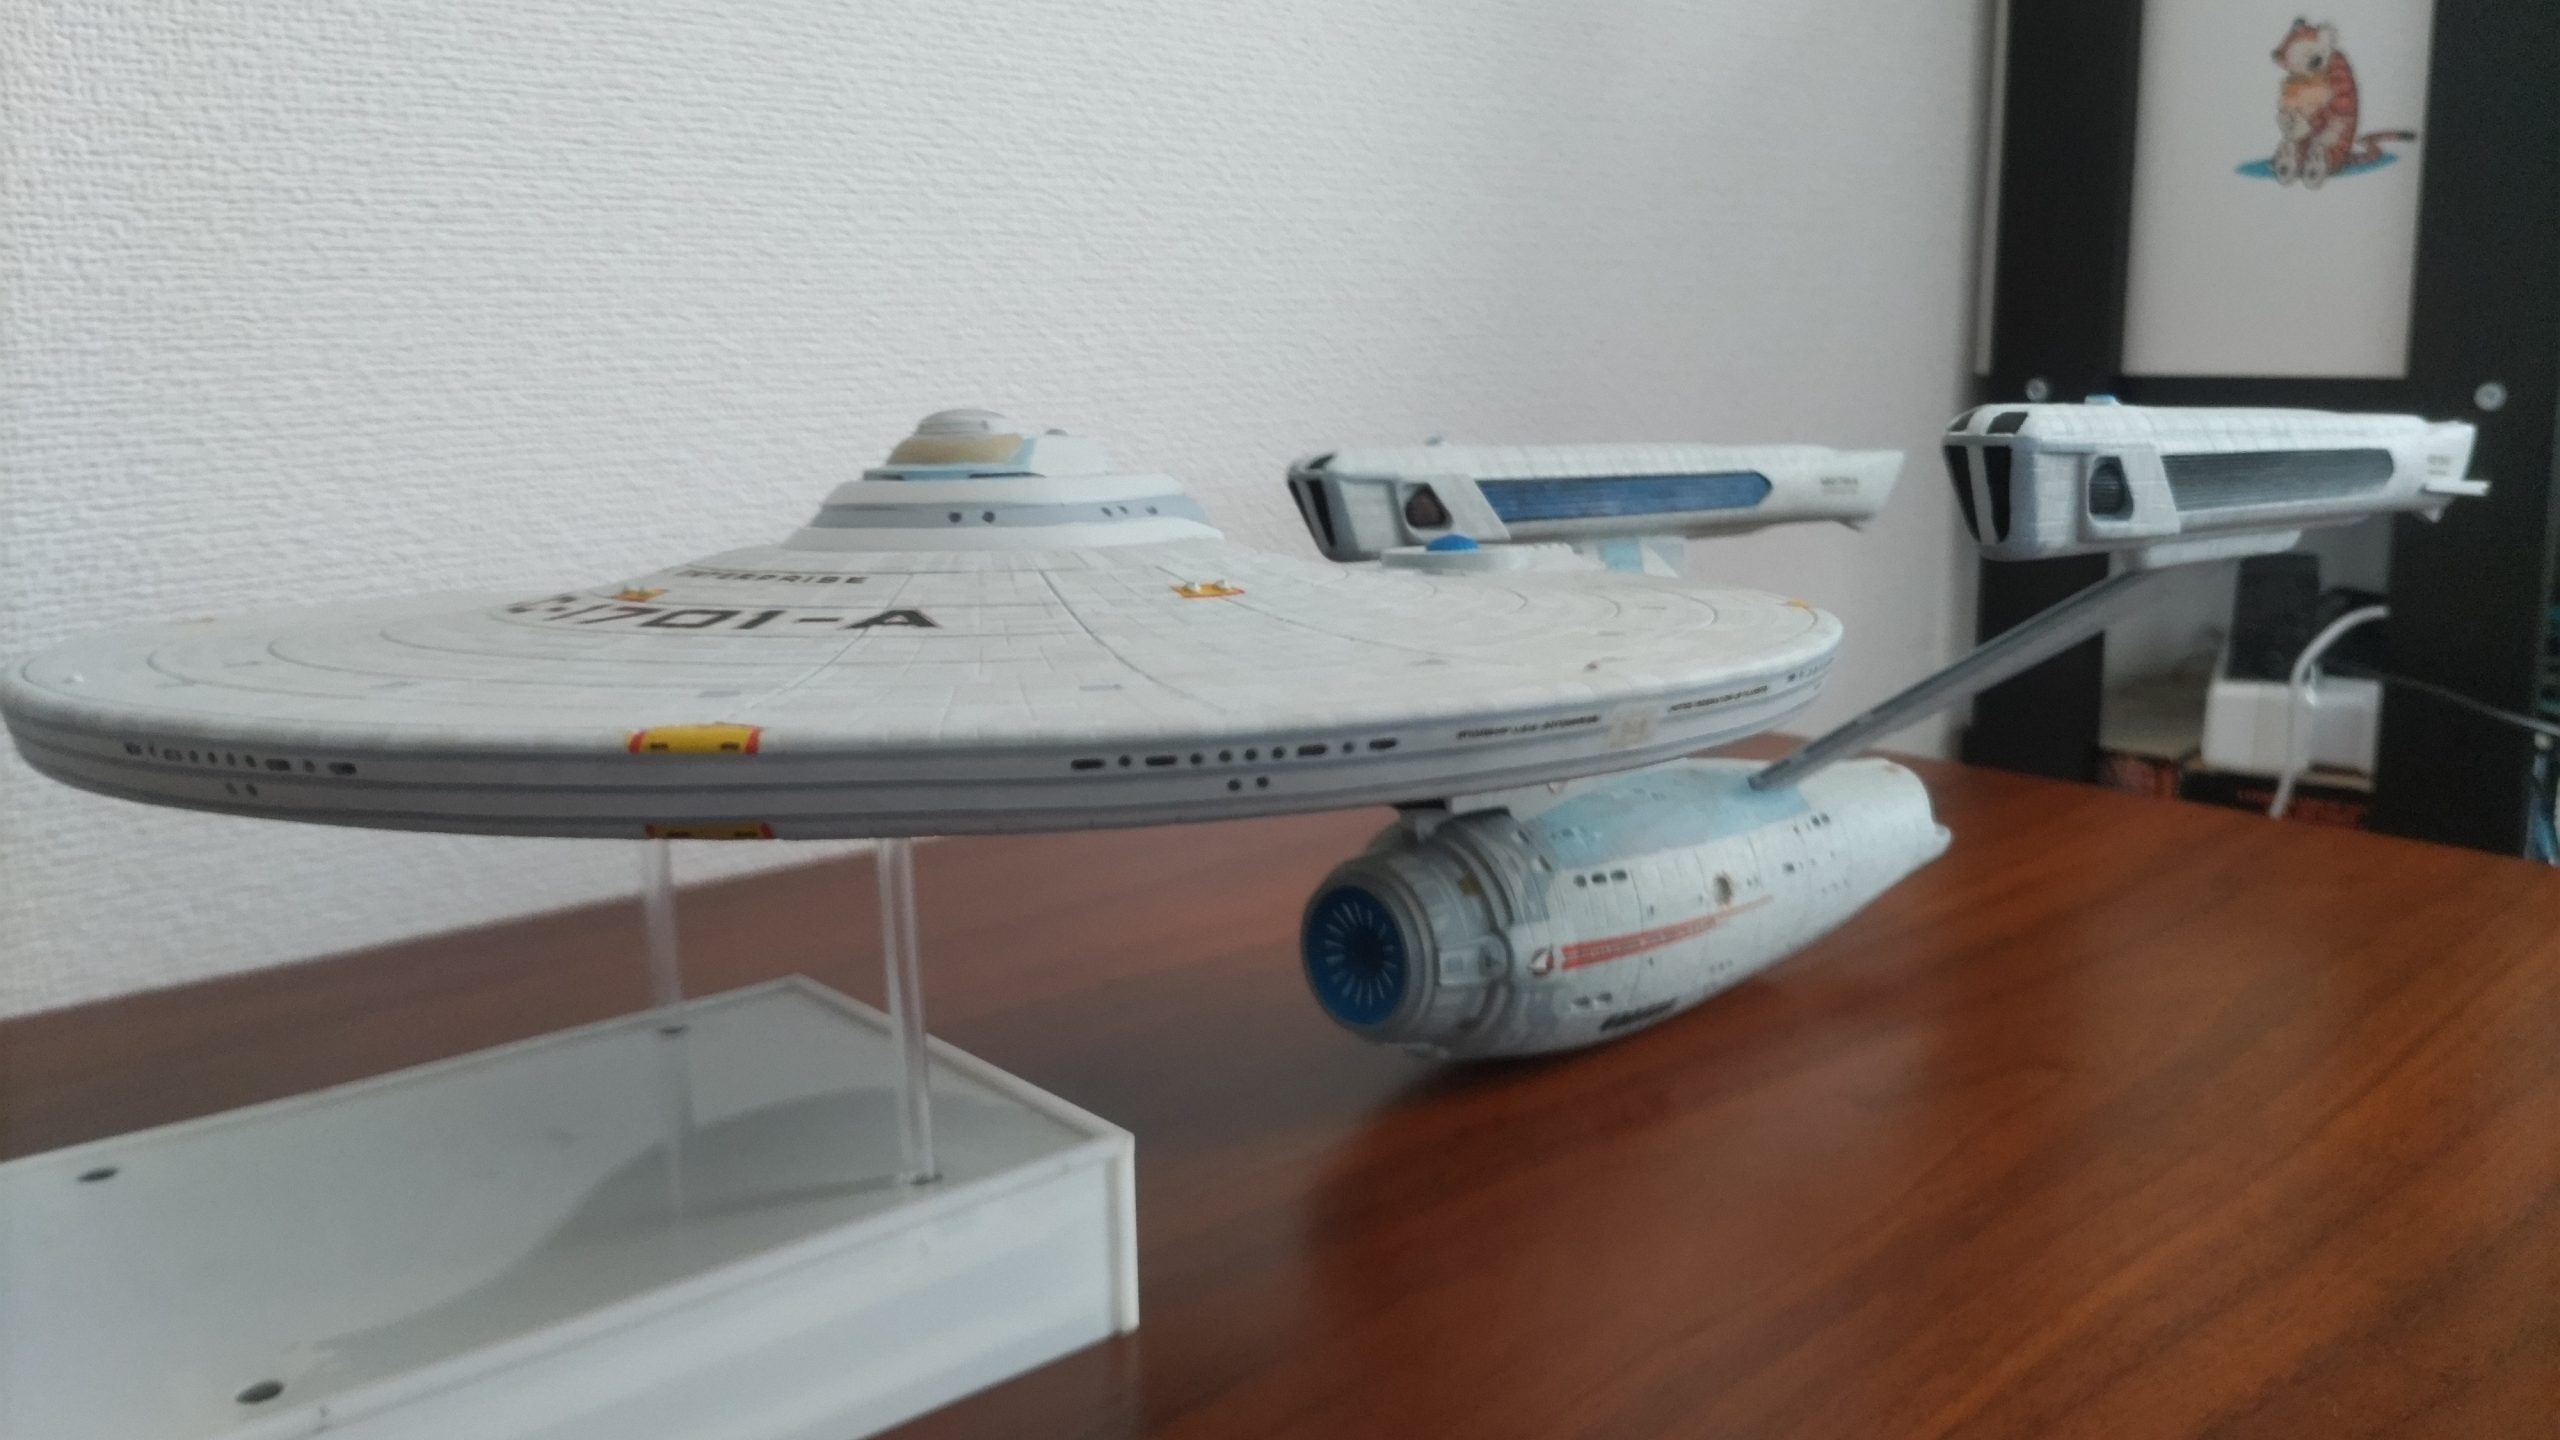
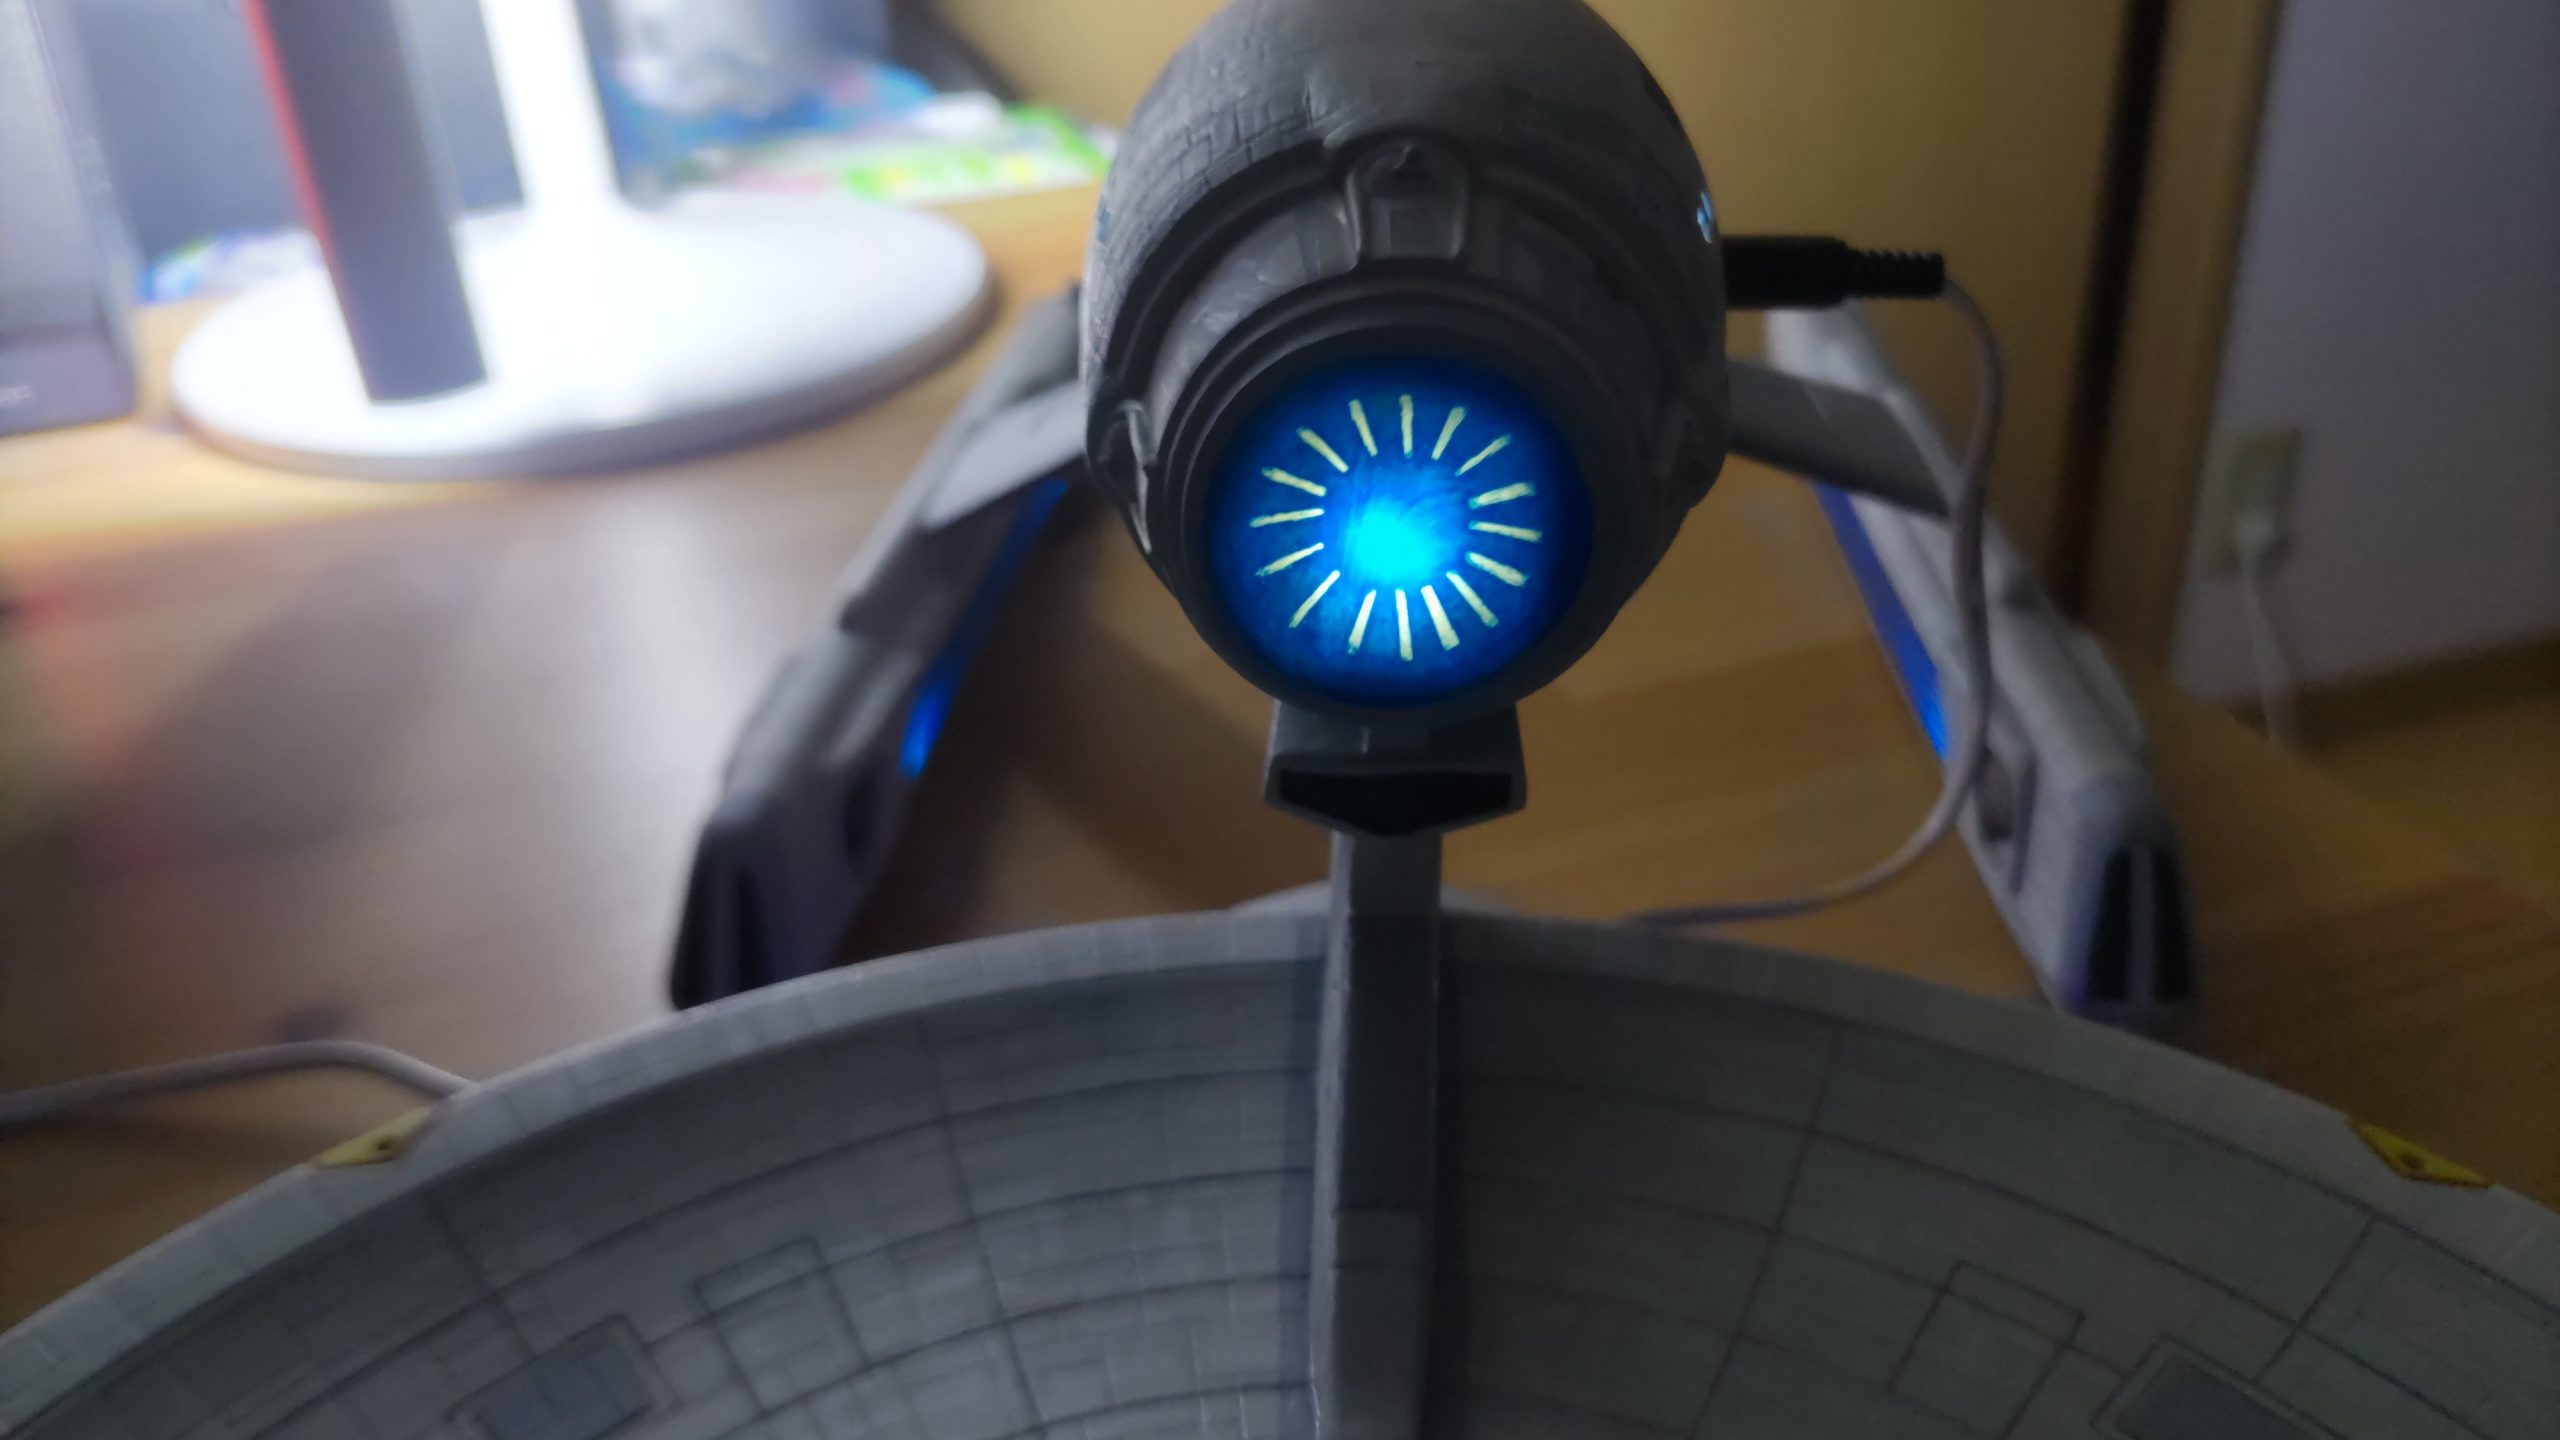
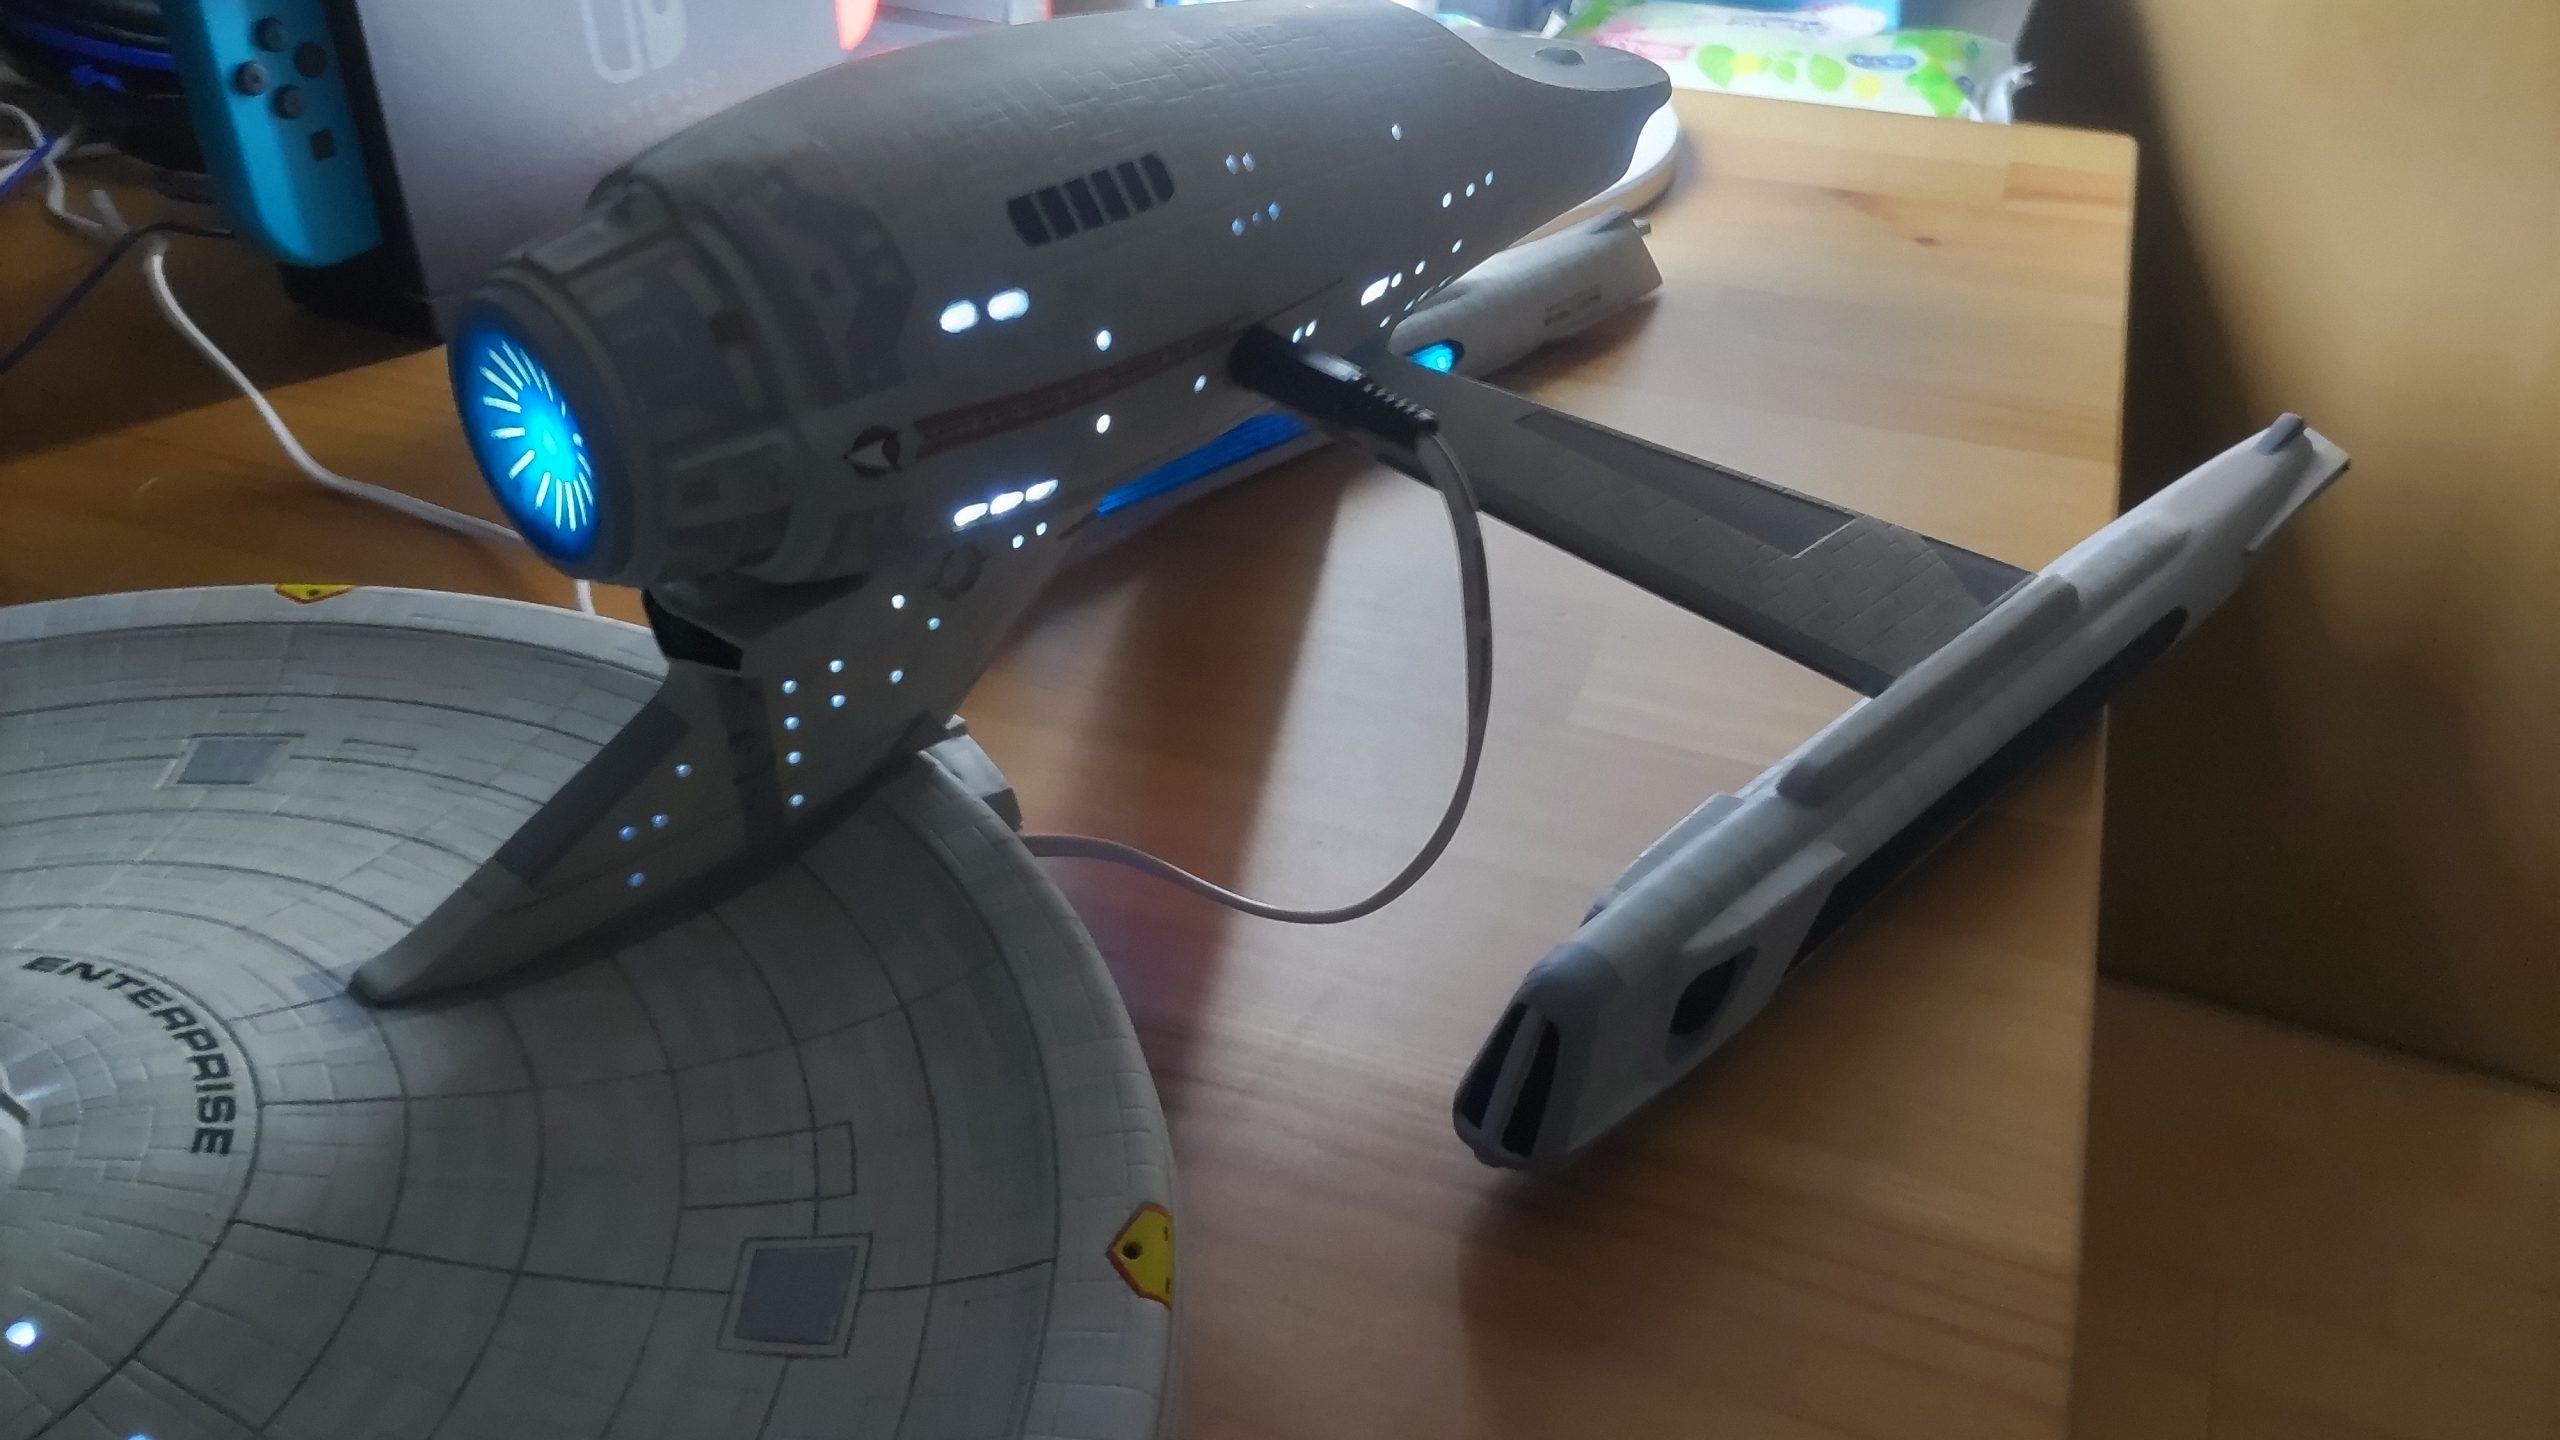
The lighting is rigged for 4.5 volt DC. I used a mix of 3mm white LEDs and chip style surface mount white LEDs . I did use some red 3mm LEDs for the impulse engines and a blue surface mount LED for the impulse crystal. The deflector dish, nacelle inner lighting, impulse engines and impulse crystal were all back lit through the plastic. Basically, a good bright LED could push right through the old white plastic and give a good glow. Pretty much the Raytheon effect some modelers used for faking spotlights.
The deflector dish was a bit of trouble. I tried a couple of different ways to give it a ‘starburst’ look but ended up sanding down the whole thing back to bare plastic before the final iteration. That one was basically adding a ring of small hand cut stickers on the base plastic, then spraying clear blue and sealing it all with the matt varnish. The back white ‘bare’ plastic give a good flared look with the lights off, and helps brighten the ‘glow’ when the backlight is on.

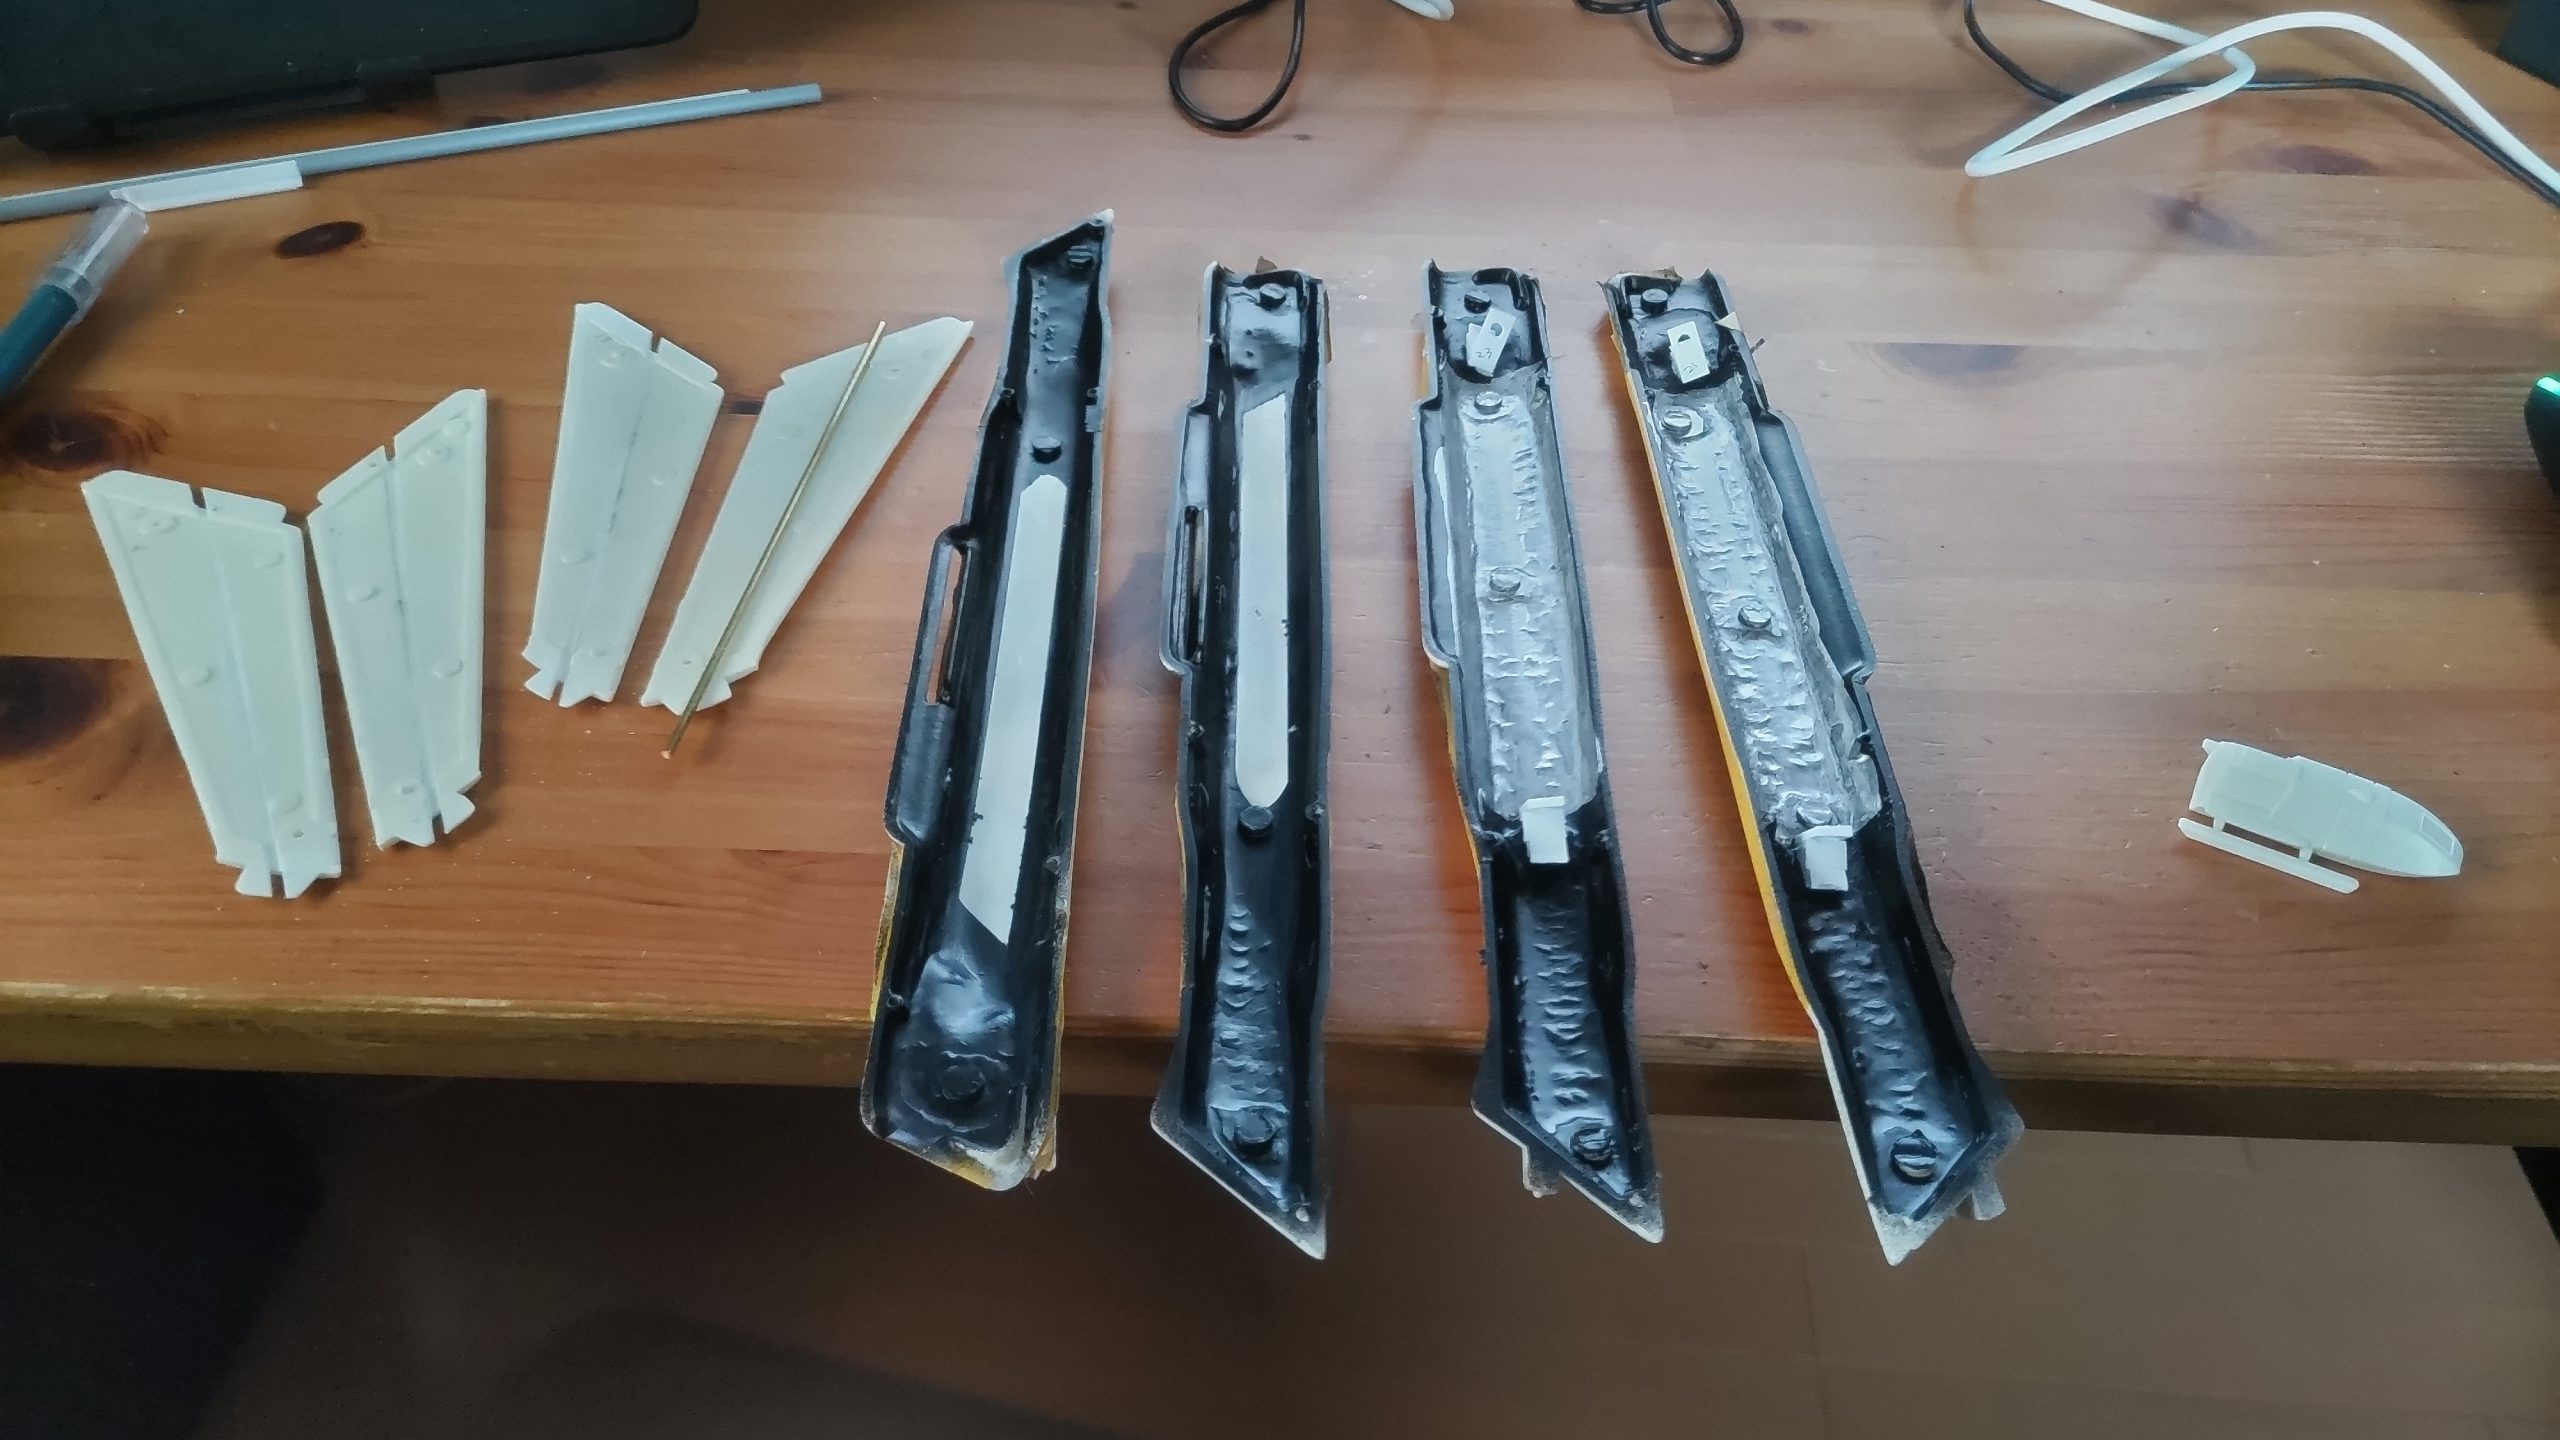
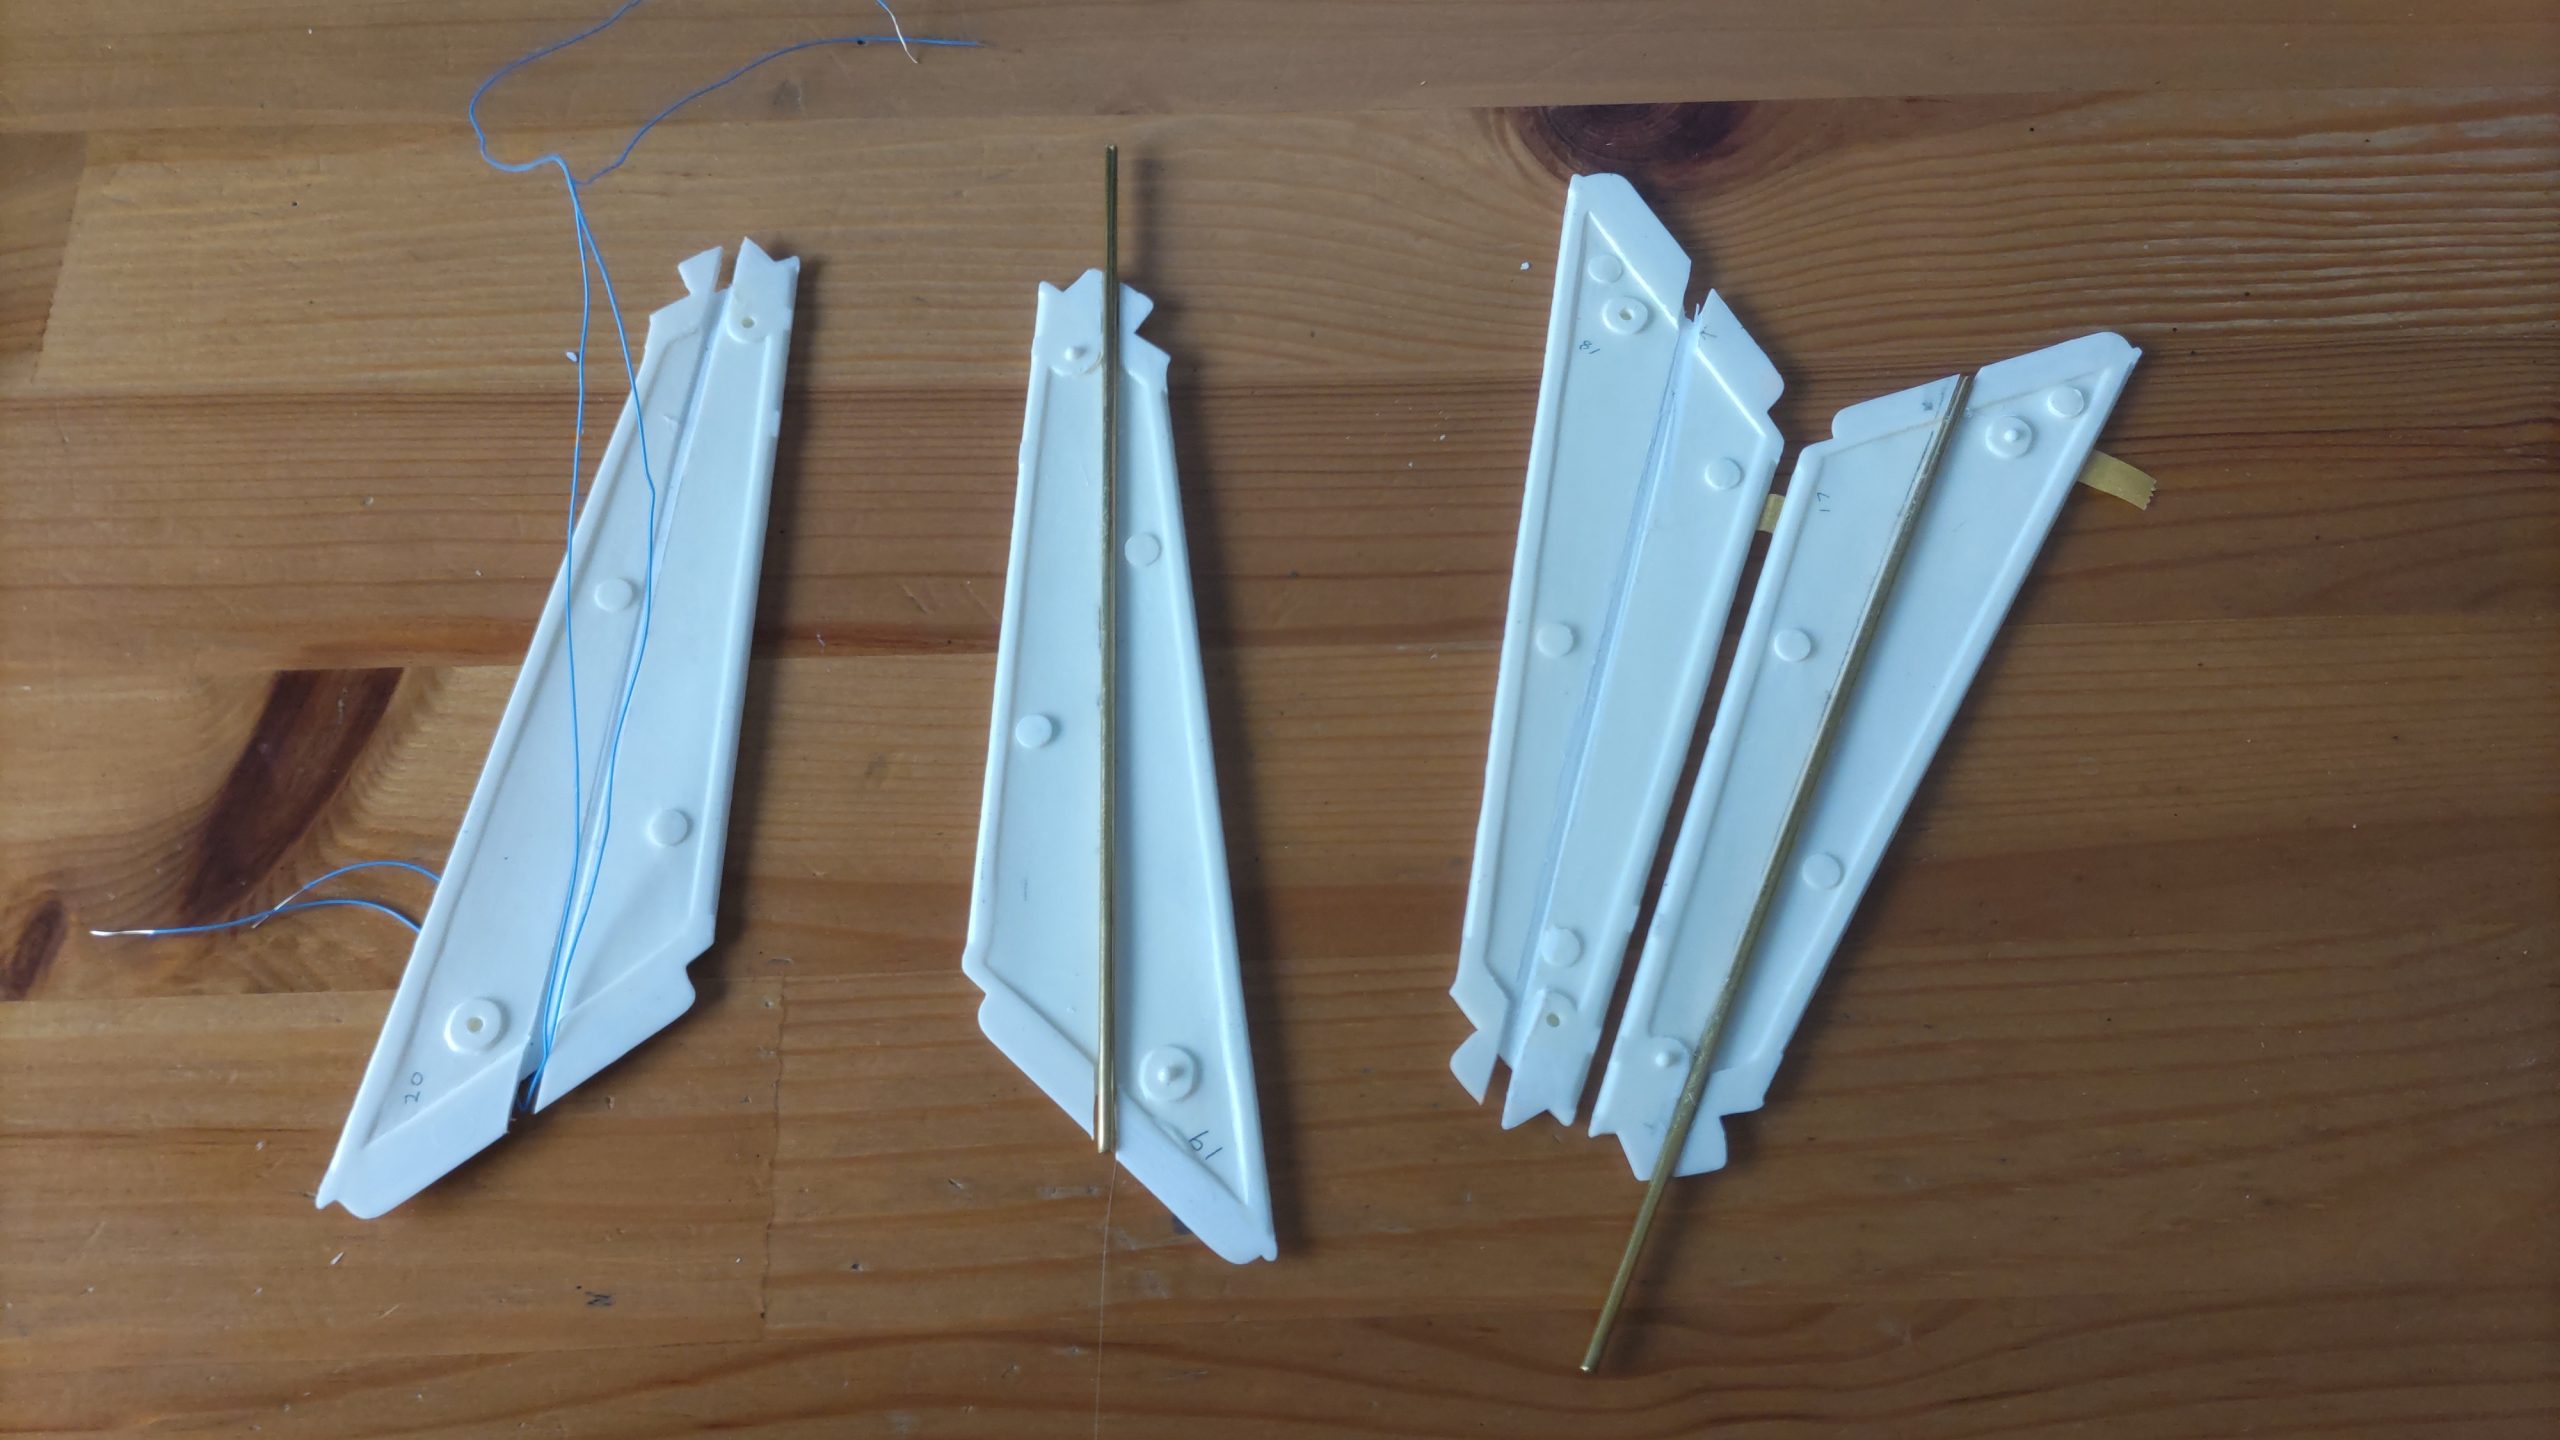
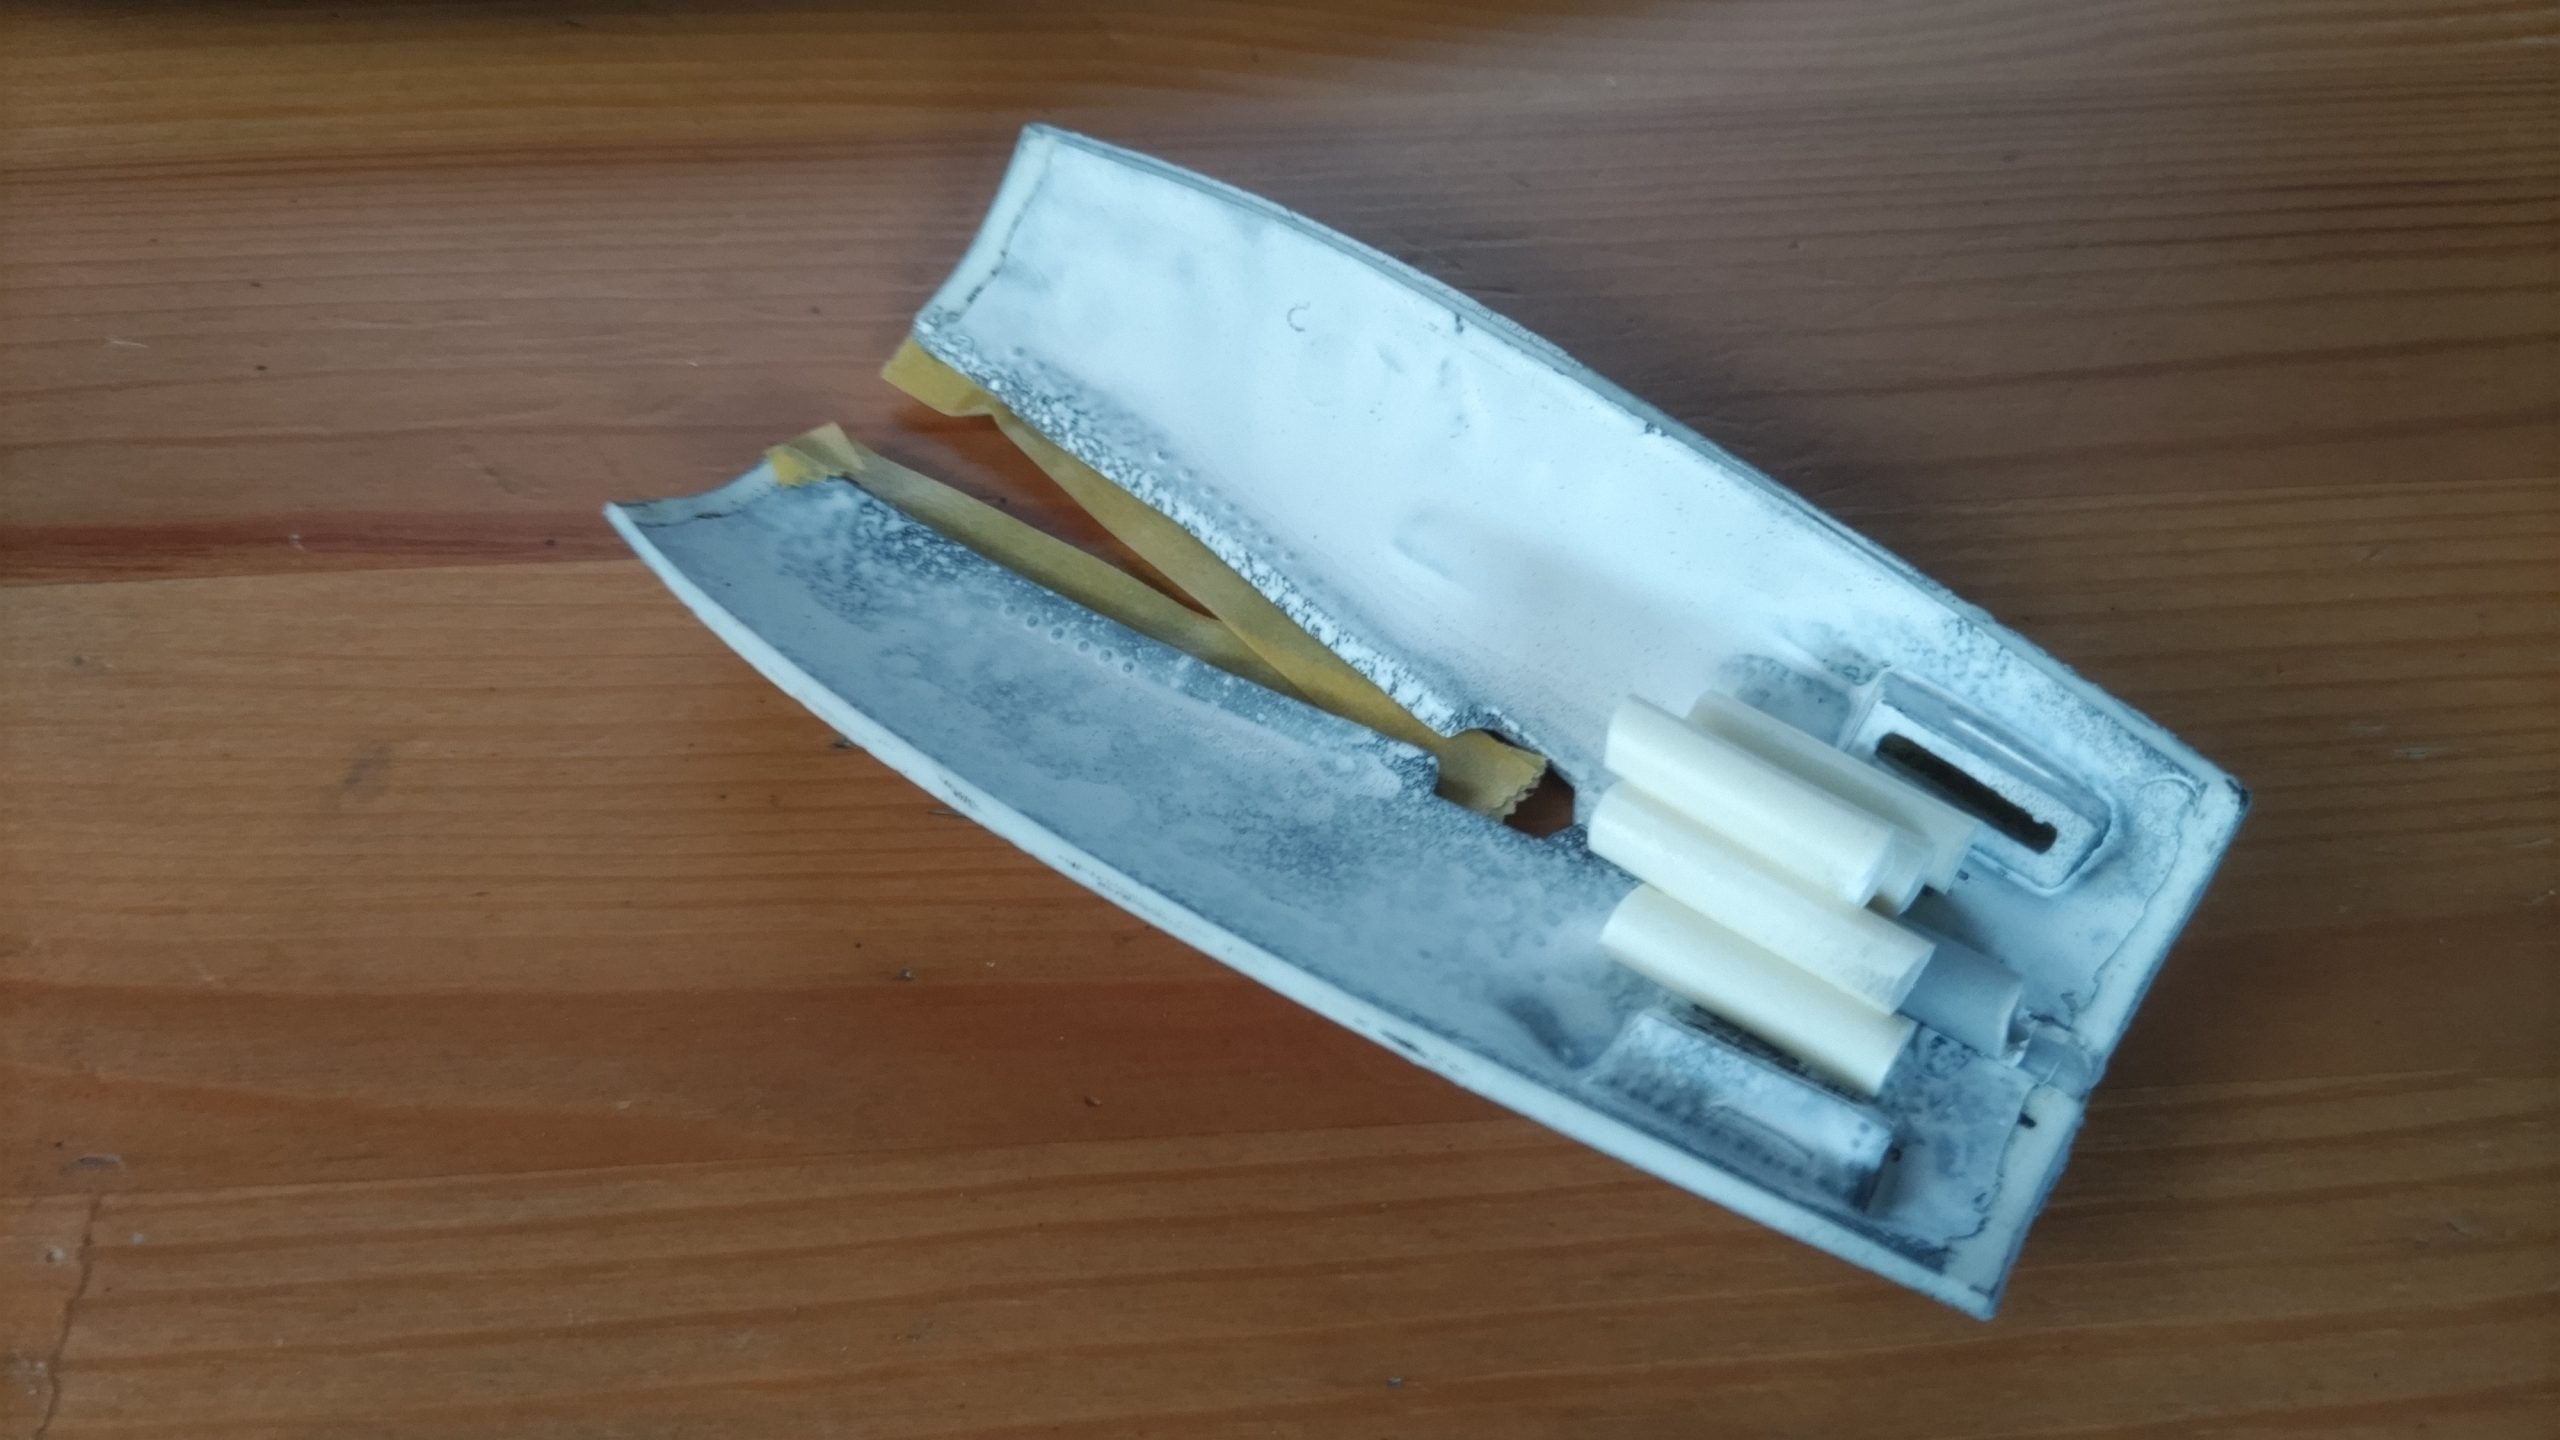
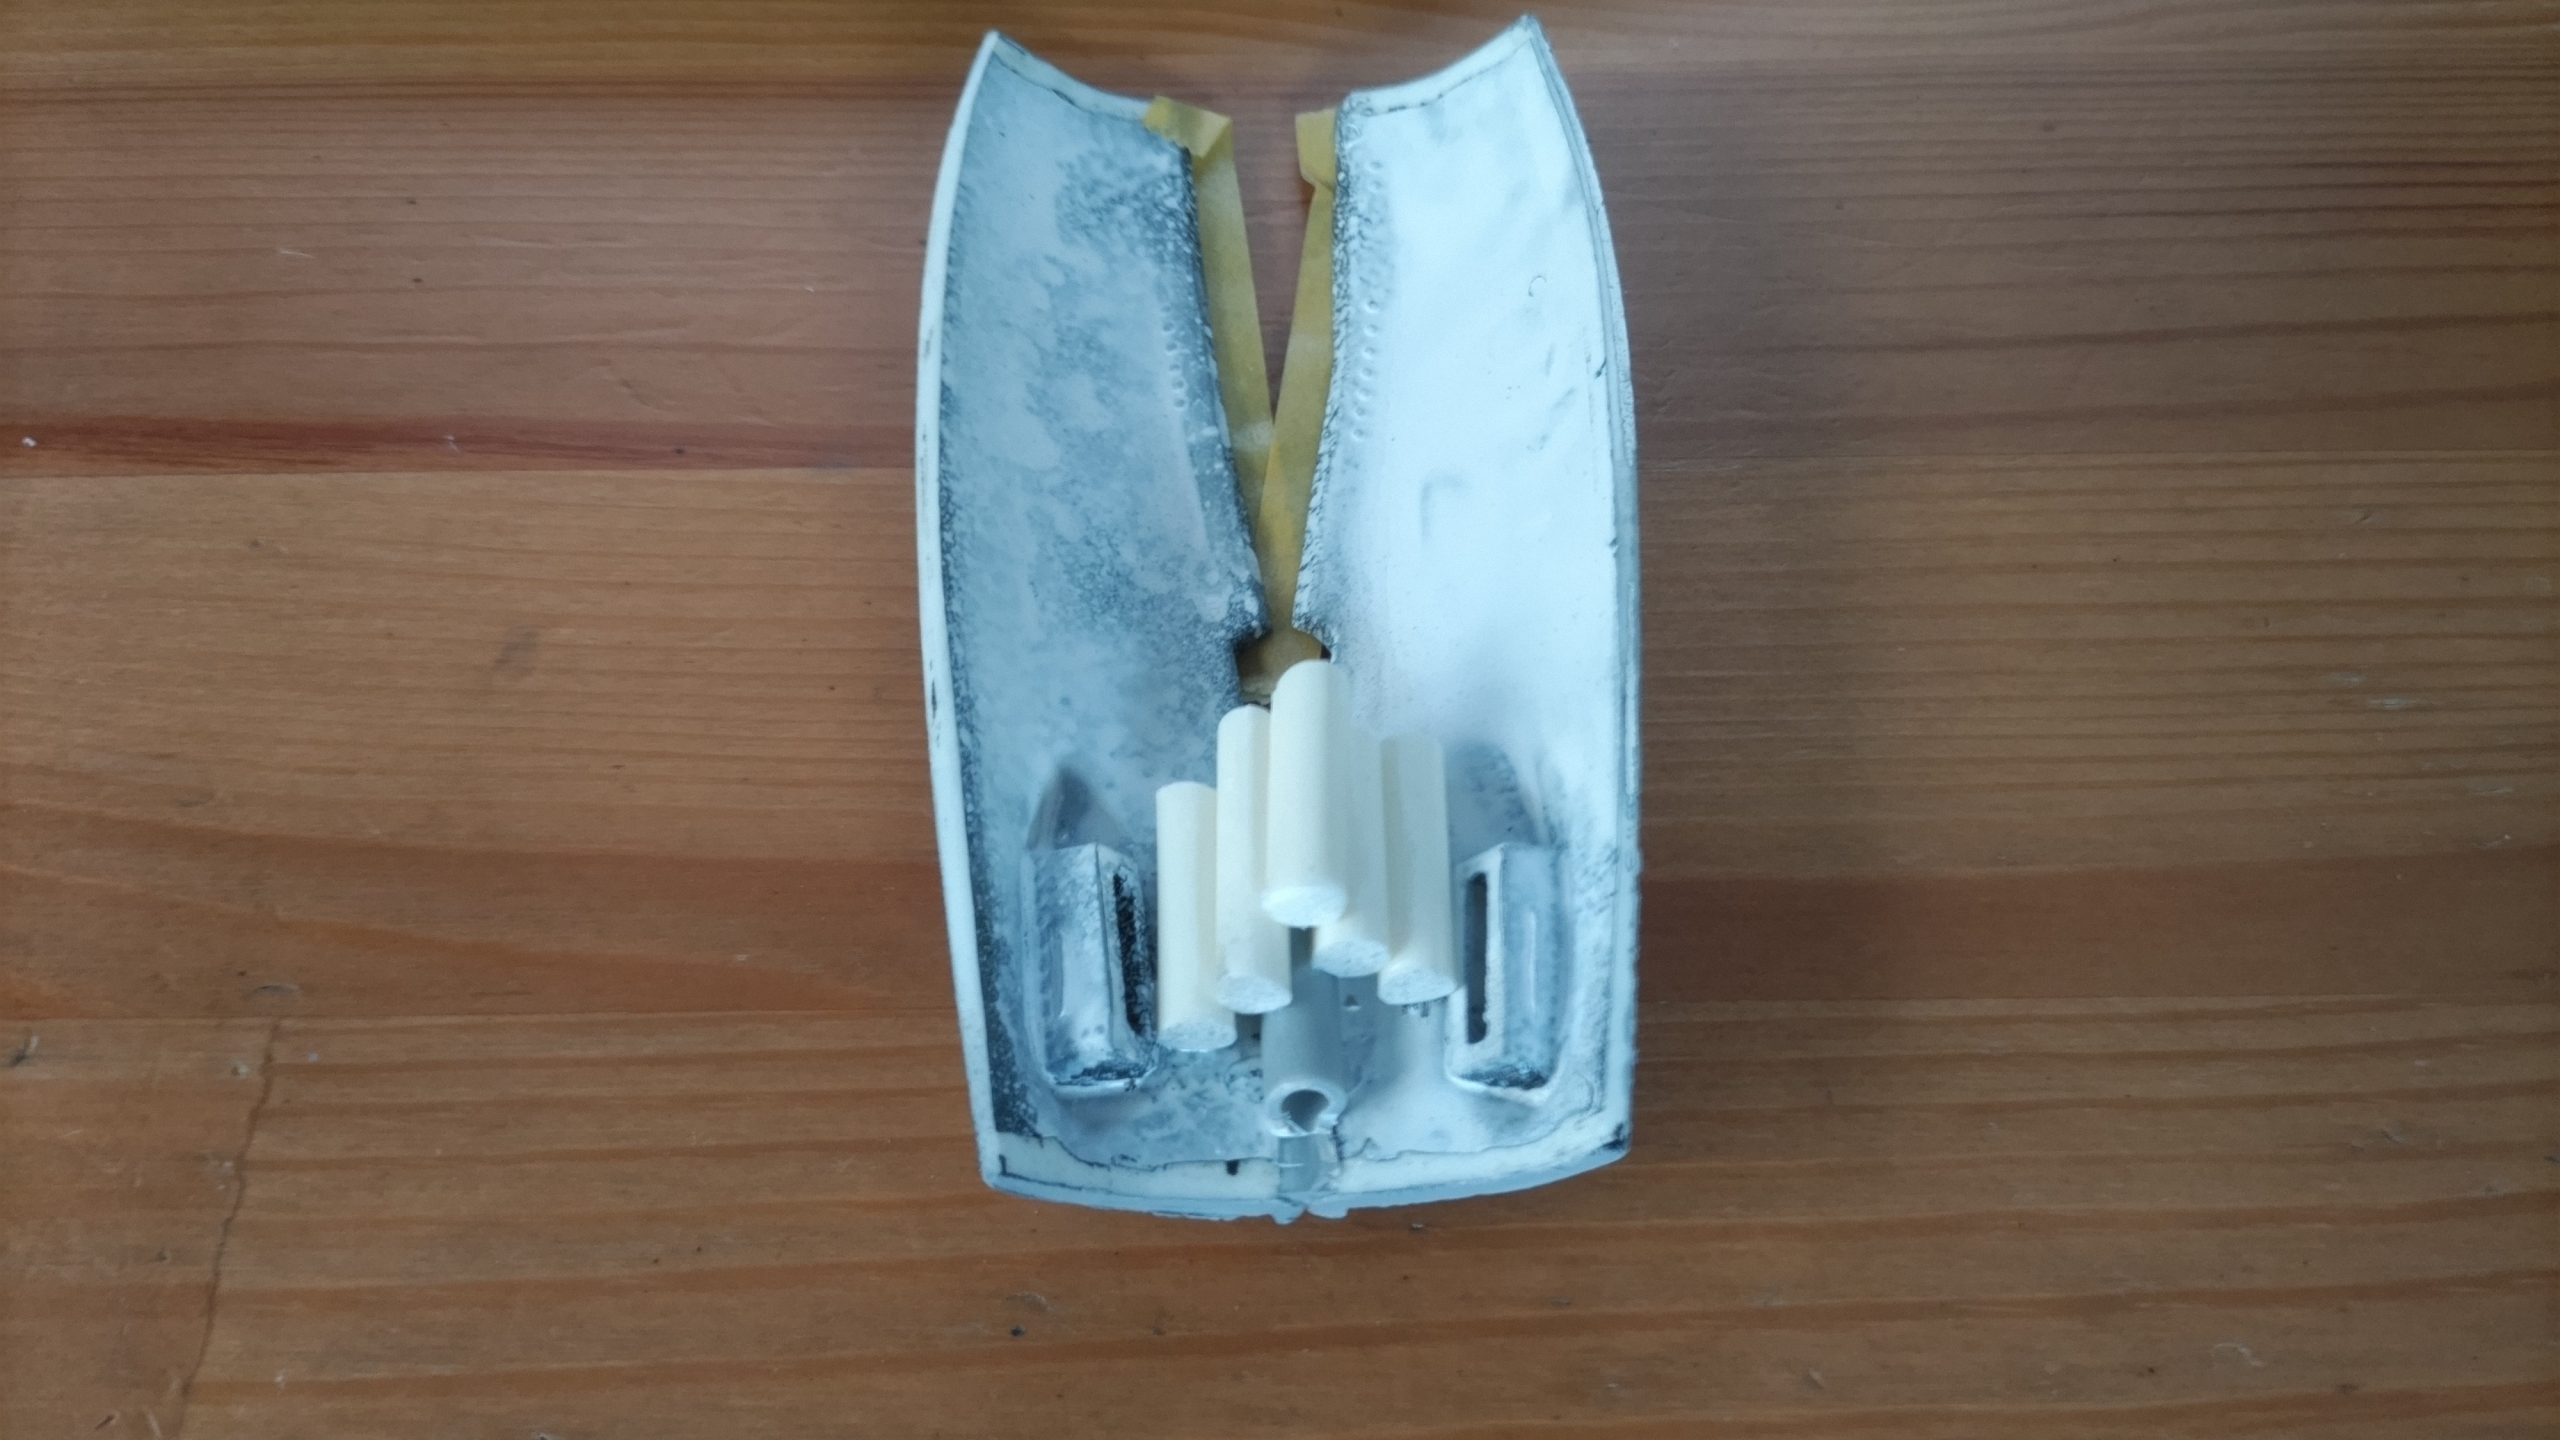
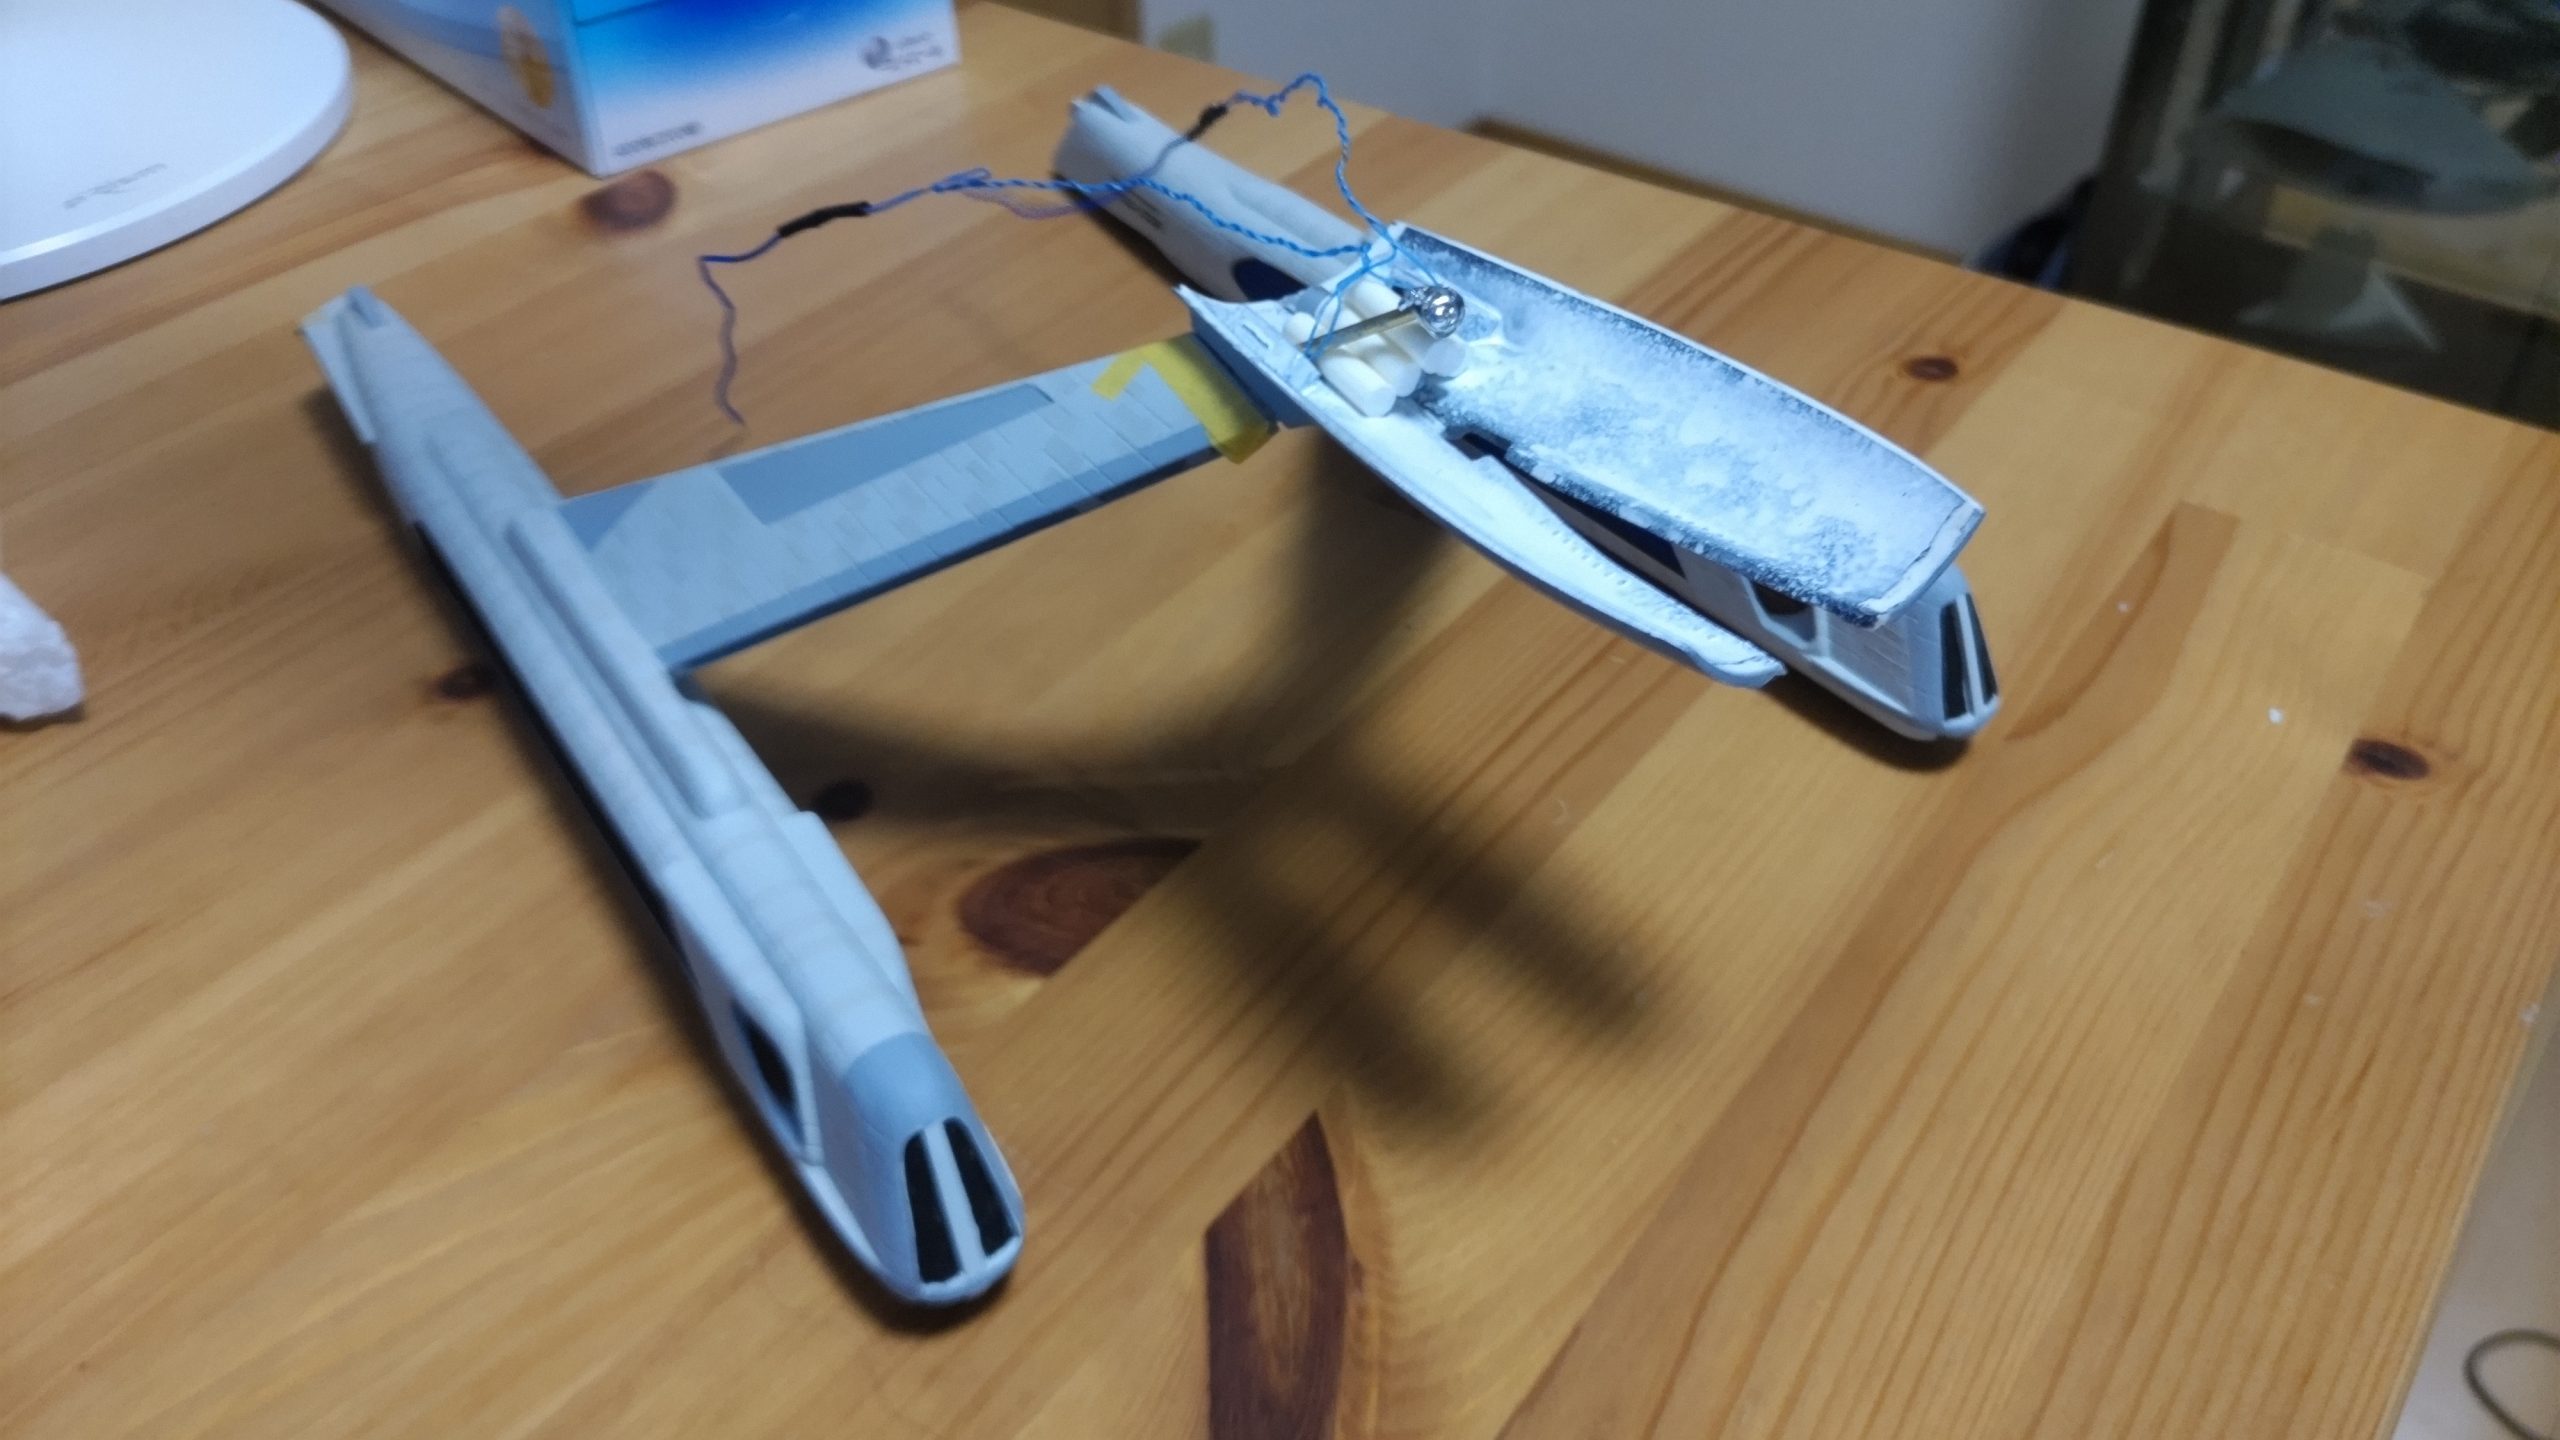
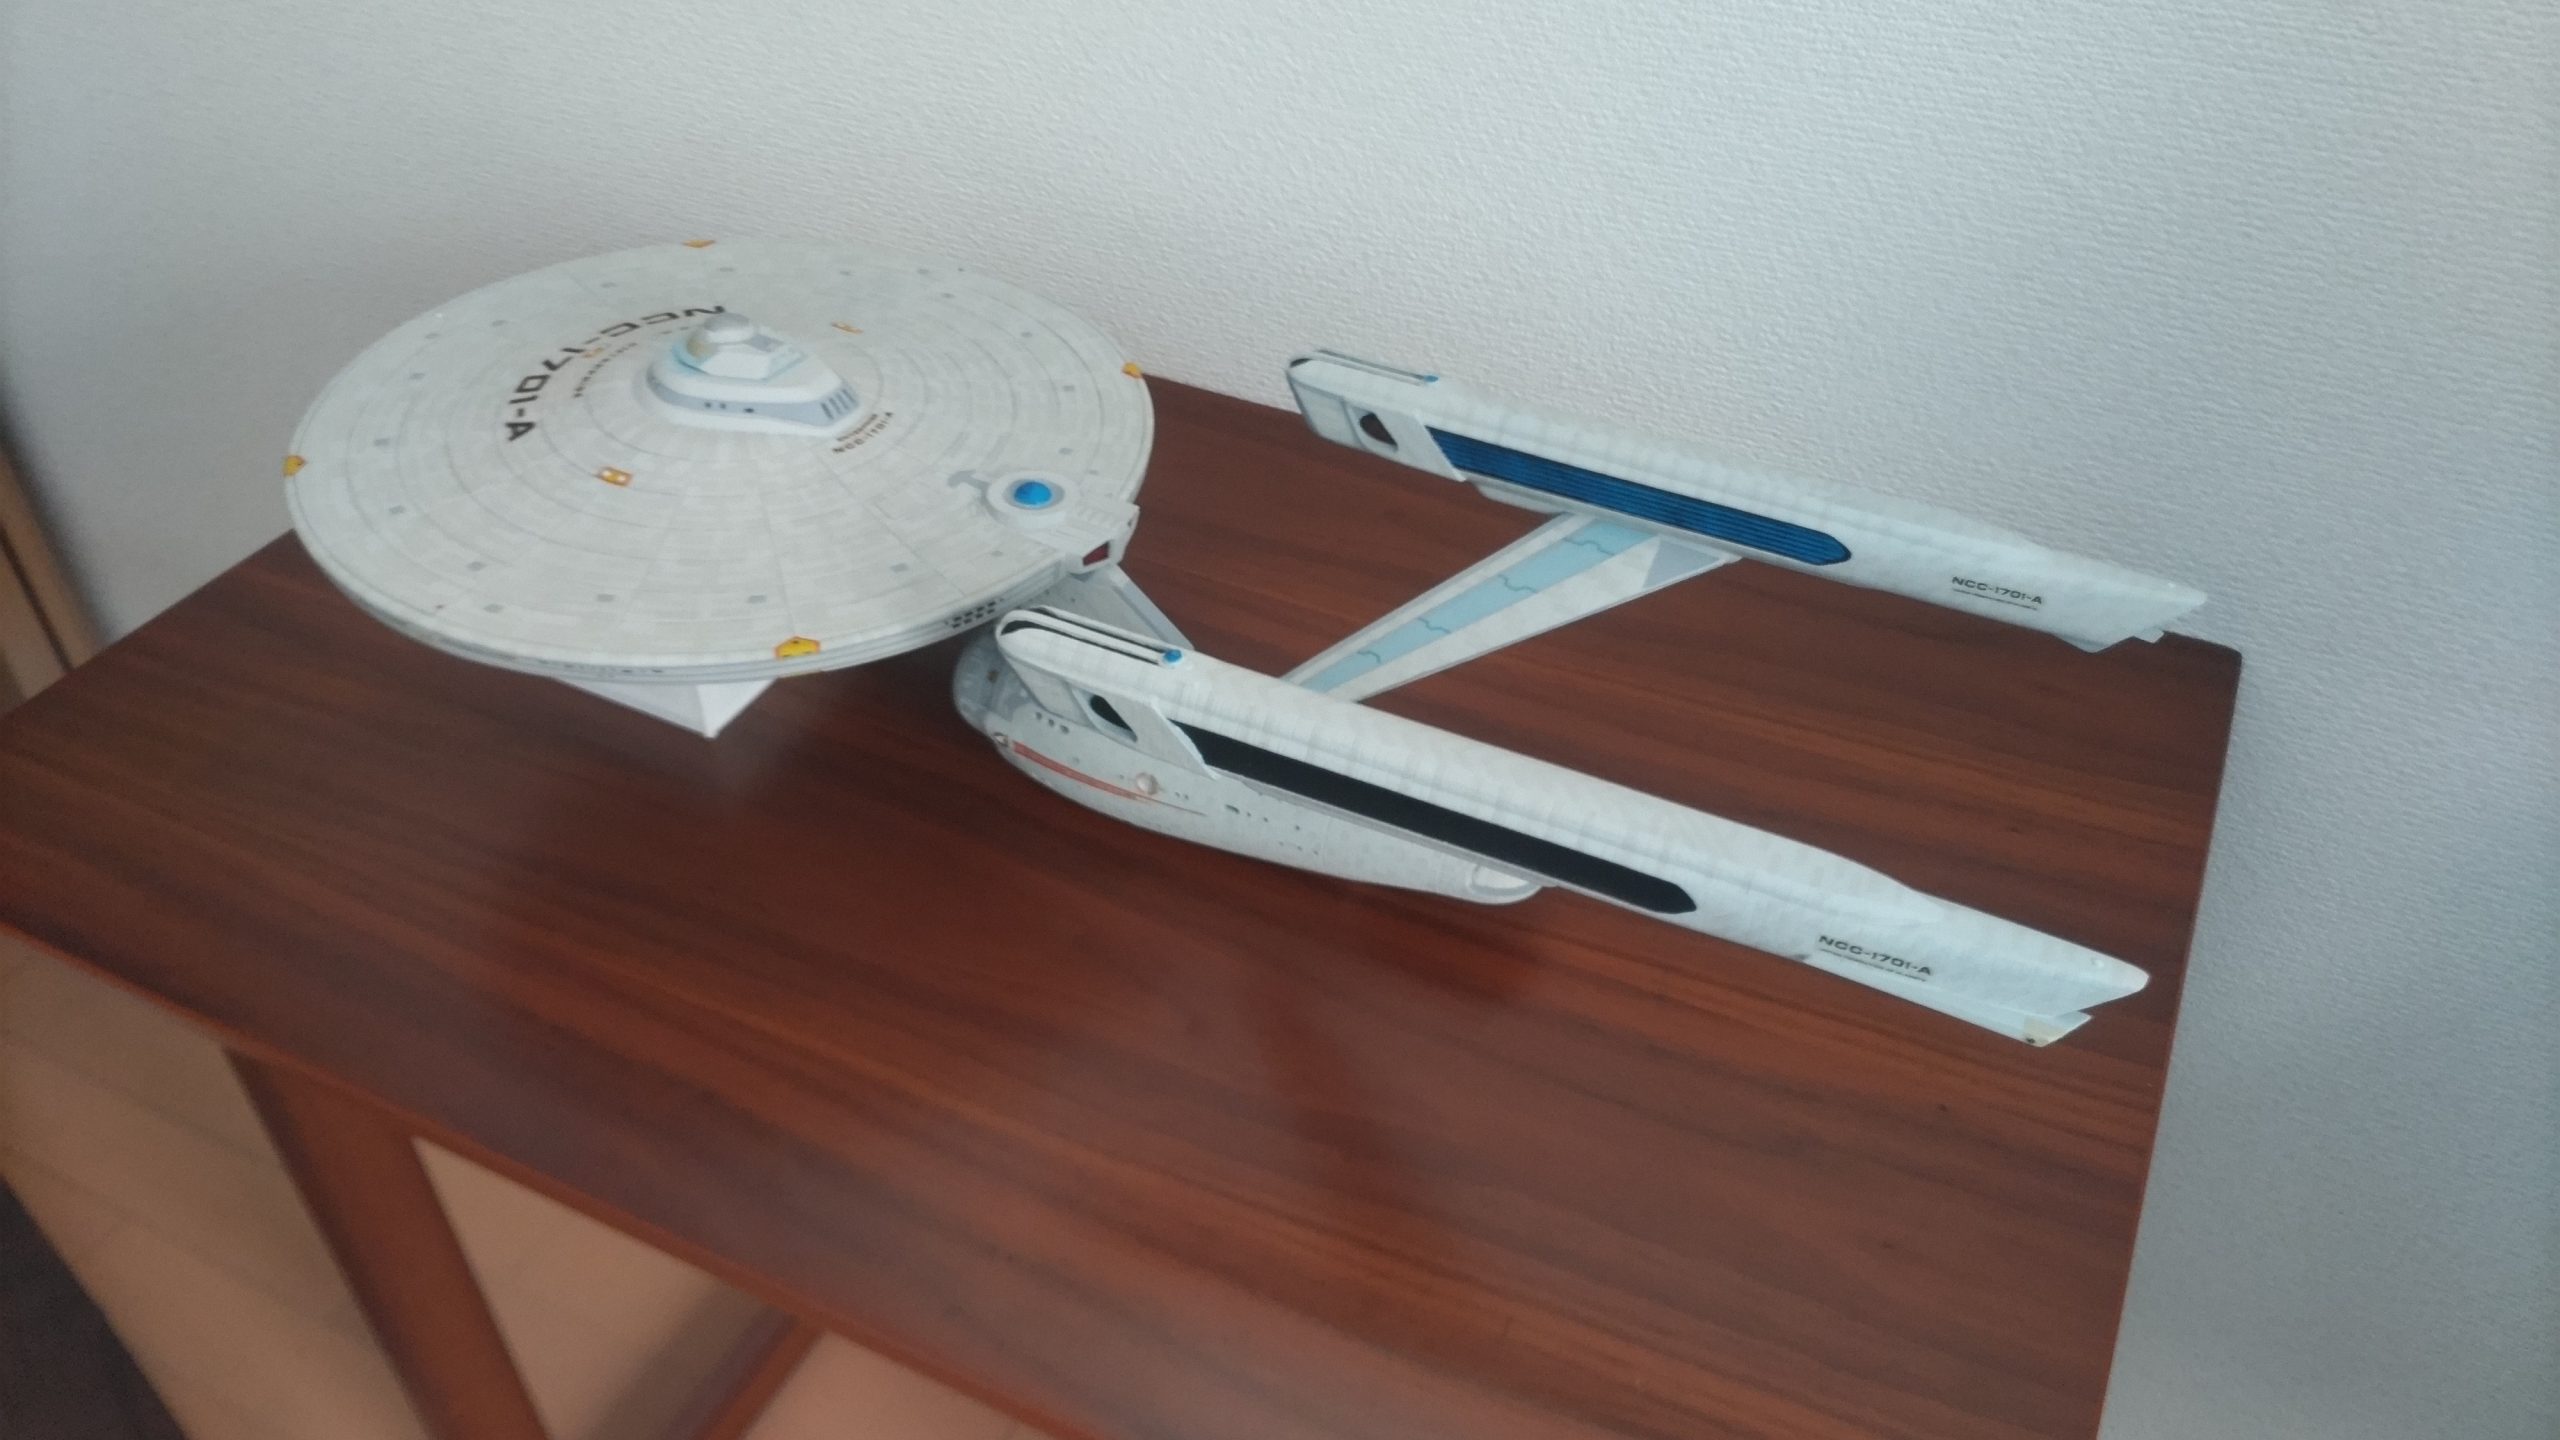
Reinforcing the Pylons
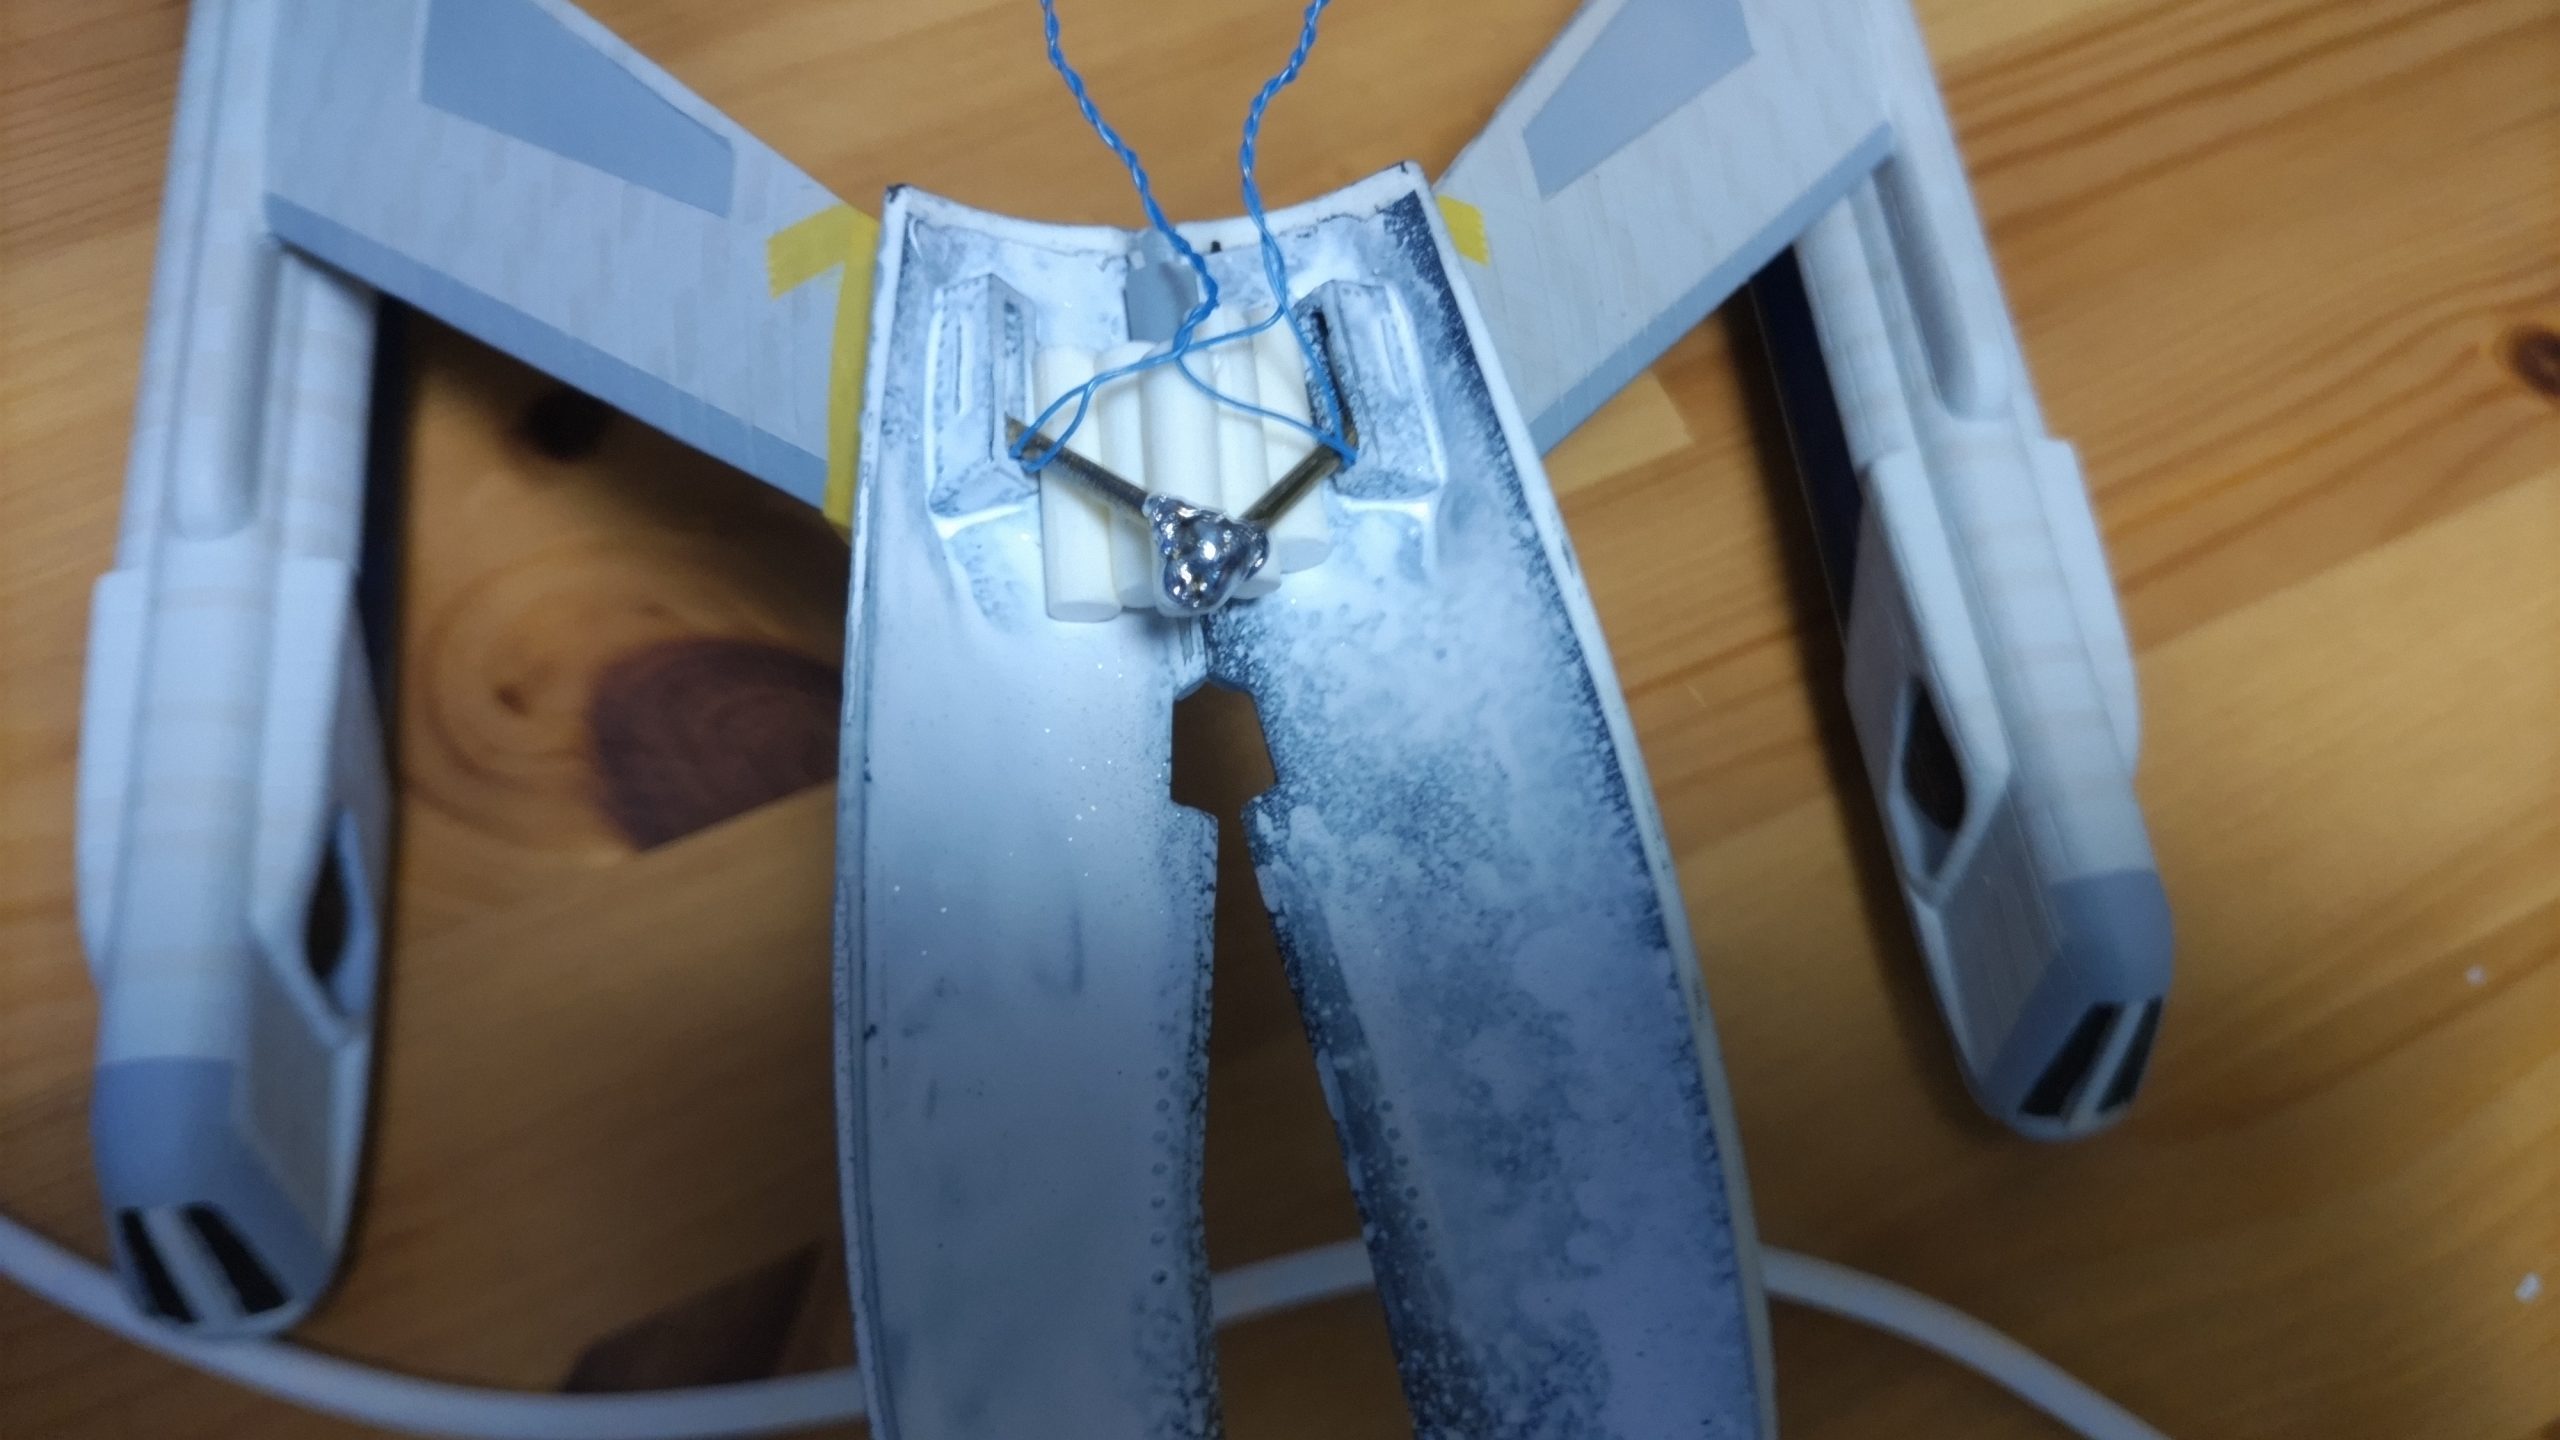
One of the biggest worries with this kit is that the pylons for the nacelles are very weak. The tab that holds each one in place are very small and can barely hold the weight, if nothing puts pressure on them. So it’s a good idea to reinforce them. In my case, I choose to put a 2mm brass rod through from the nacelle to the main hull mount. I added a stack of cut sprue to backstop the brass rods inside the strongback area. That prevents the nacelles from sagging down. Then I wired the brass rods together where they crossed and soldiered that joint to prevent the nacelles from pulling together when hung from them.
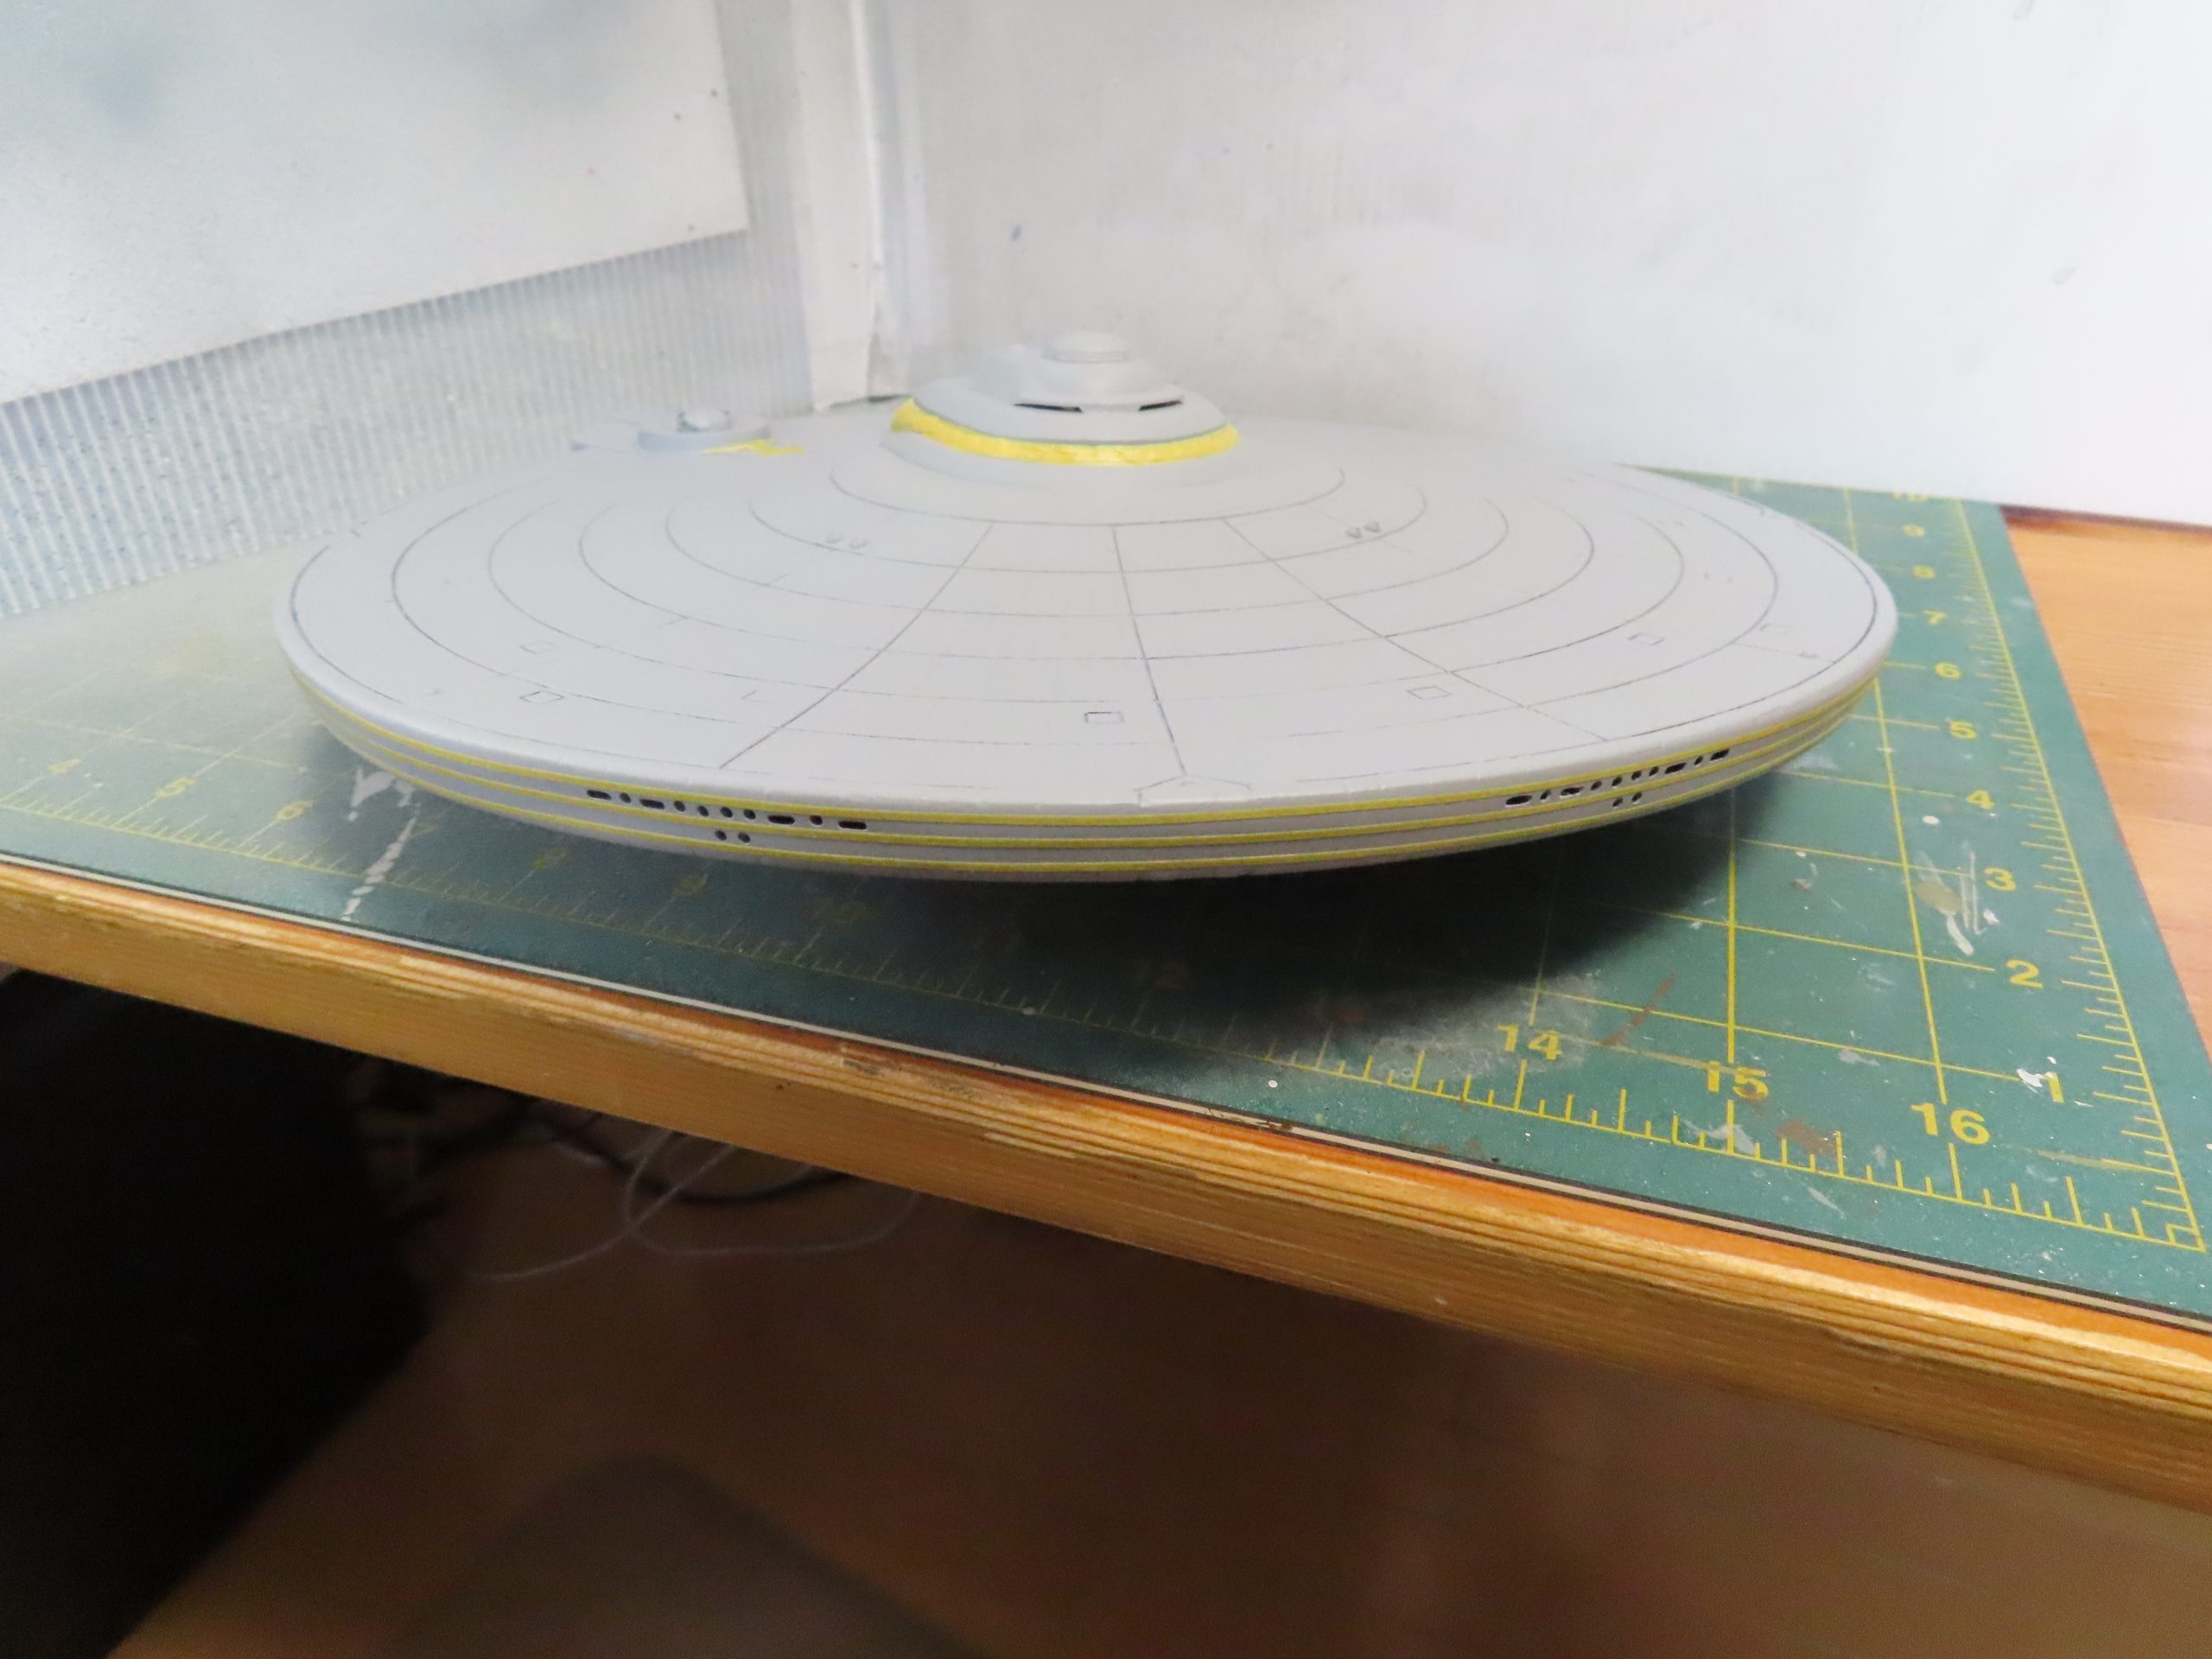
Initial assembly and Priming
Once I finished getting all the lighting components together came the assembly. This is an old kit, over 40 years at this point, and it shows. Almost every seam and joint needs to be puttied and sanded, there are many gaps that needed to be filled. I mostly used Tamiya Putty ( Basic Type ) for this work. Took a good while but eventually it all came together with only a few minor issues.
Once that was done, I primed all the exterior, aside form the backlit areas, with the Vallejo light gray surface primer. Now it was time to move on to the next level of painting.
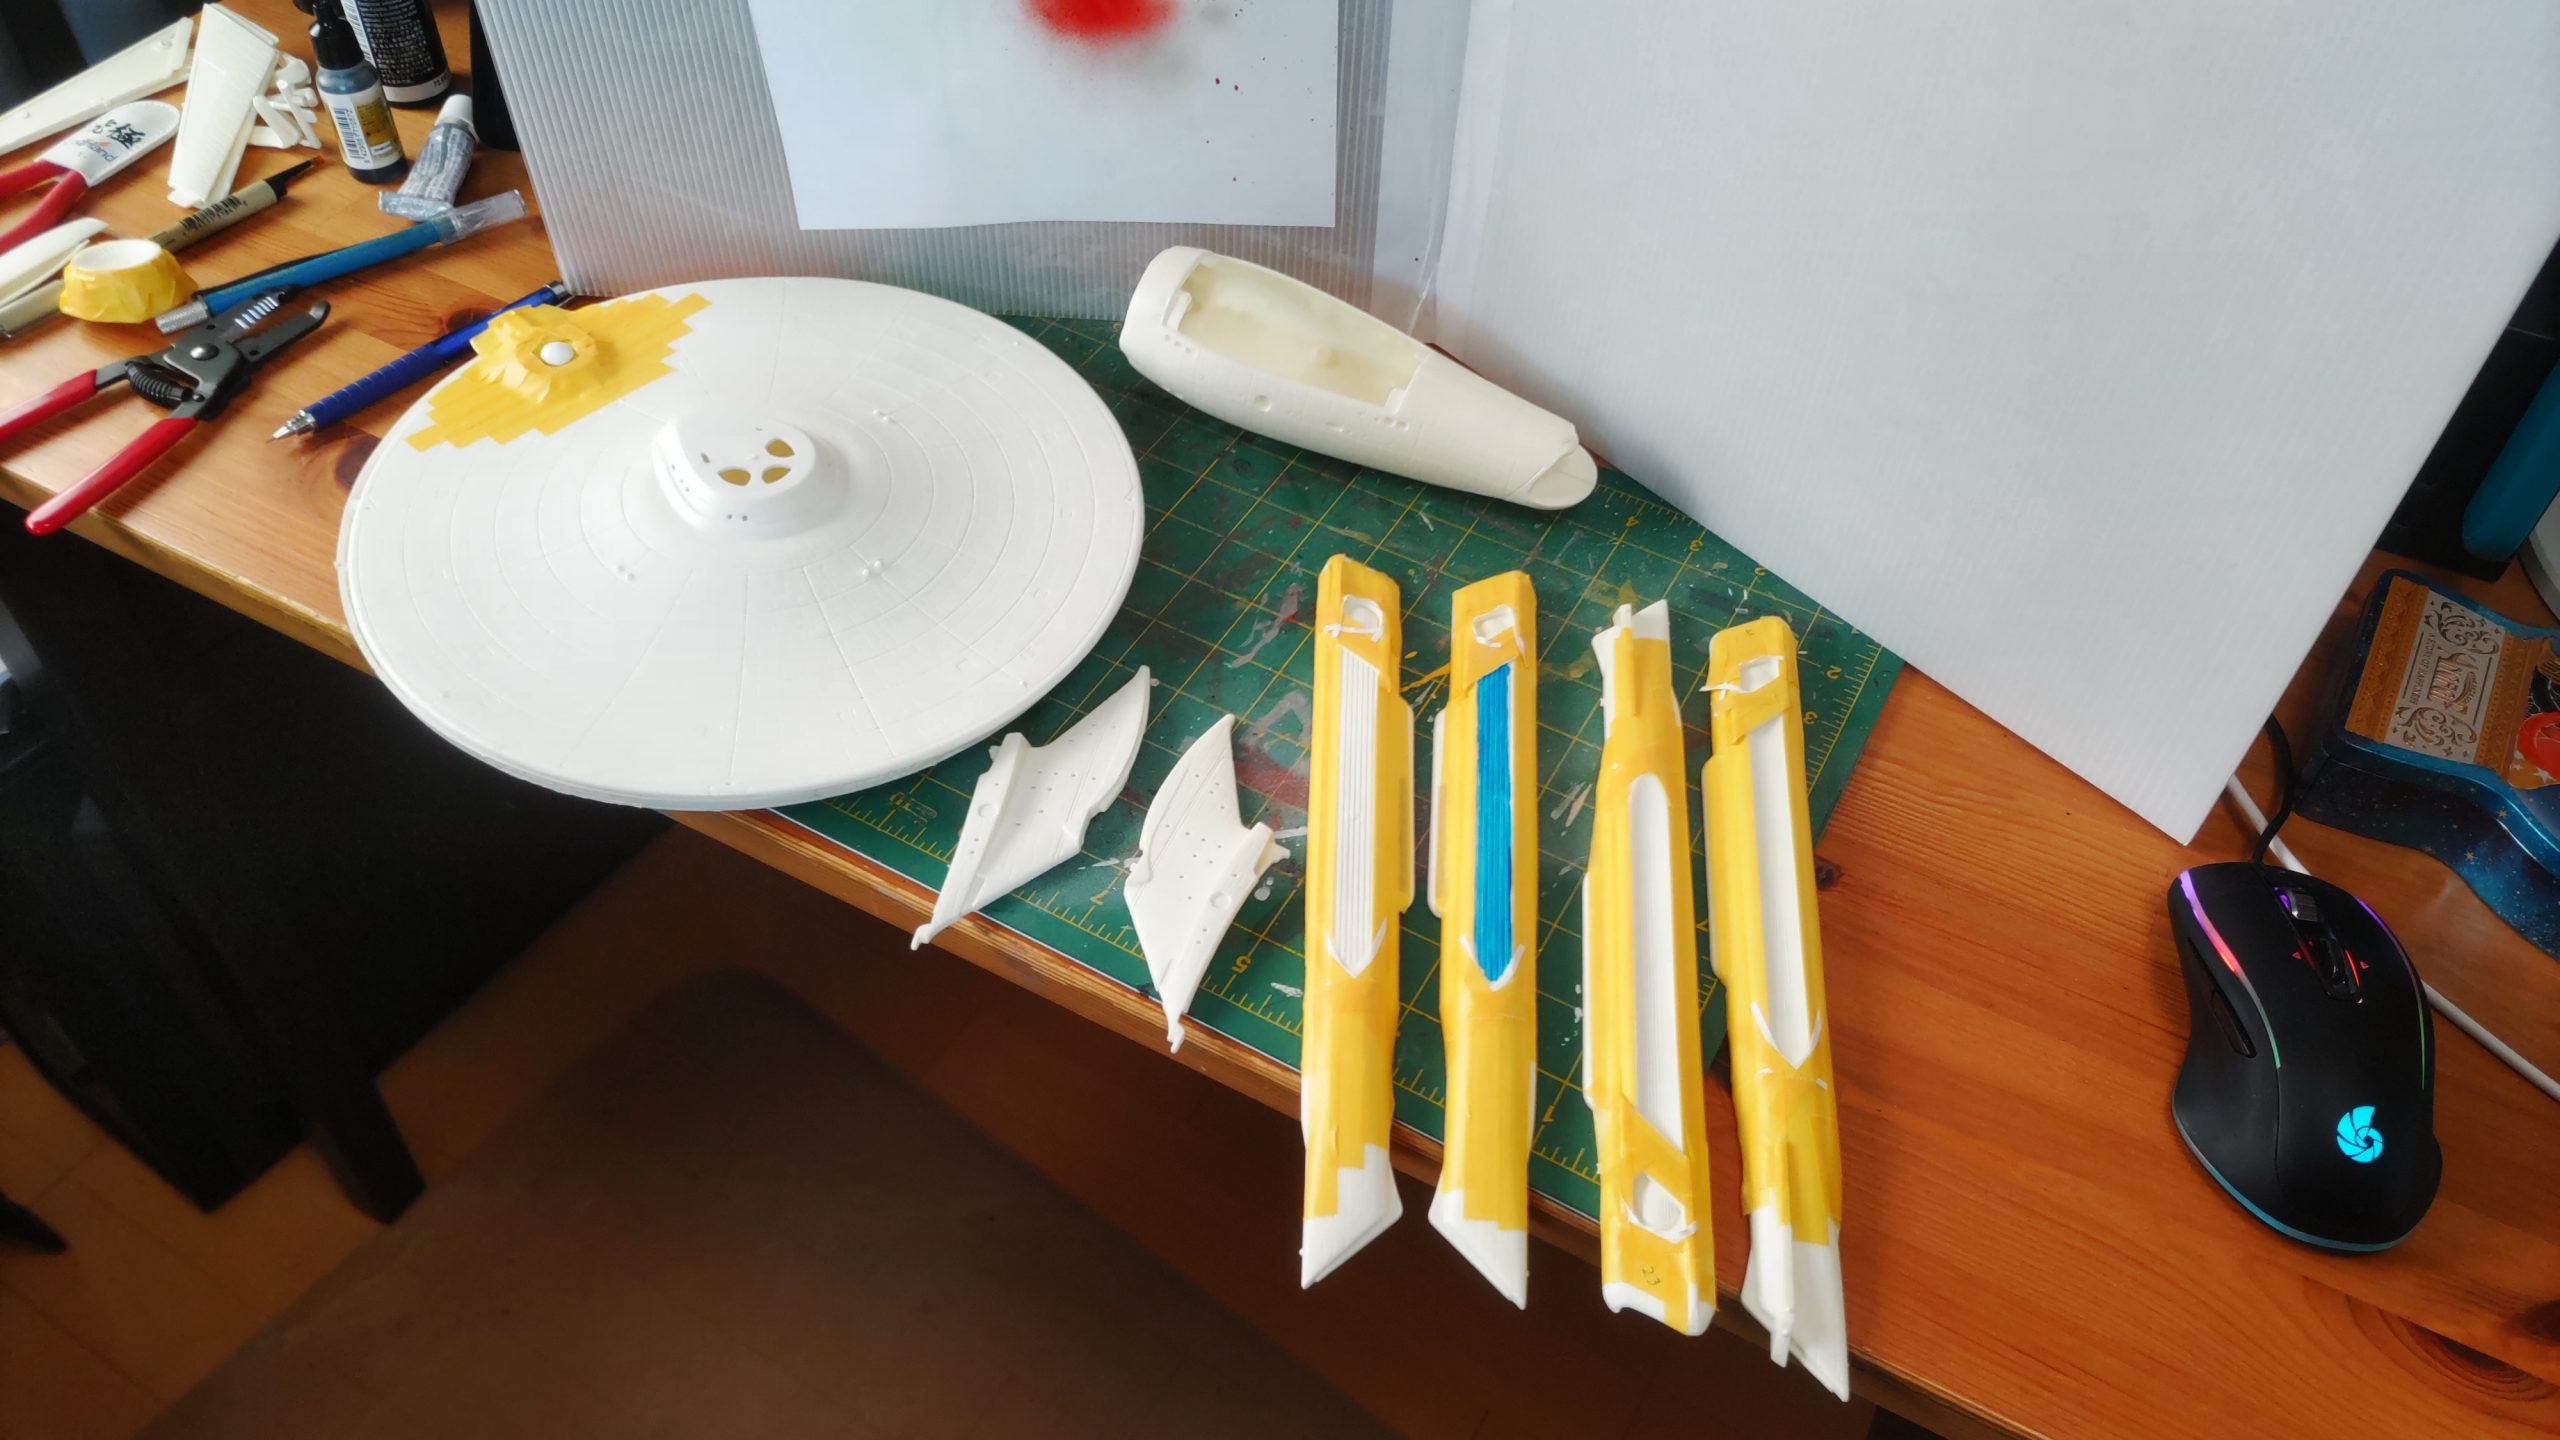
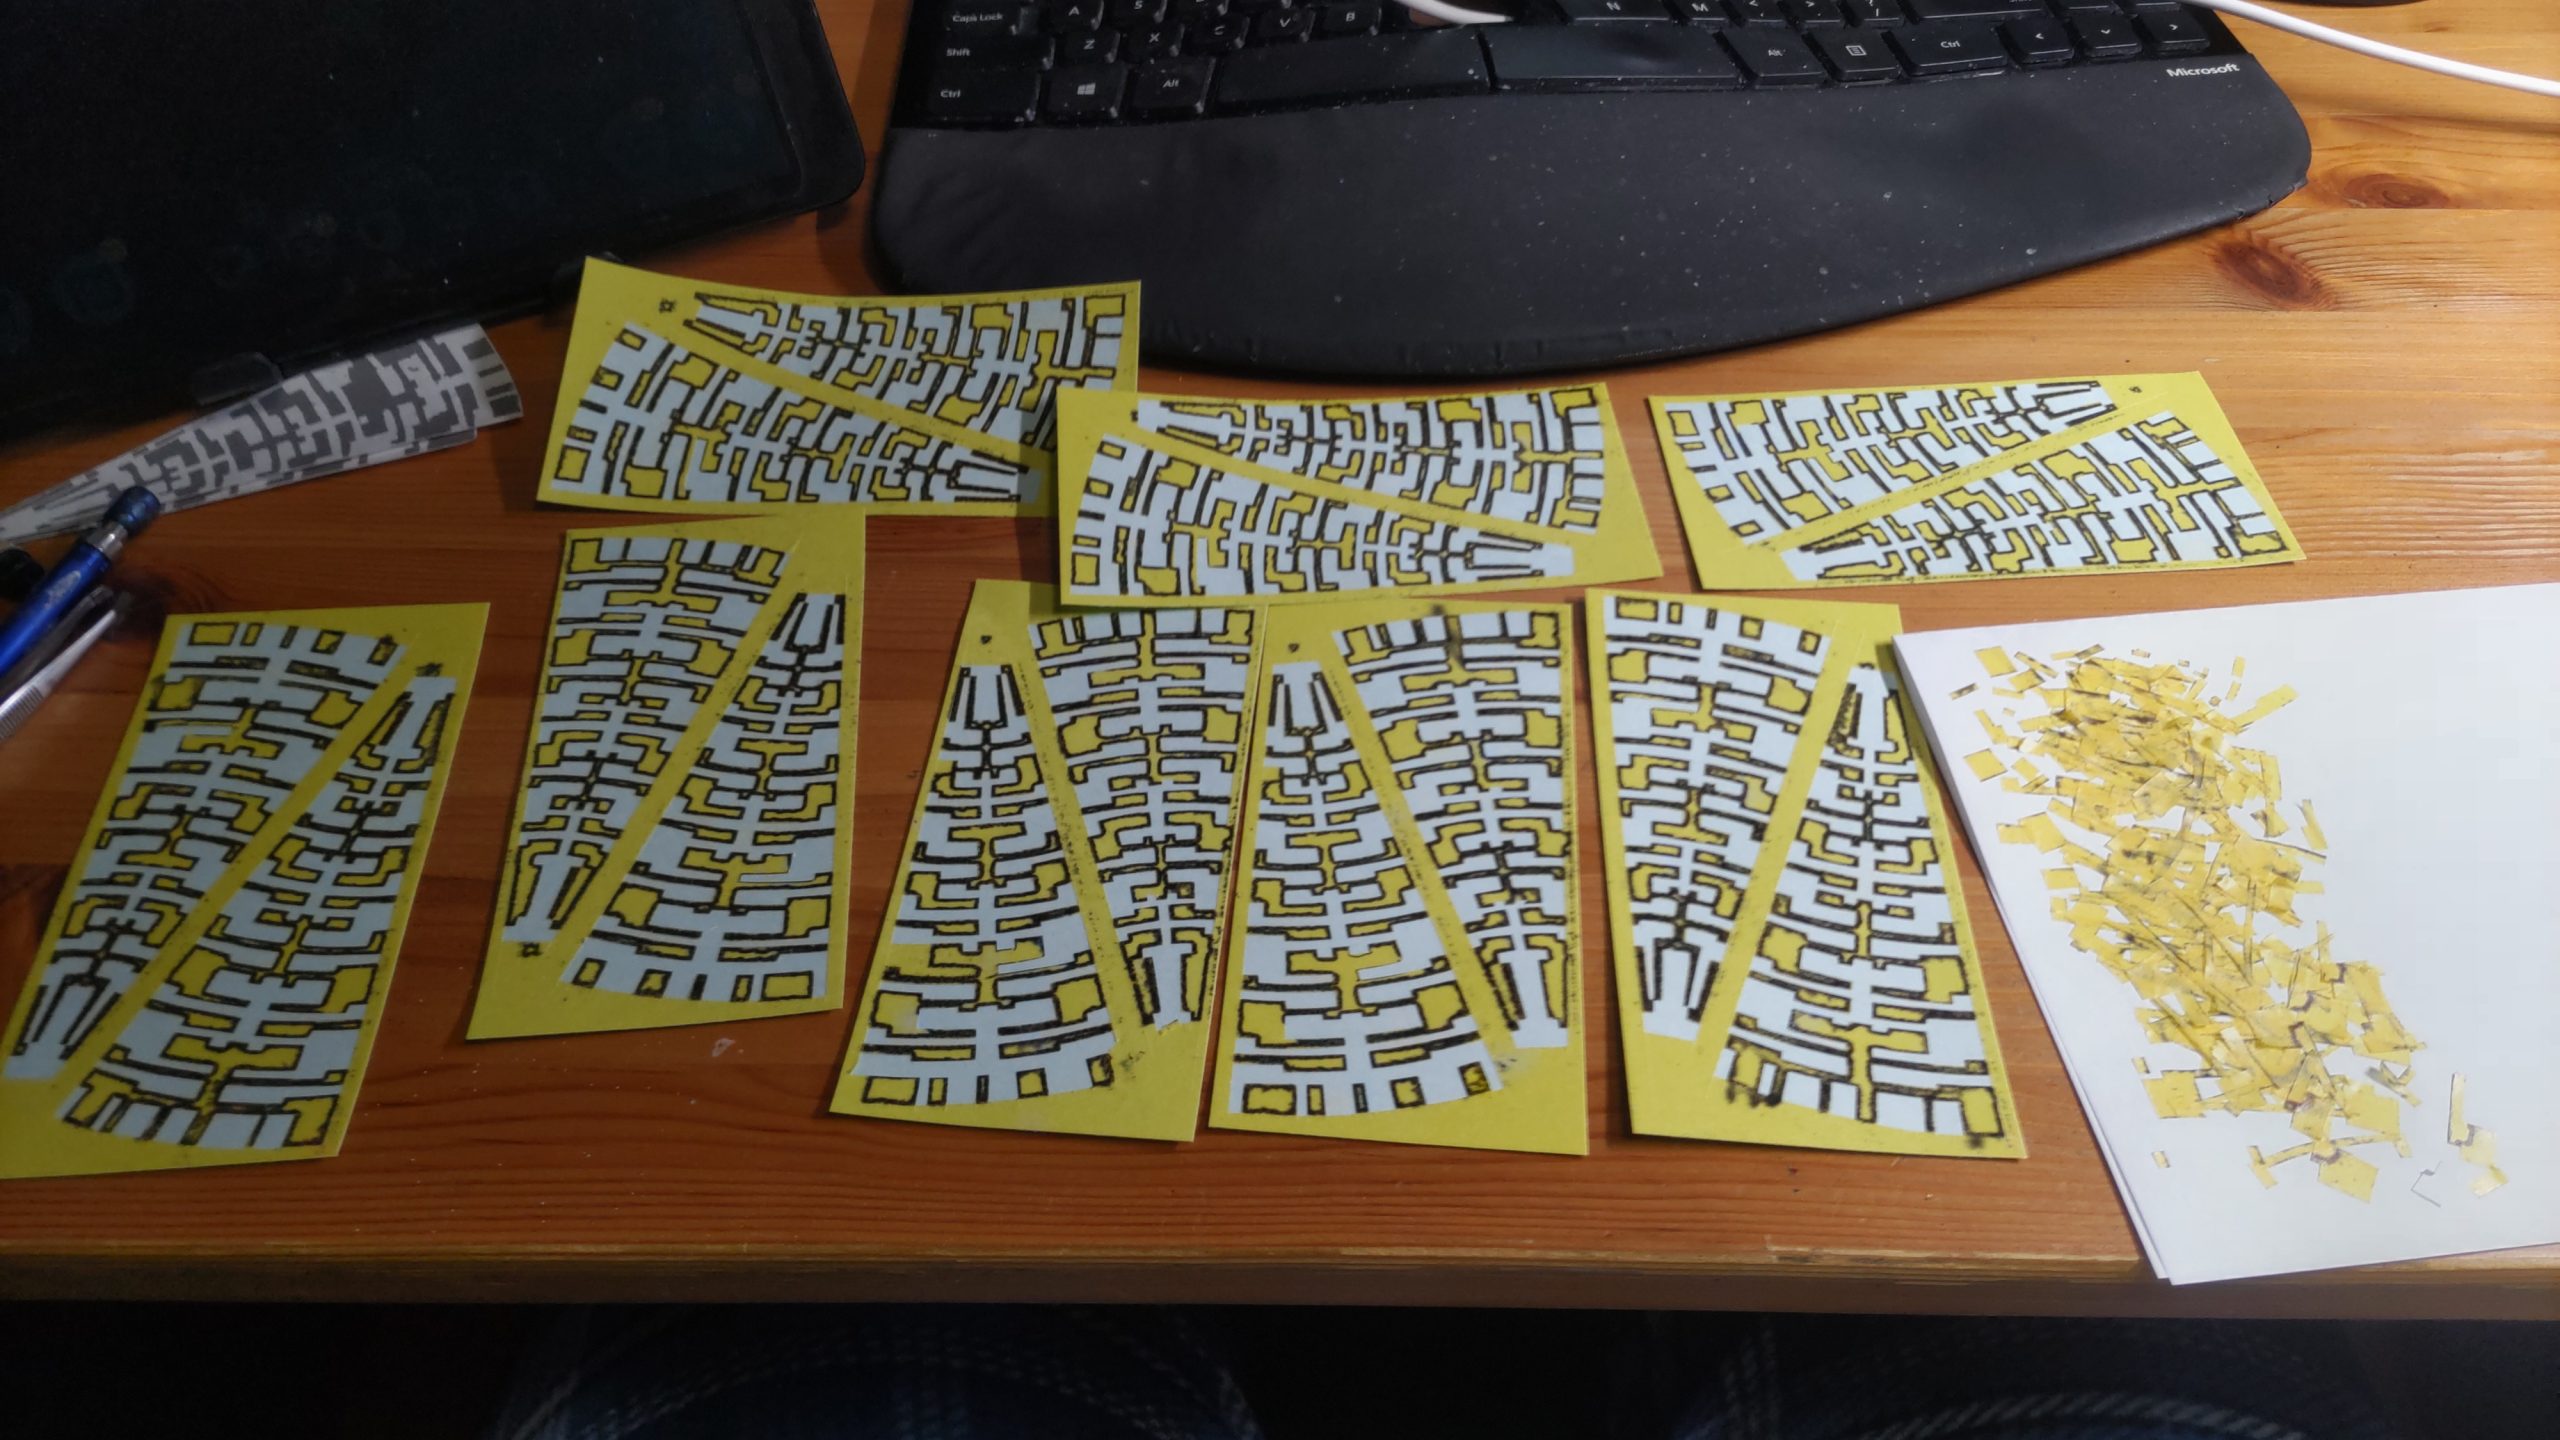
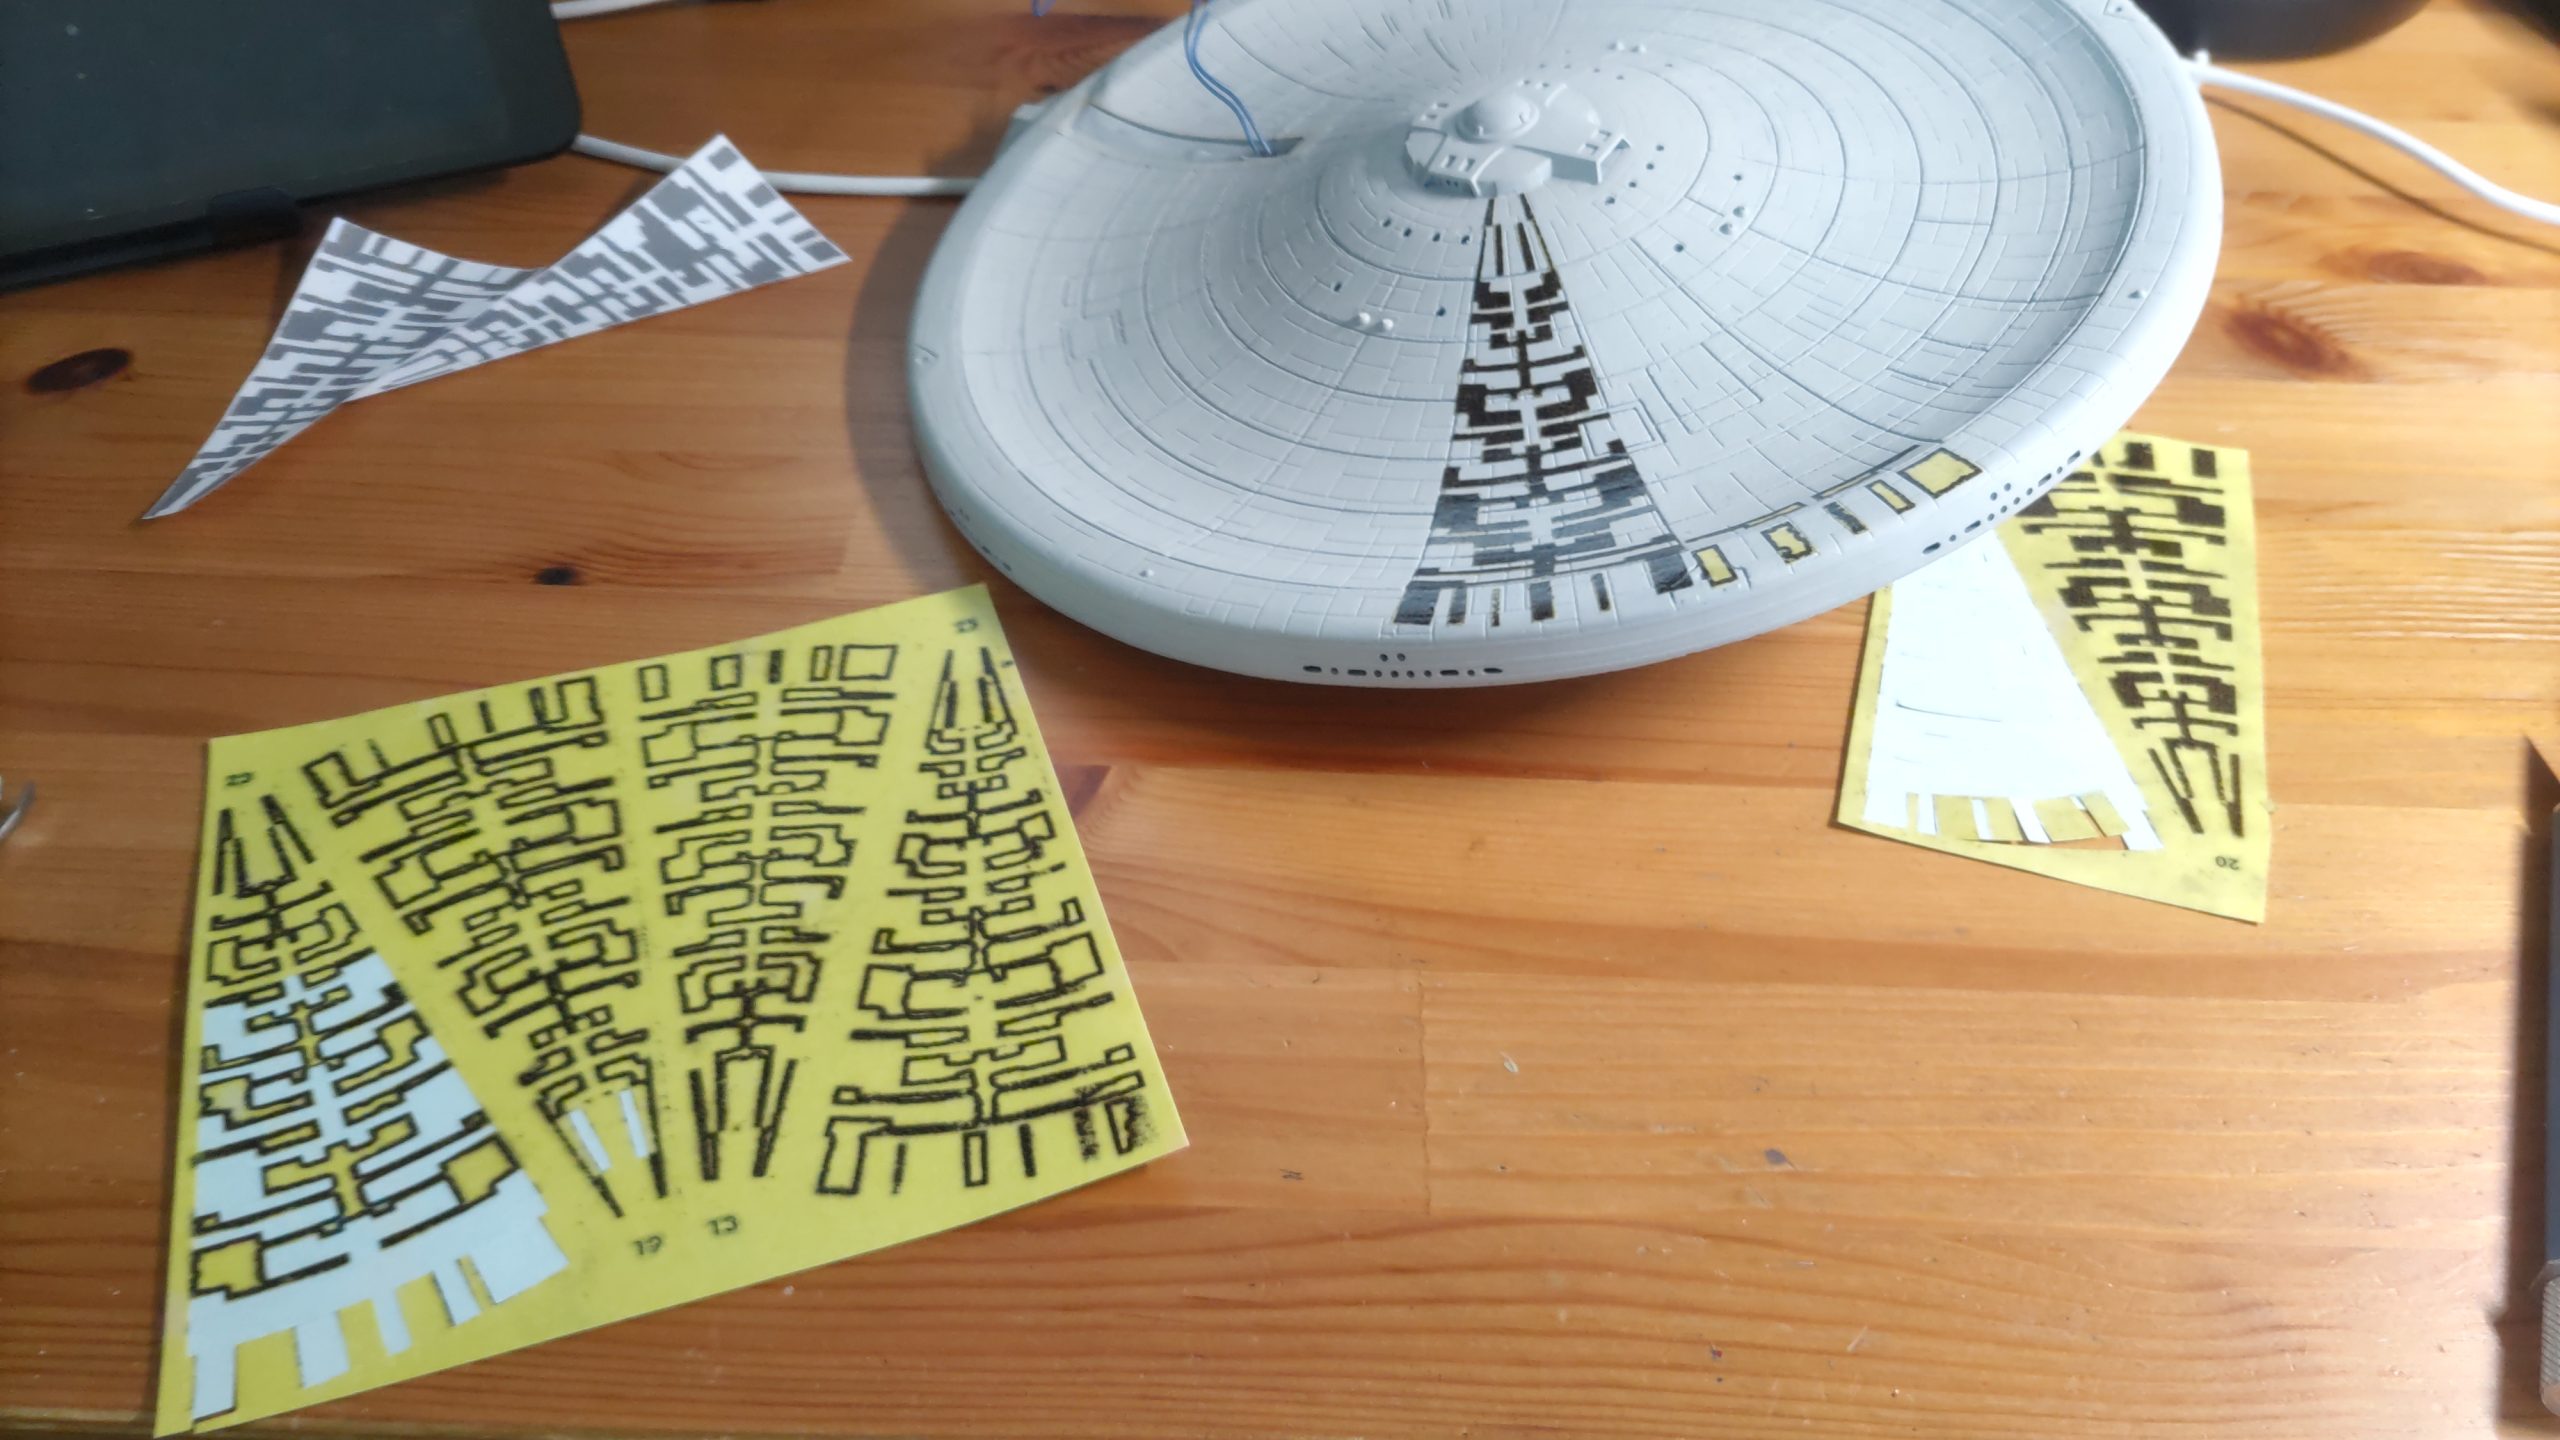
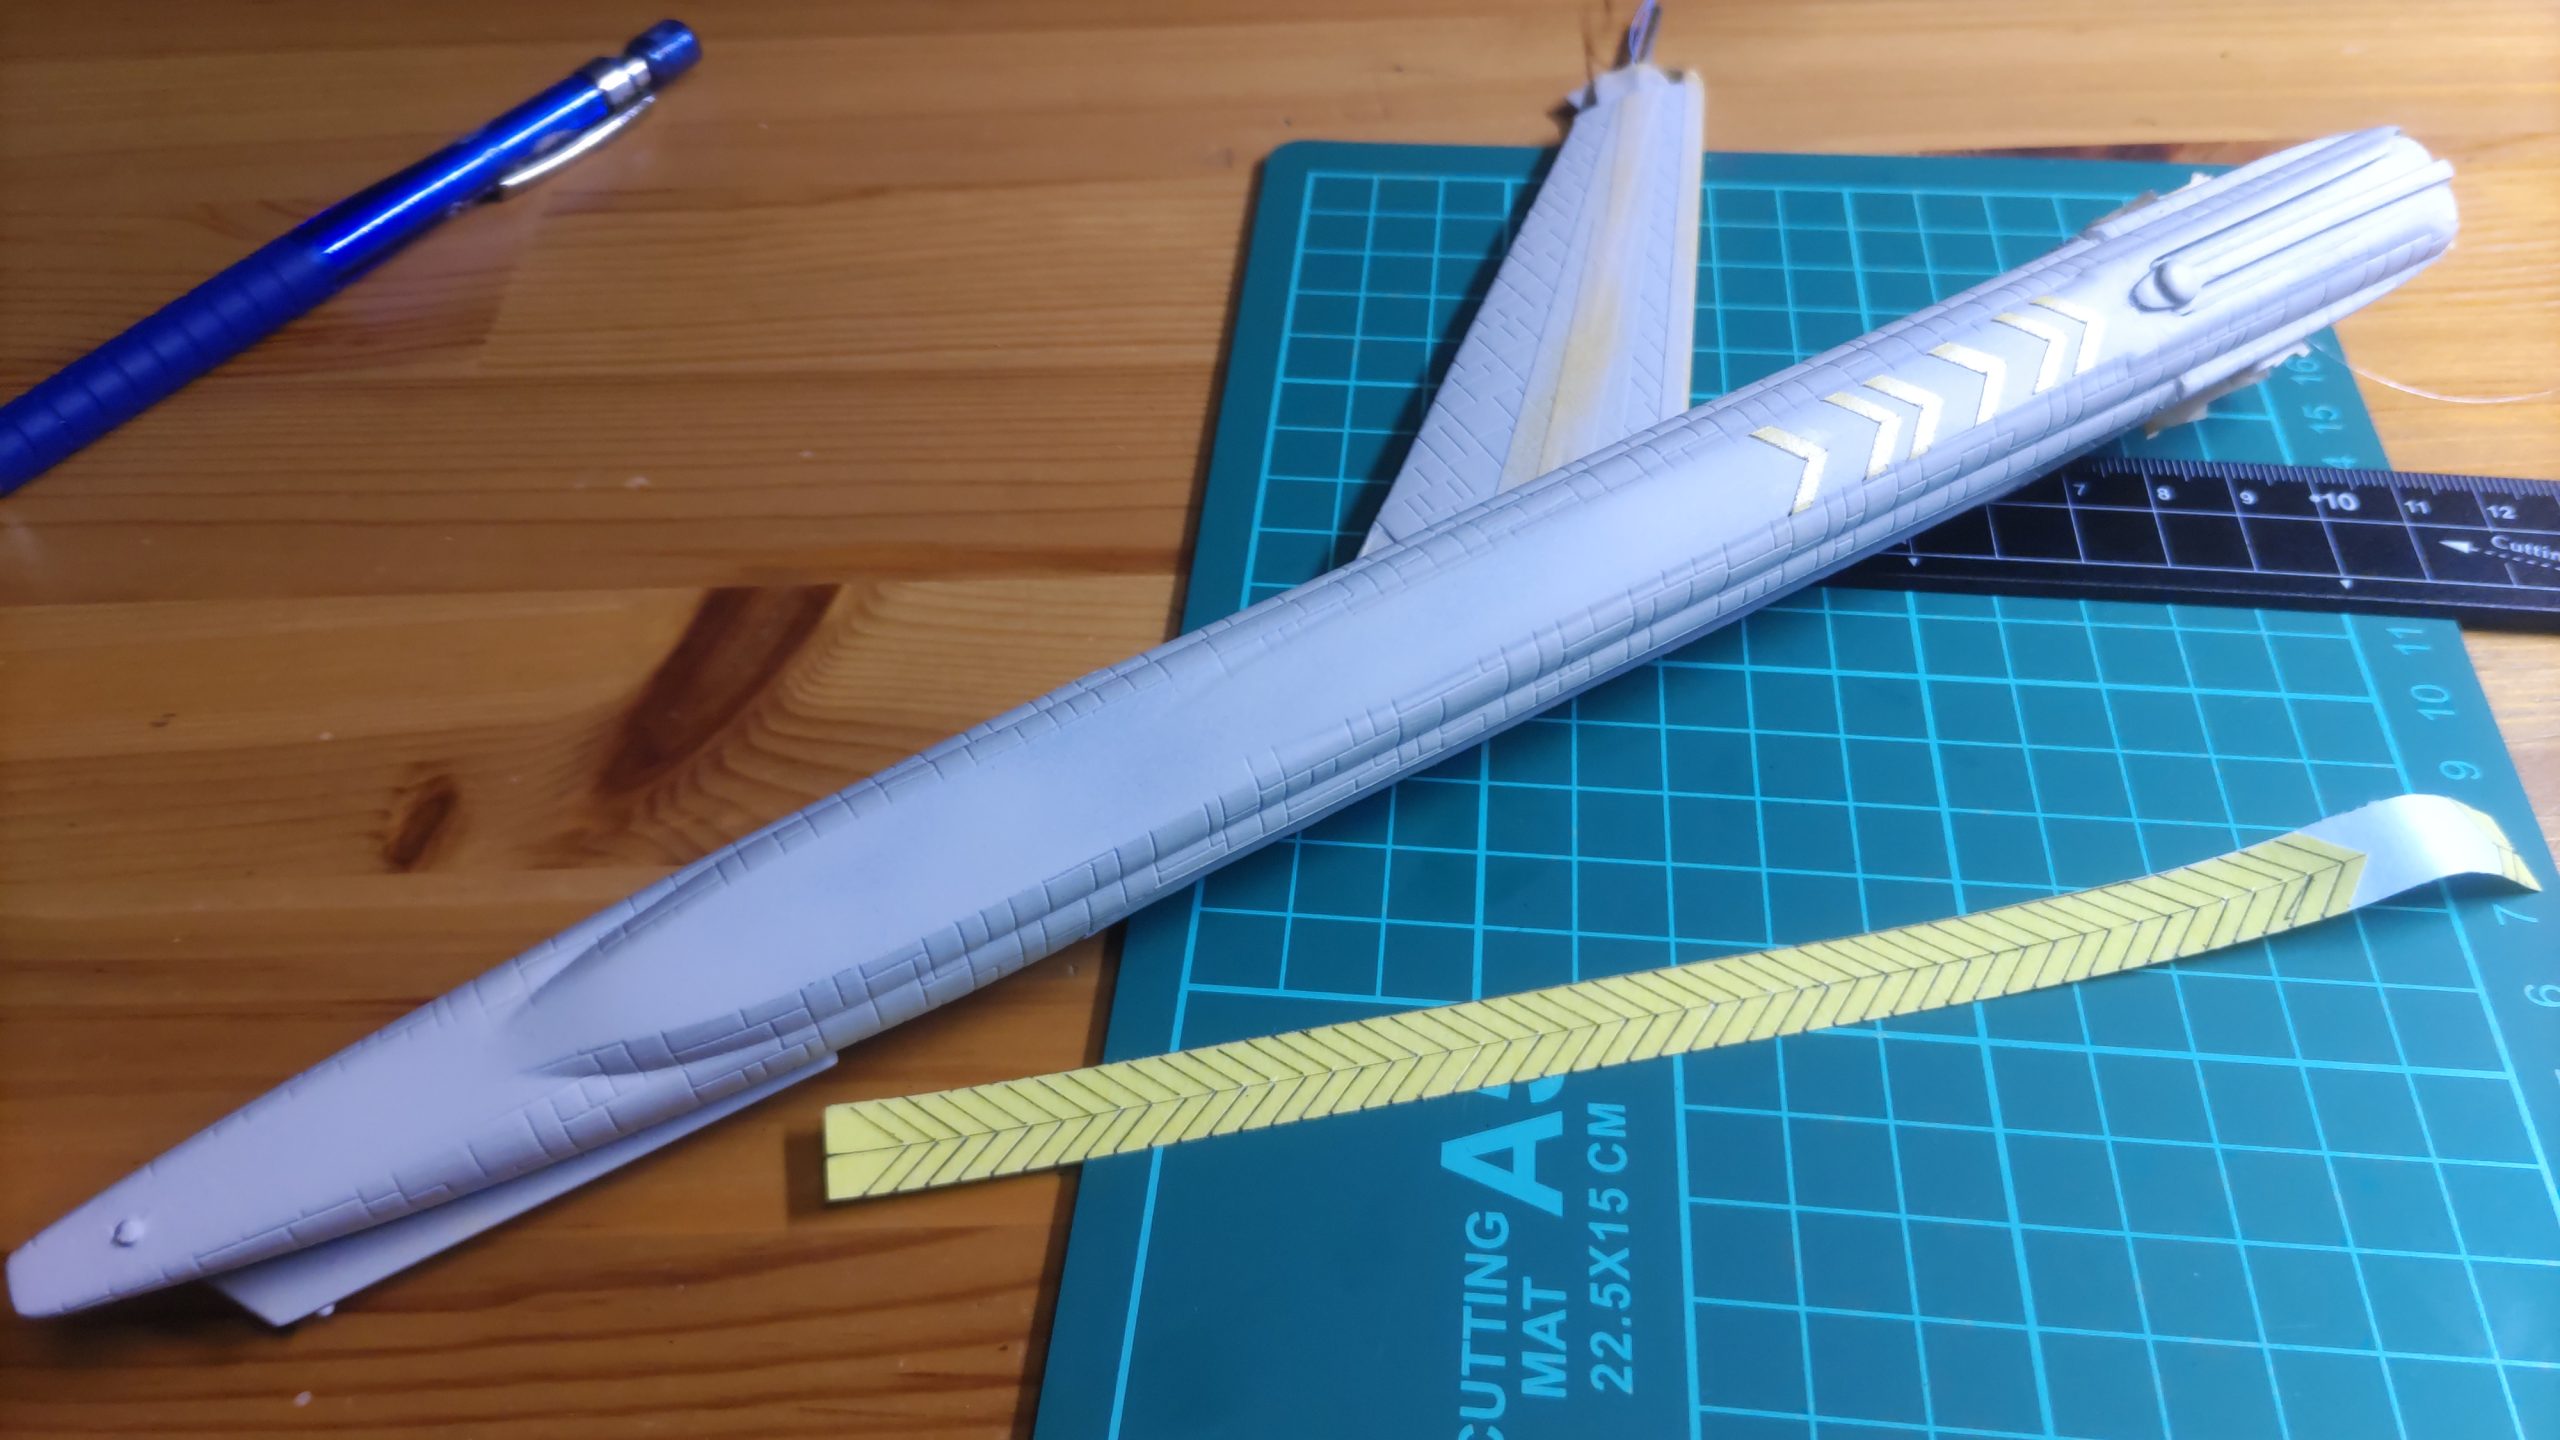
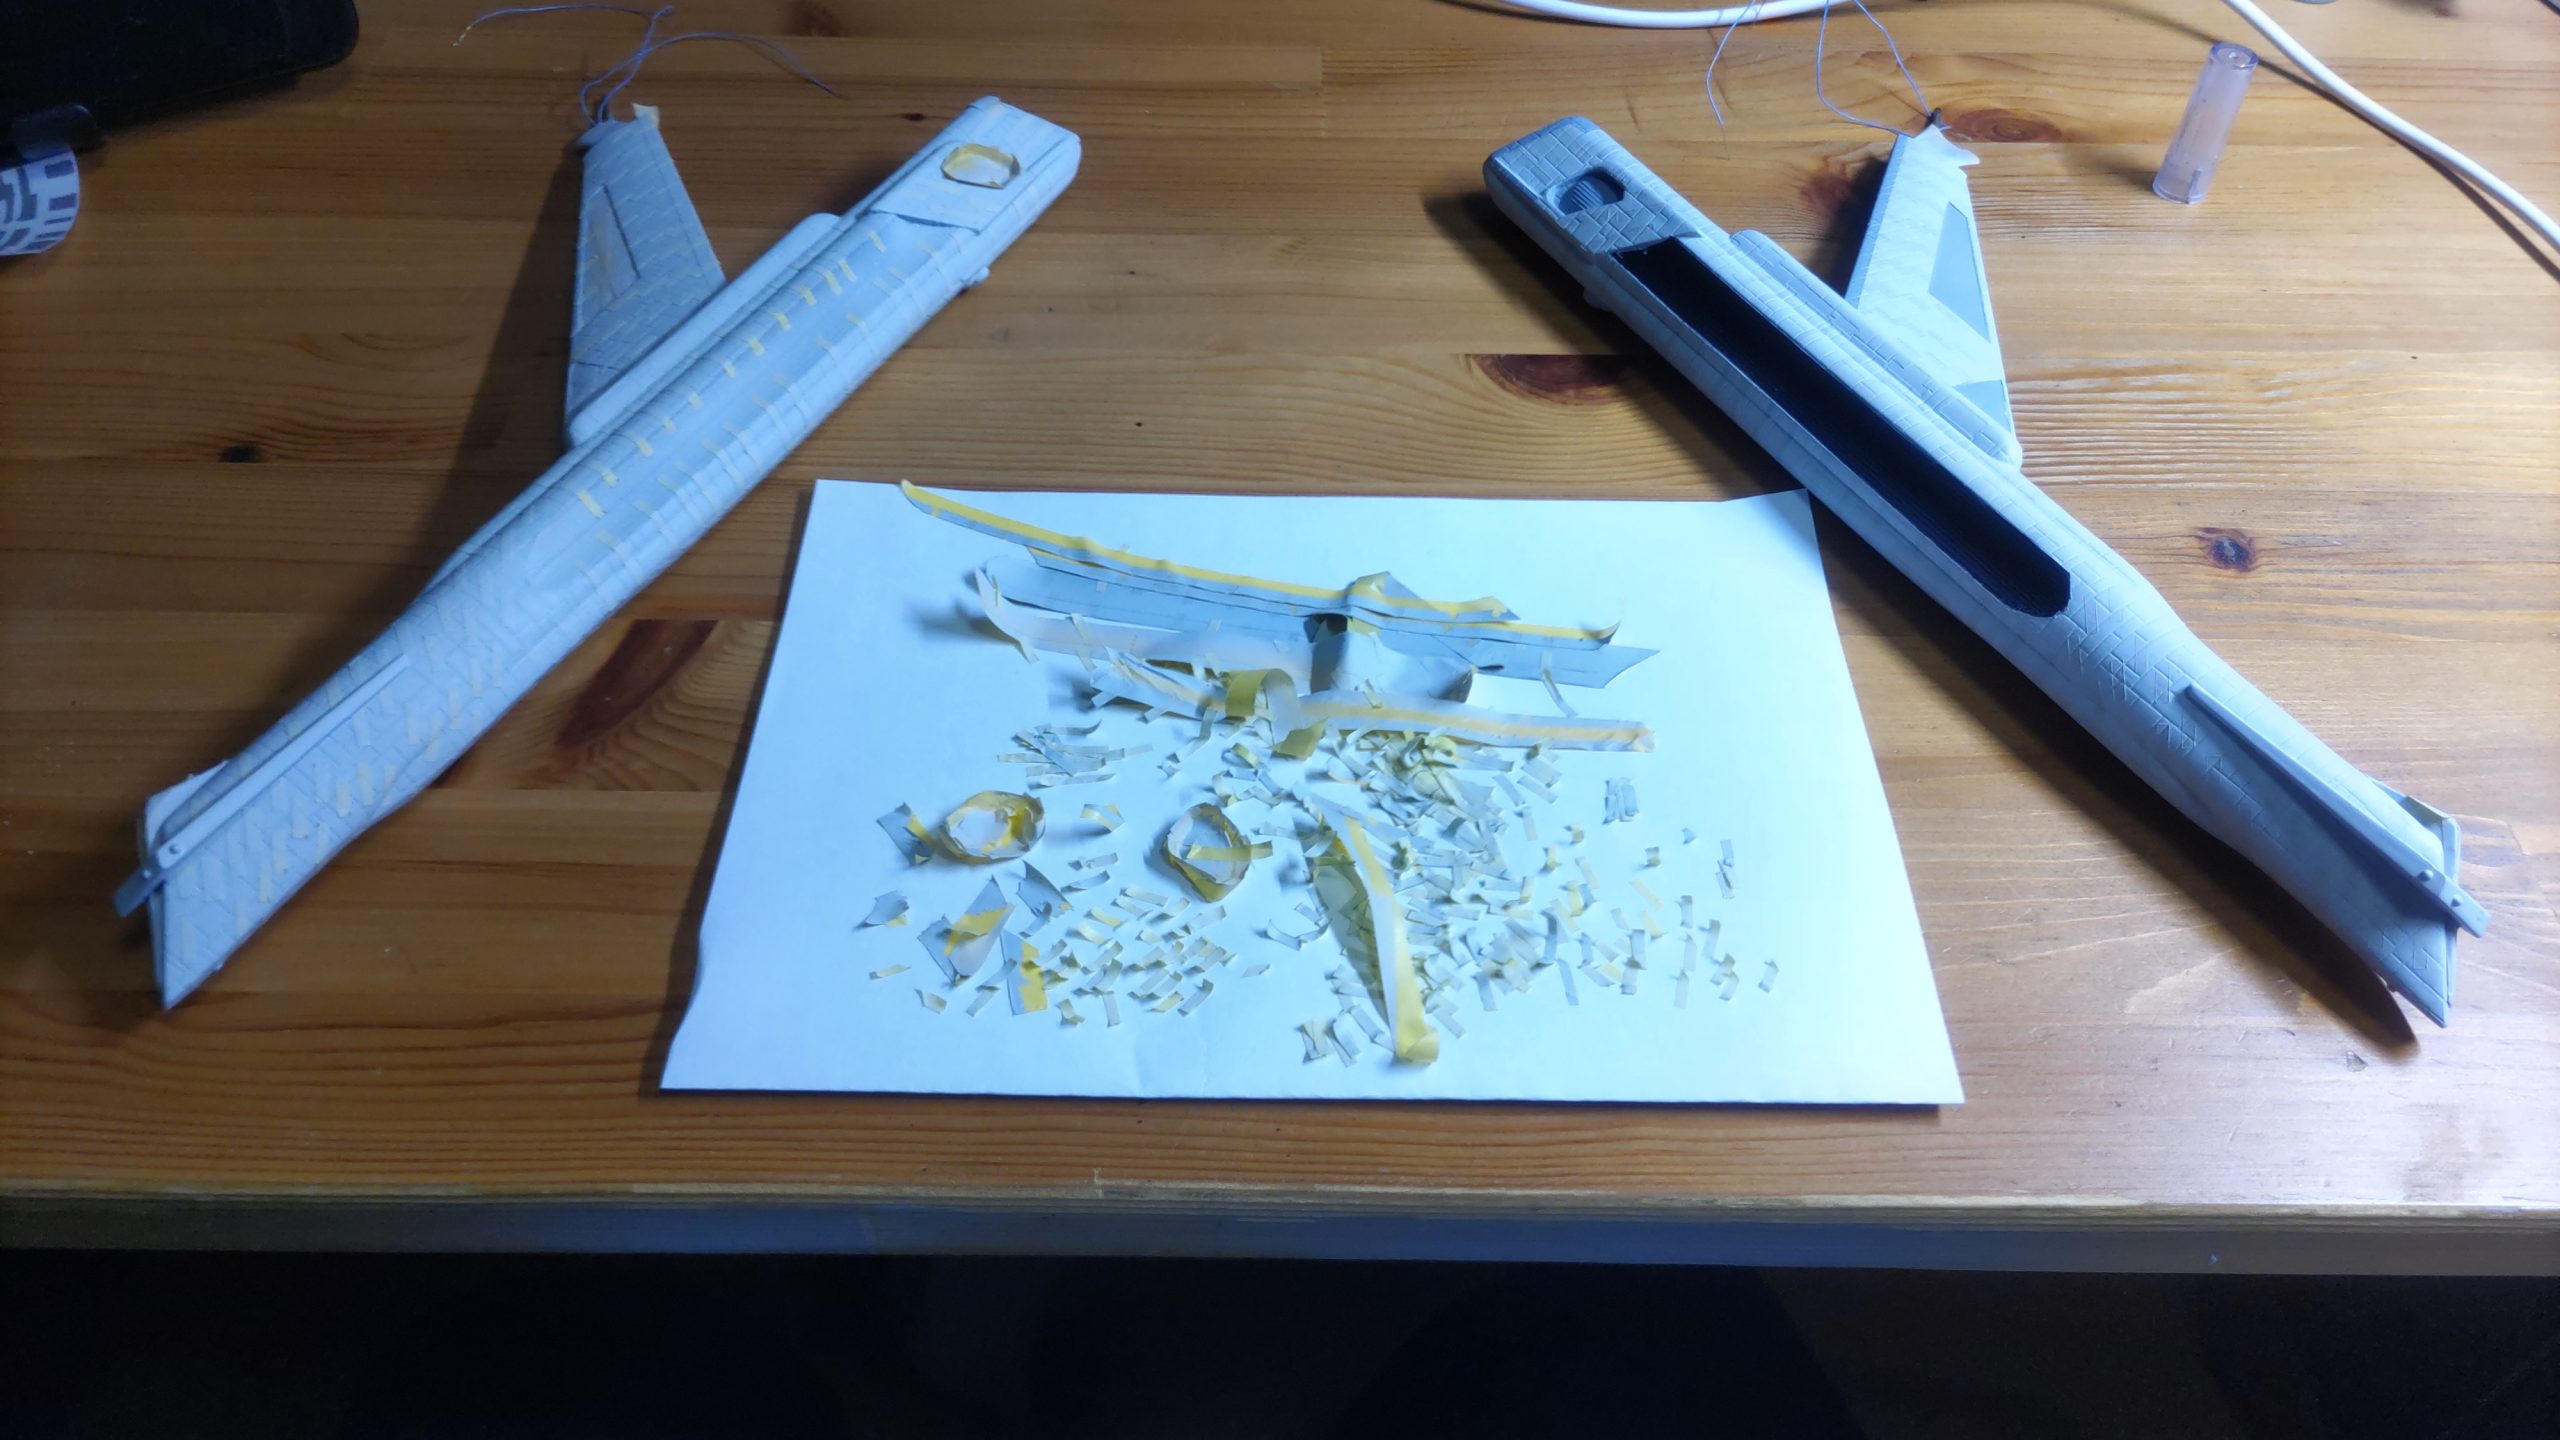
Masking and detail painting
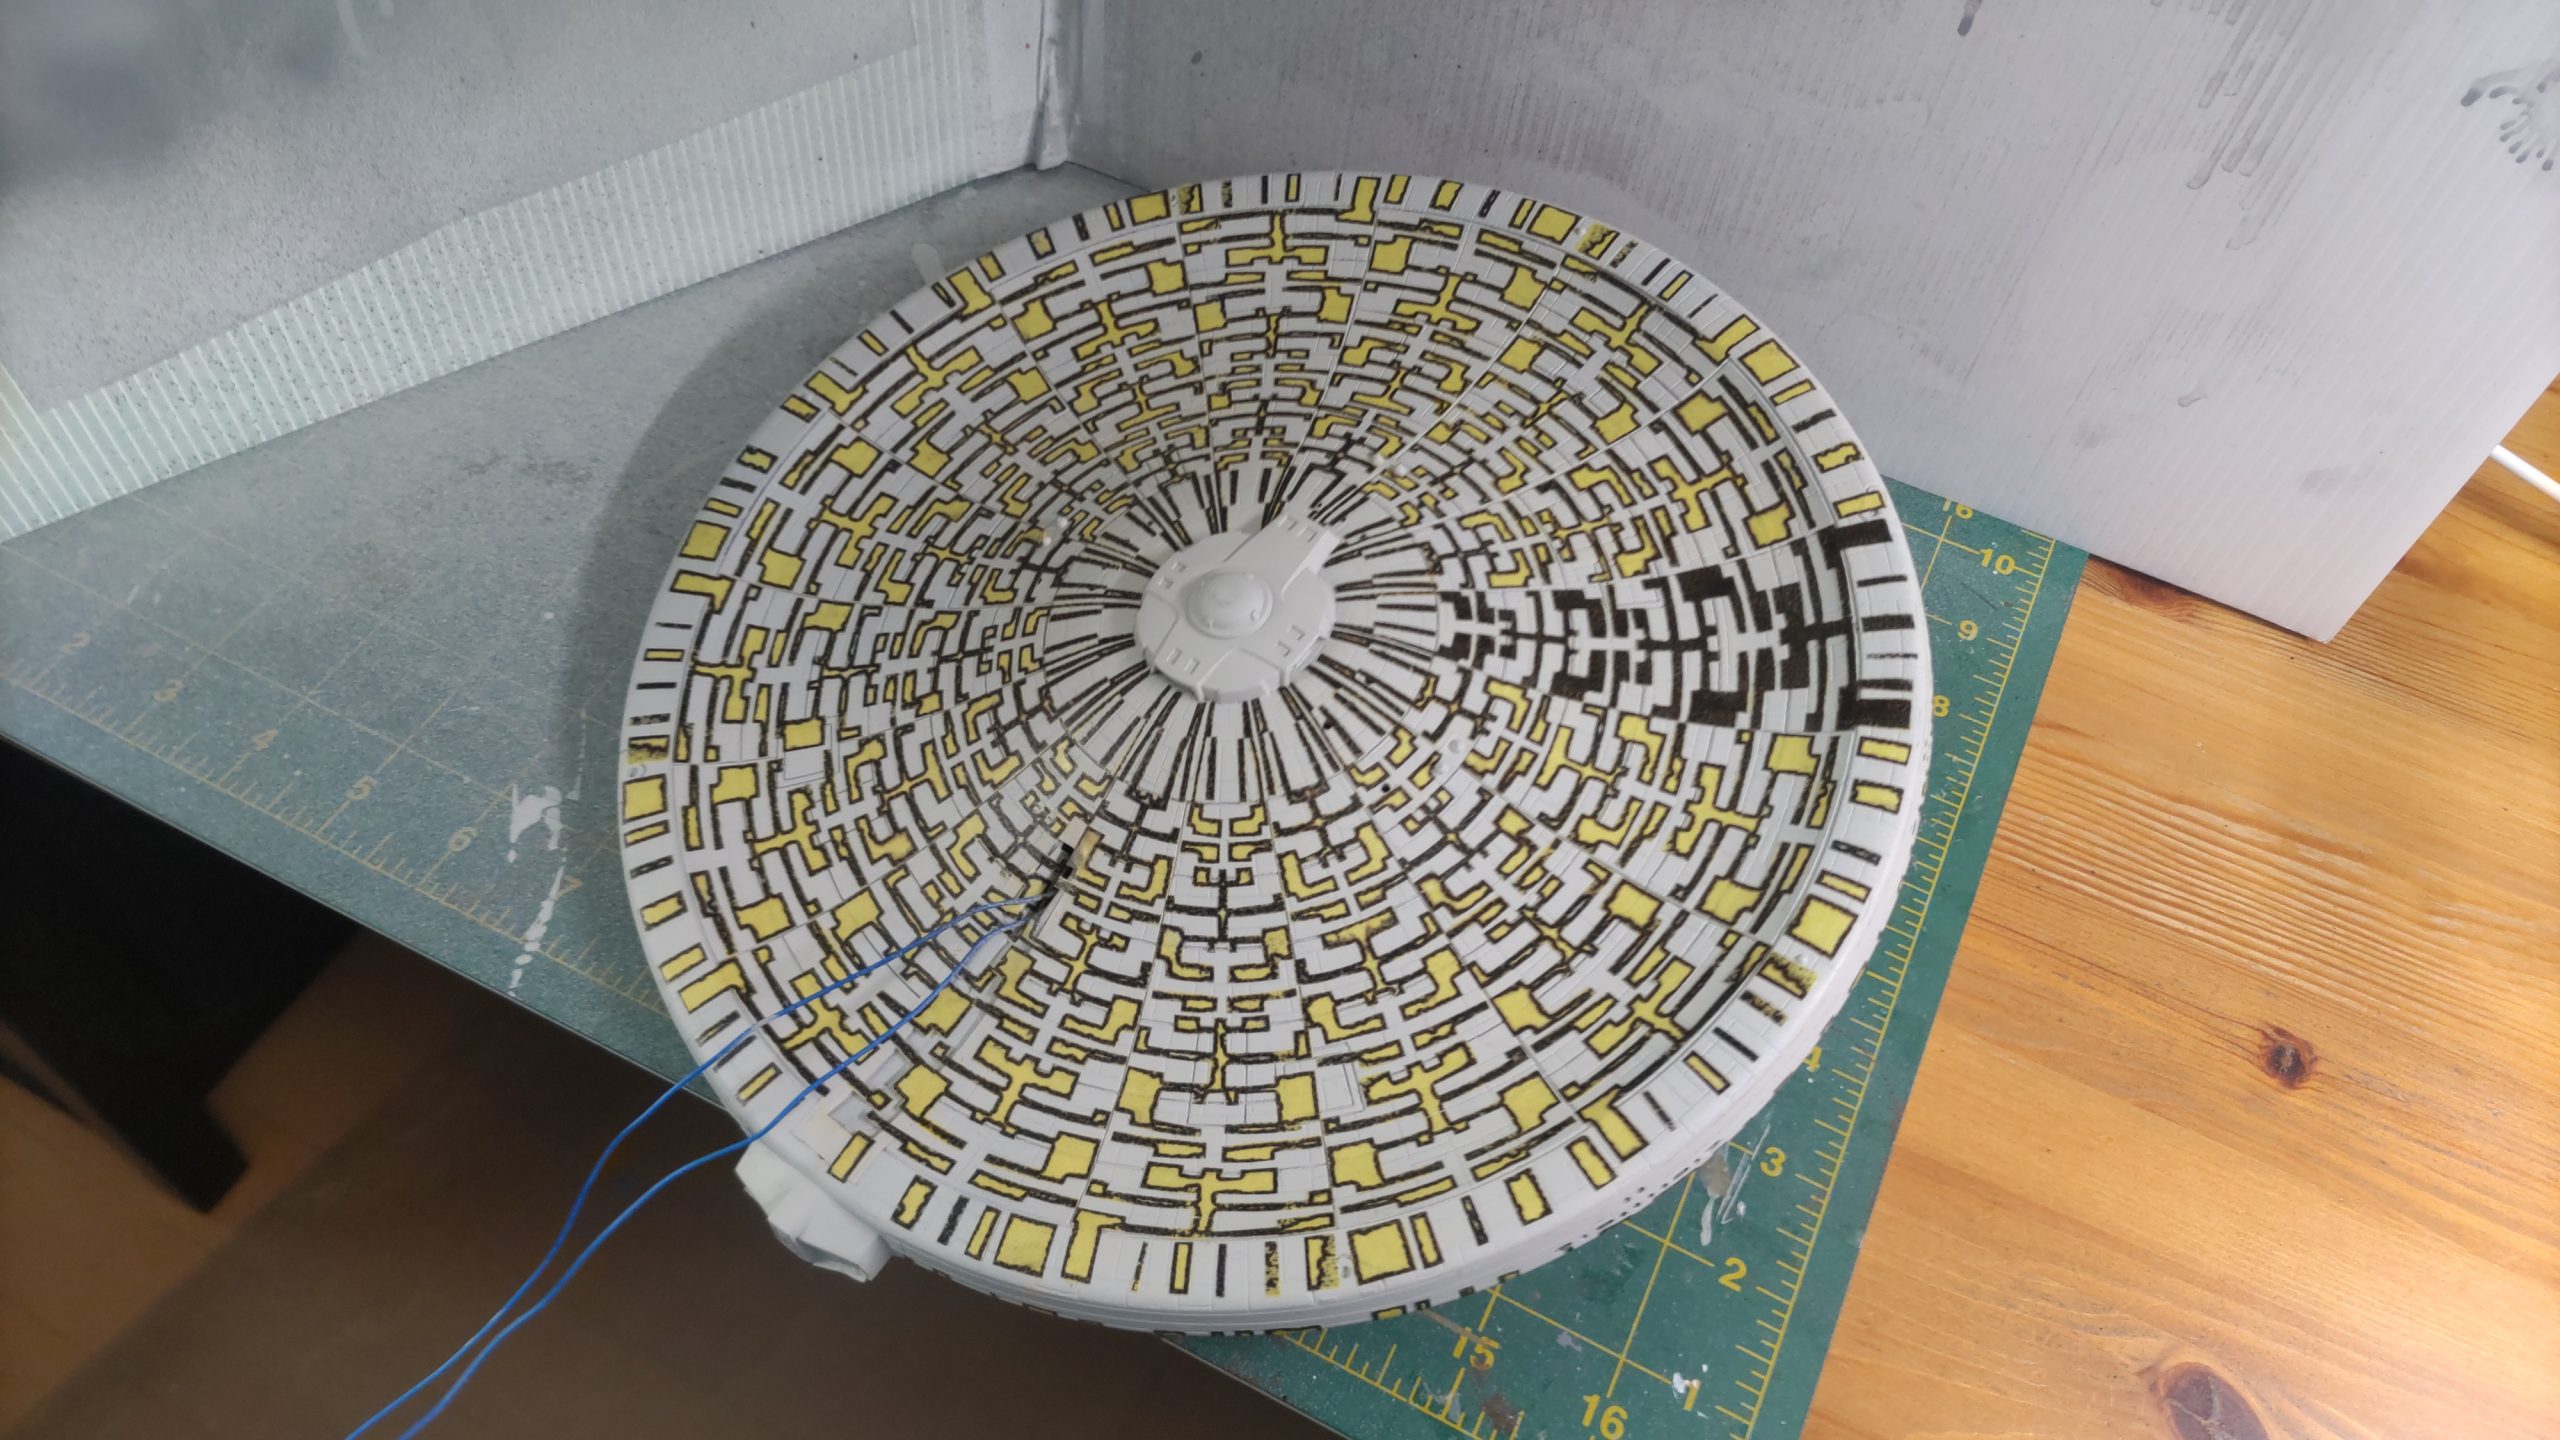
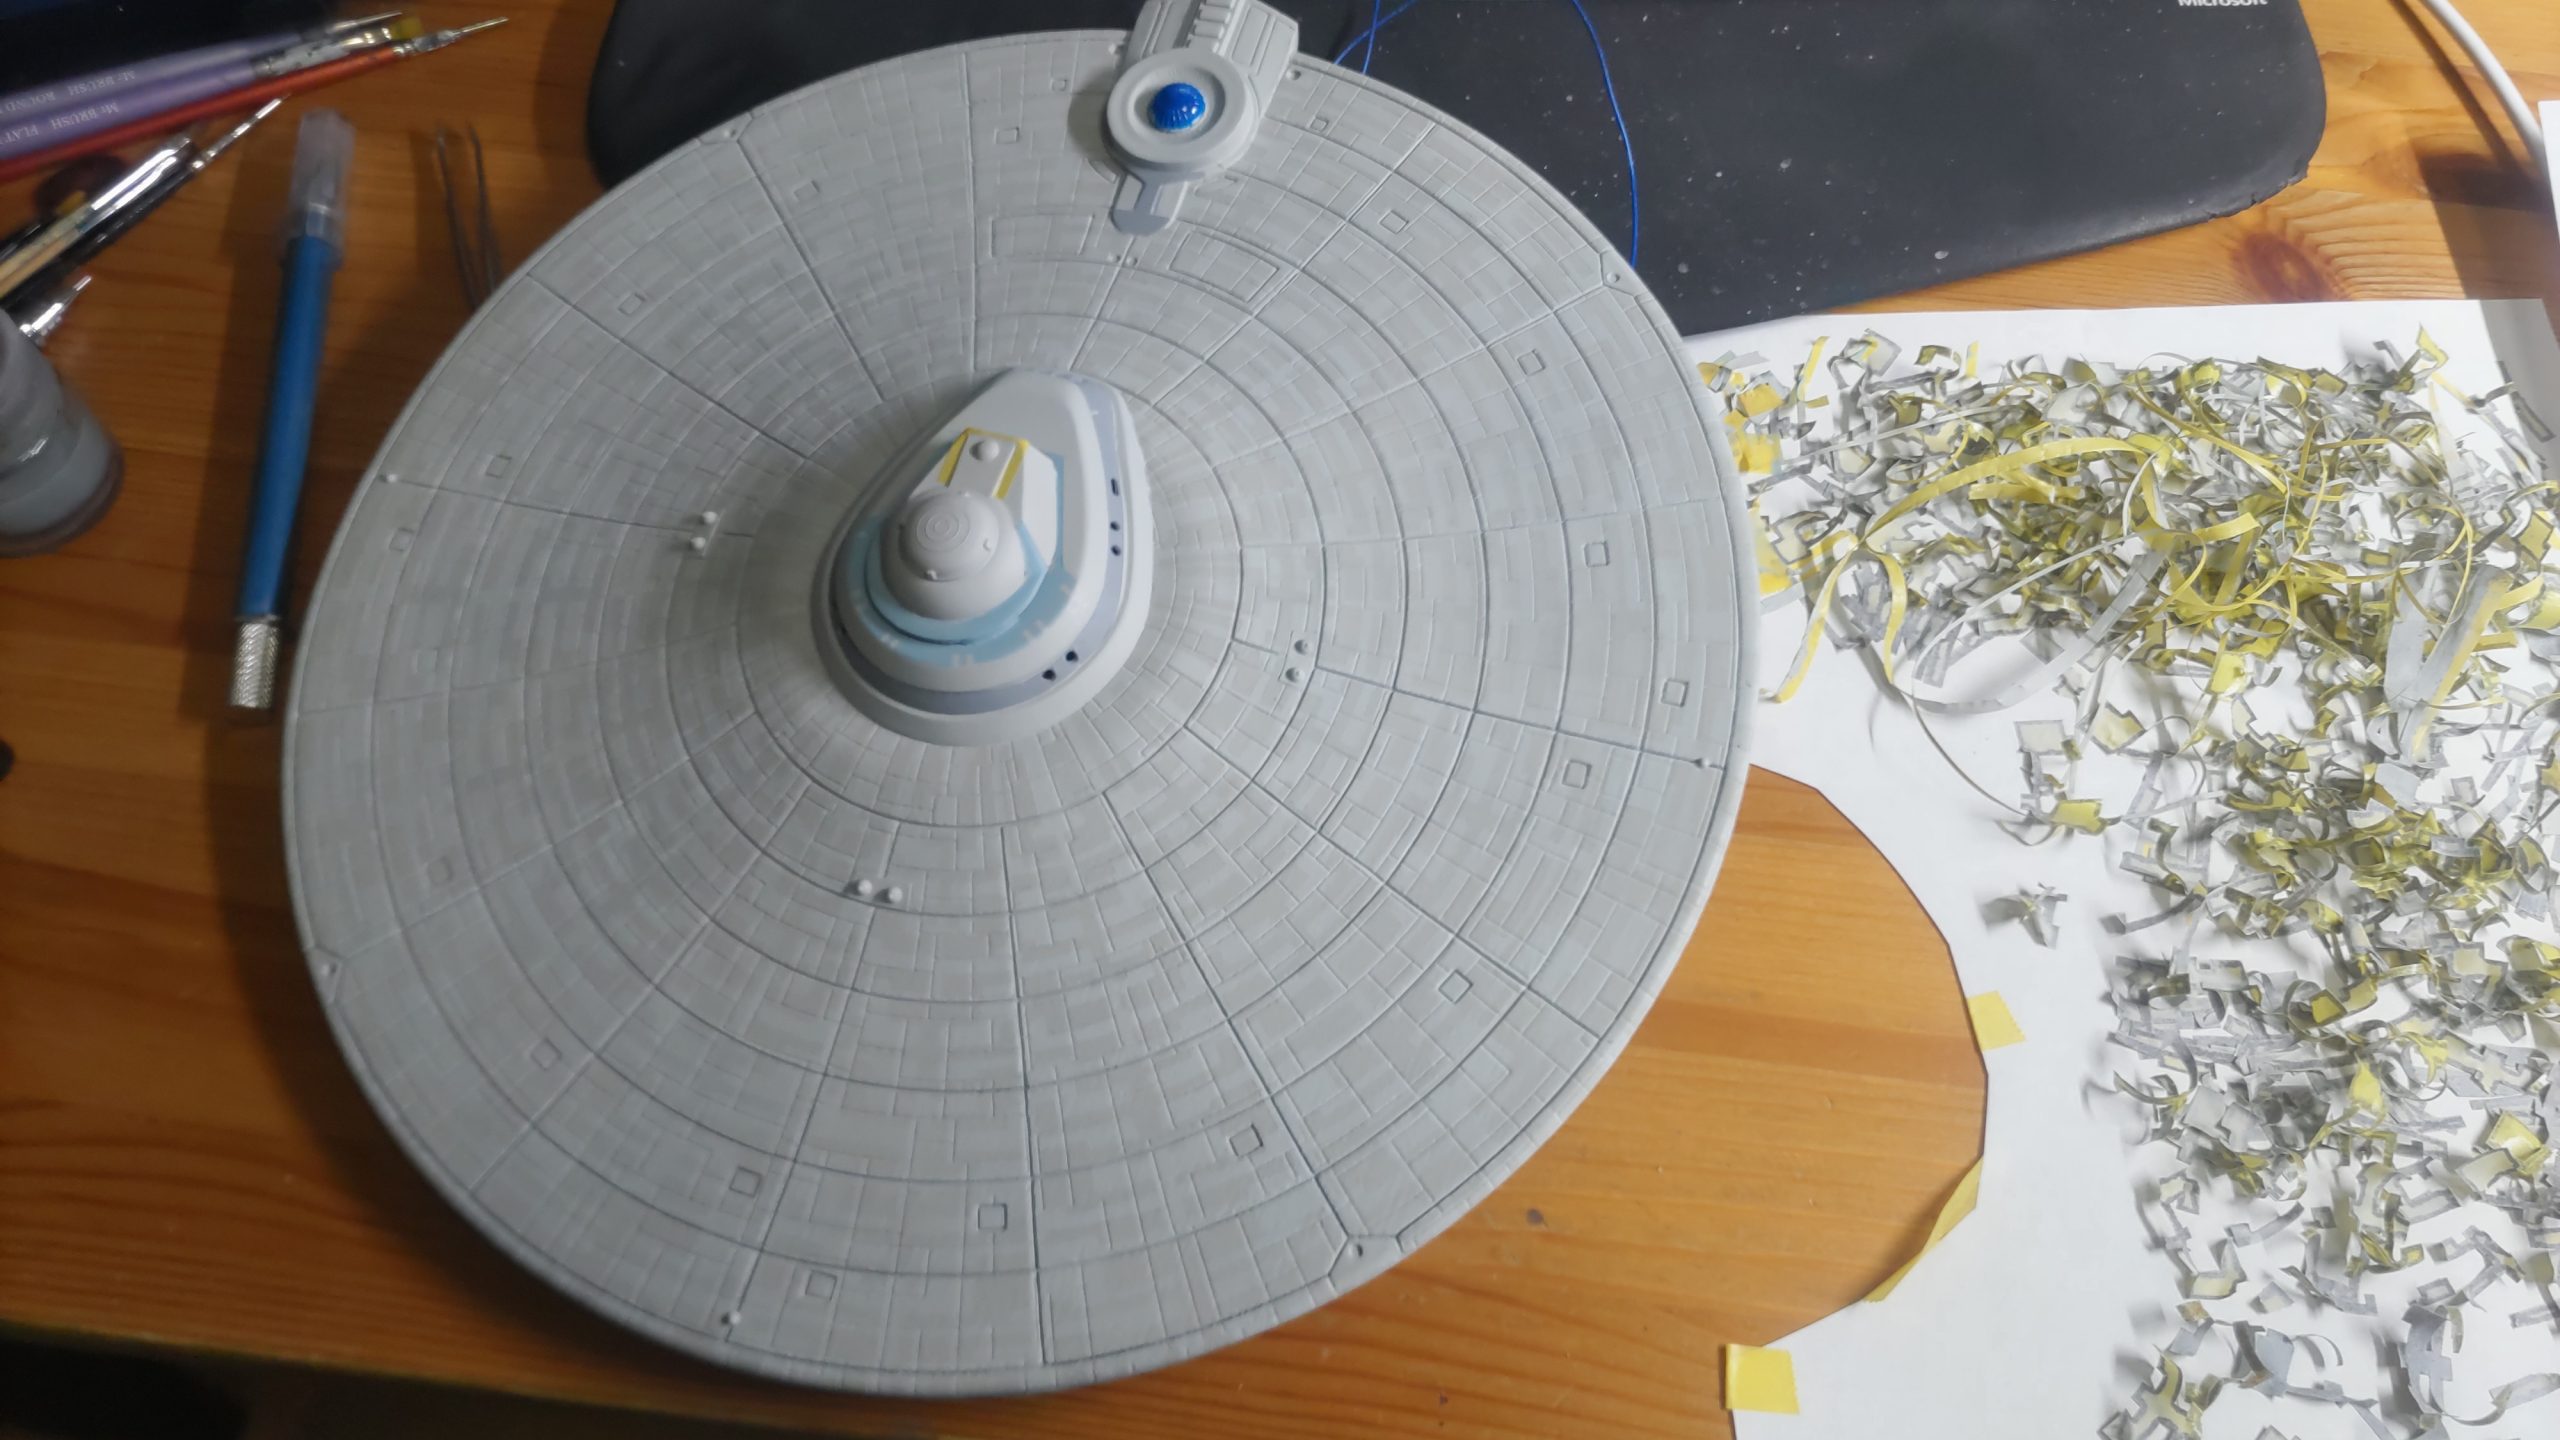
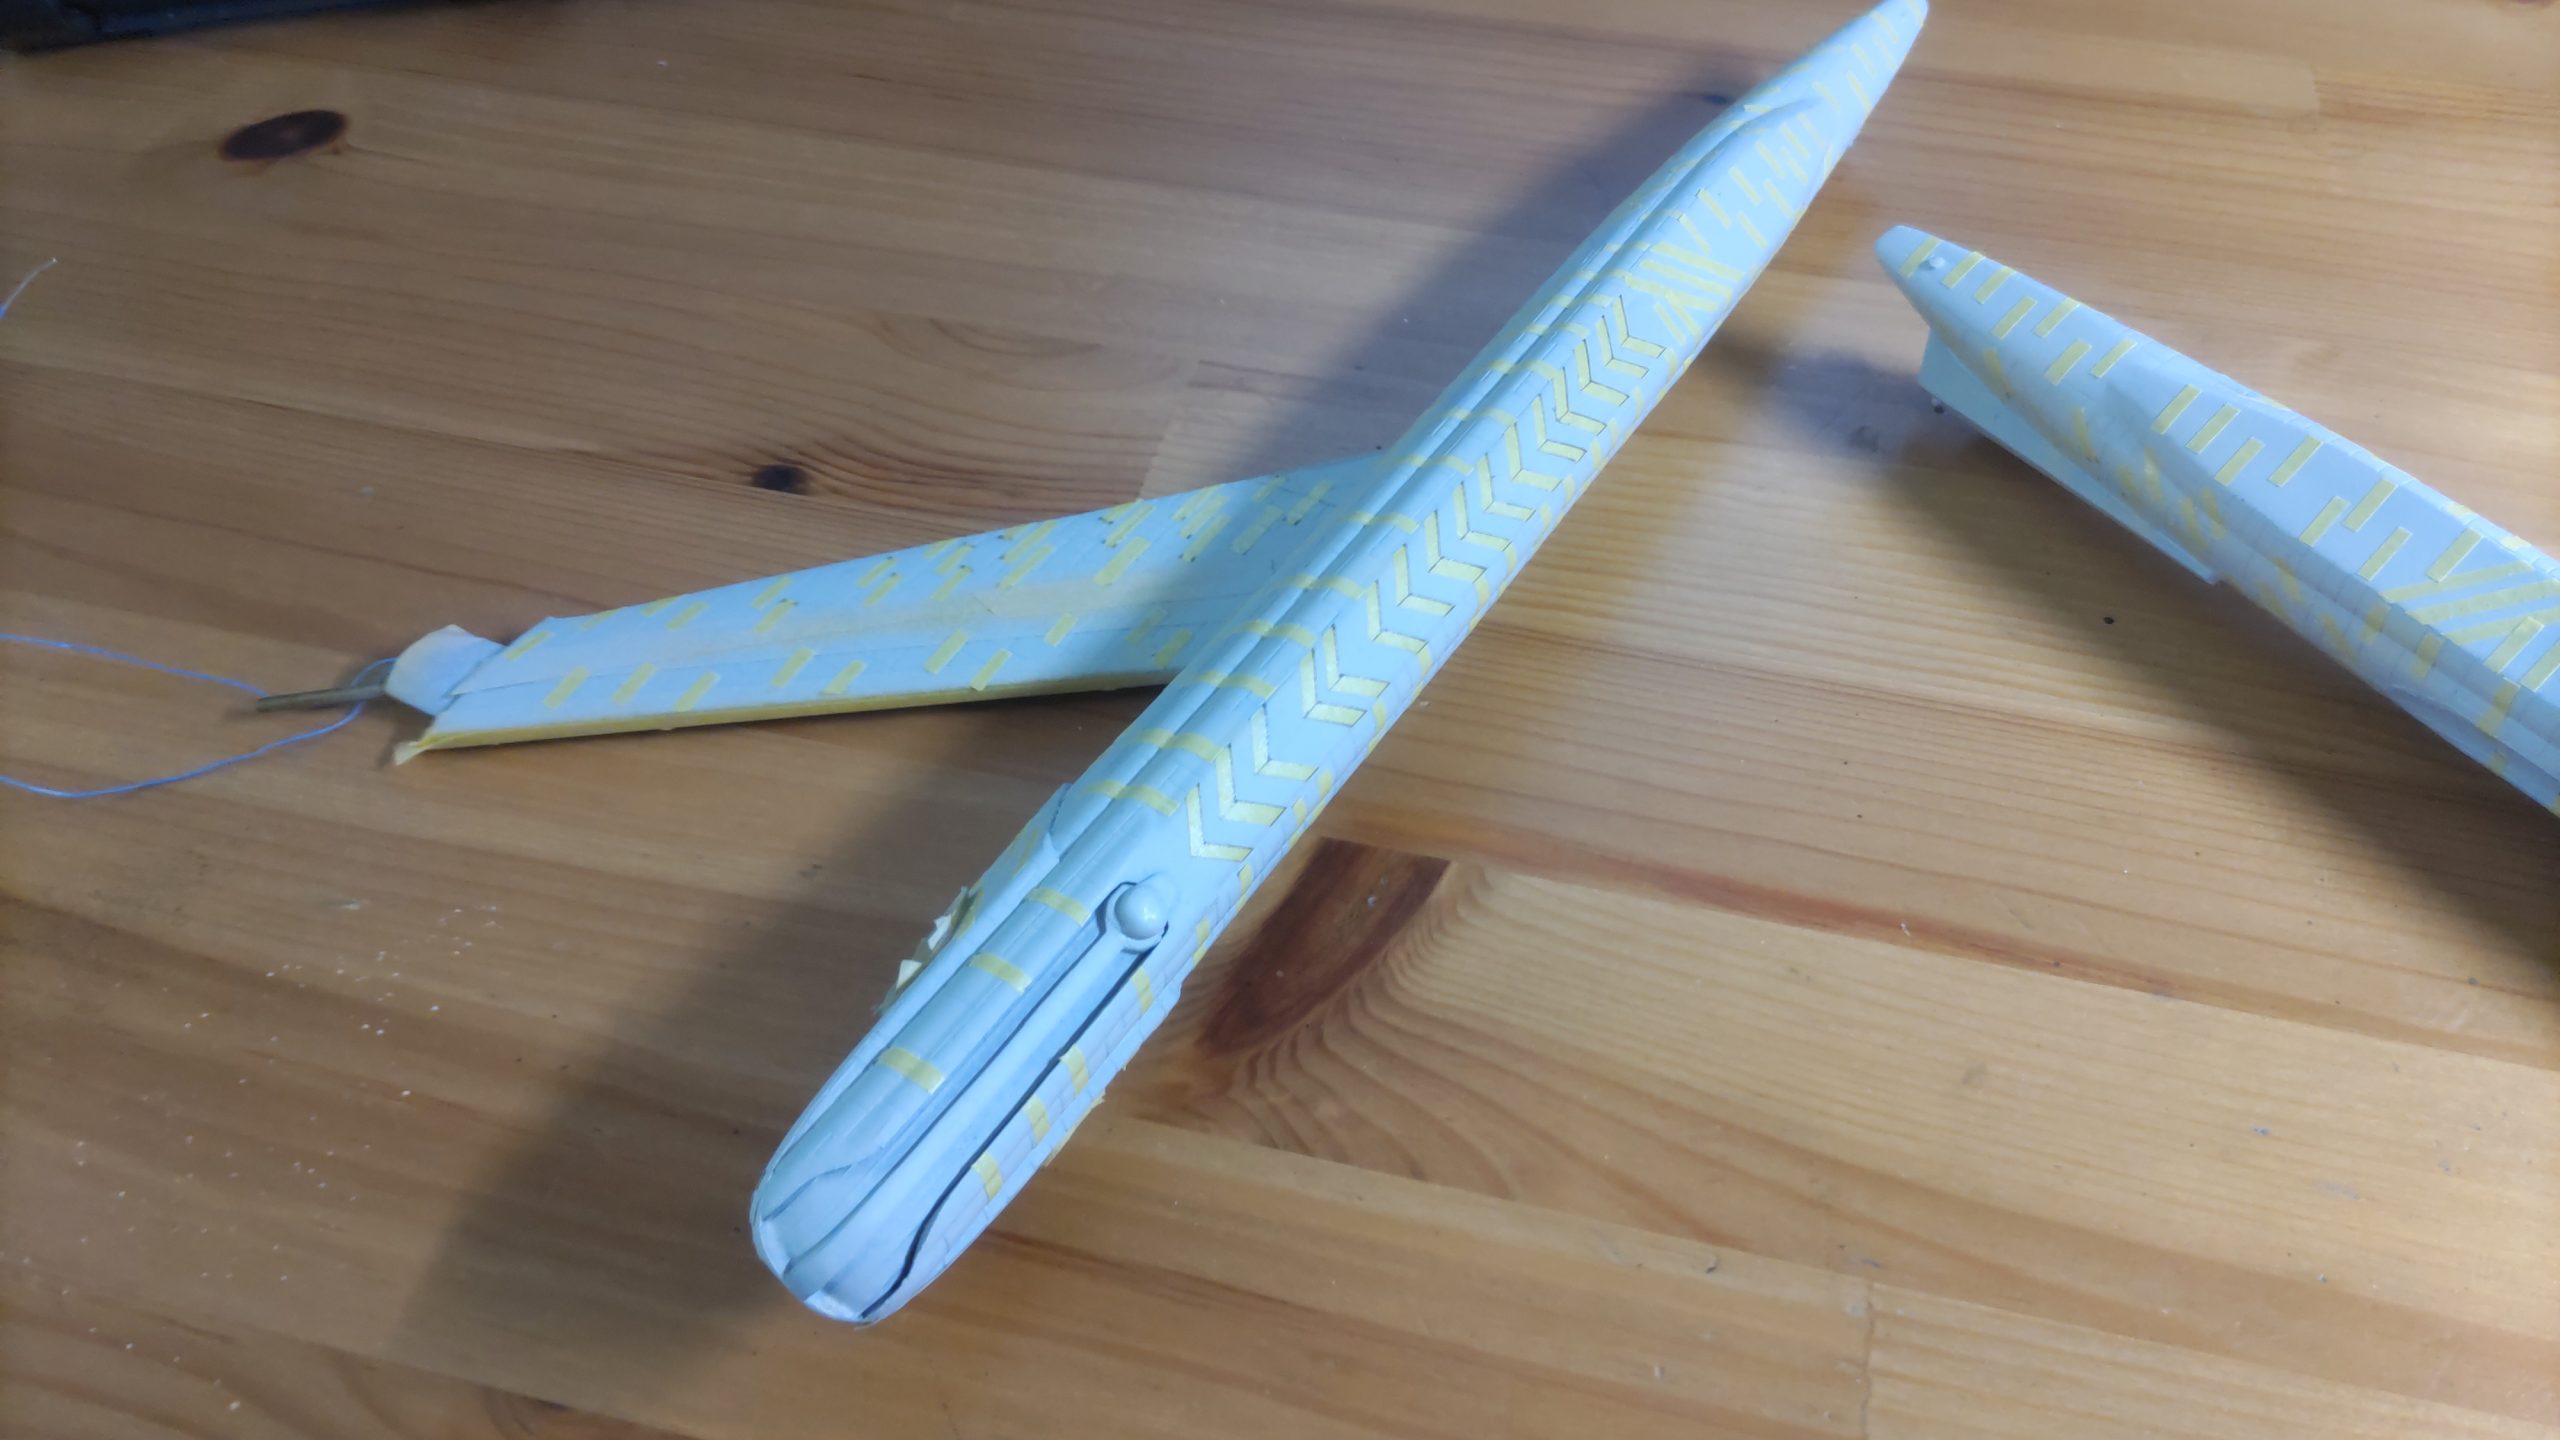
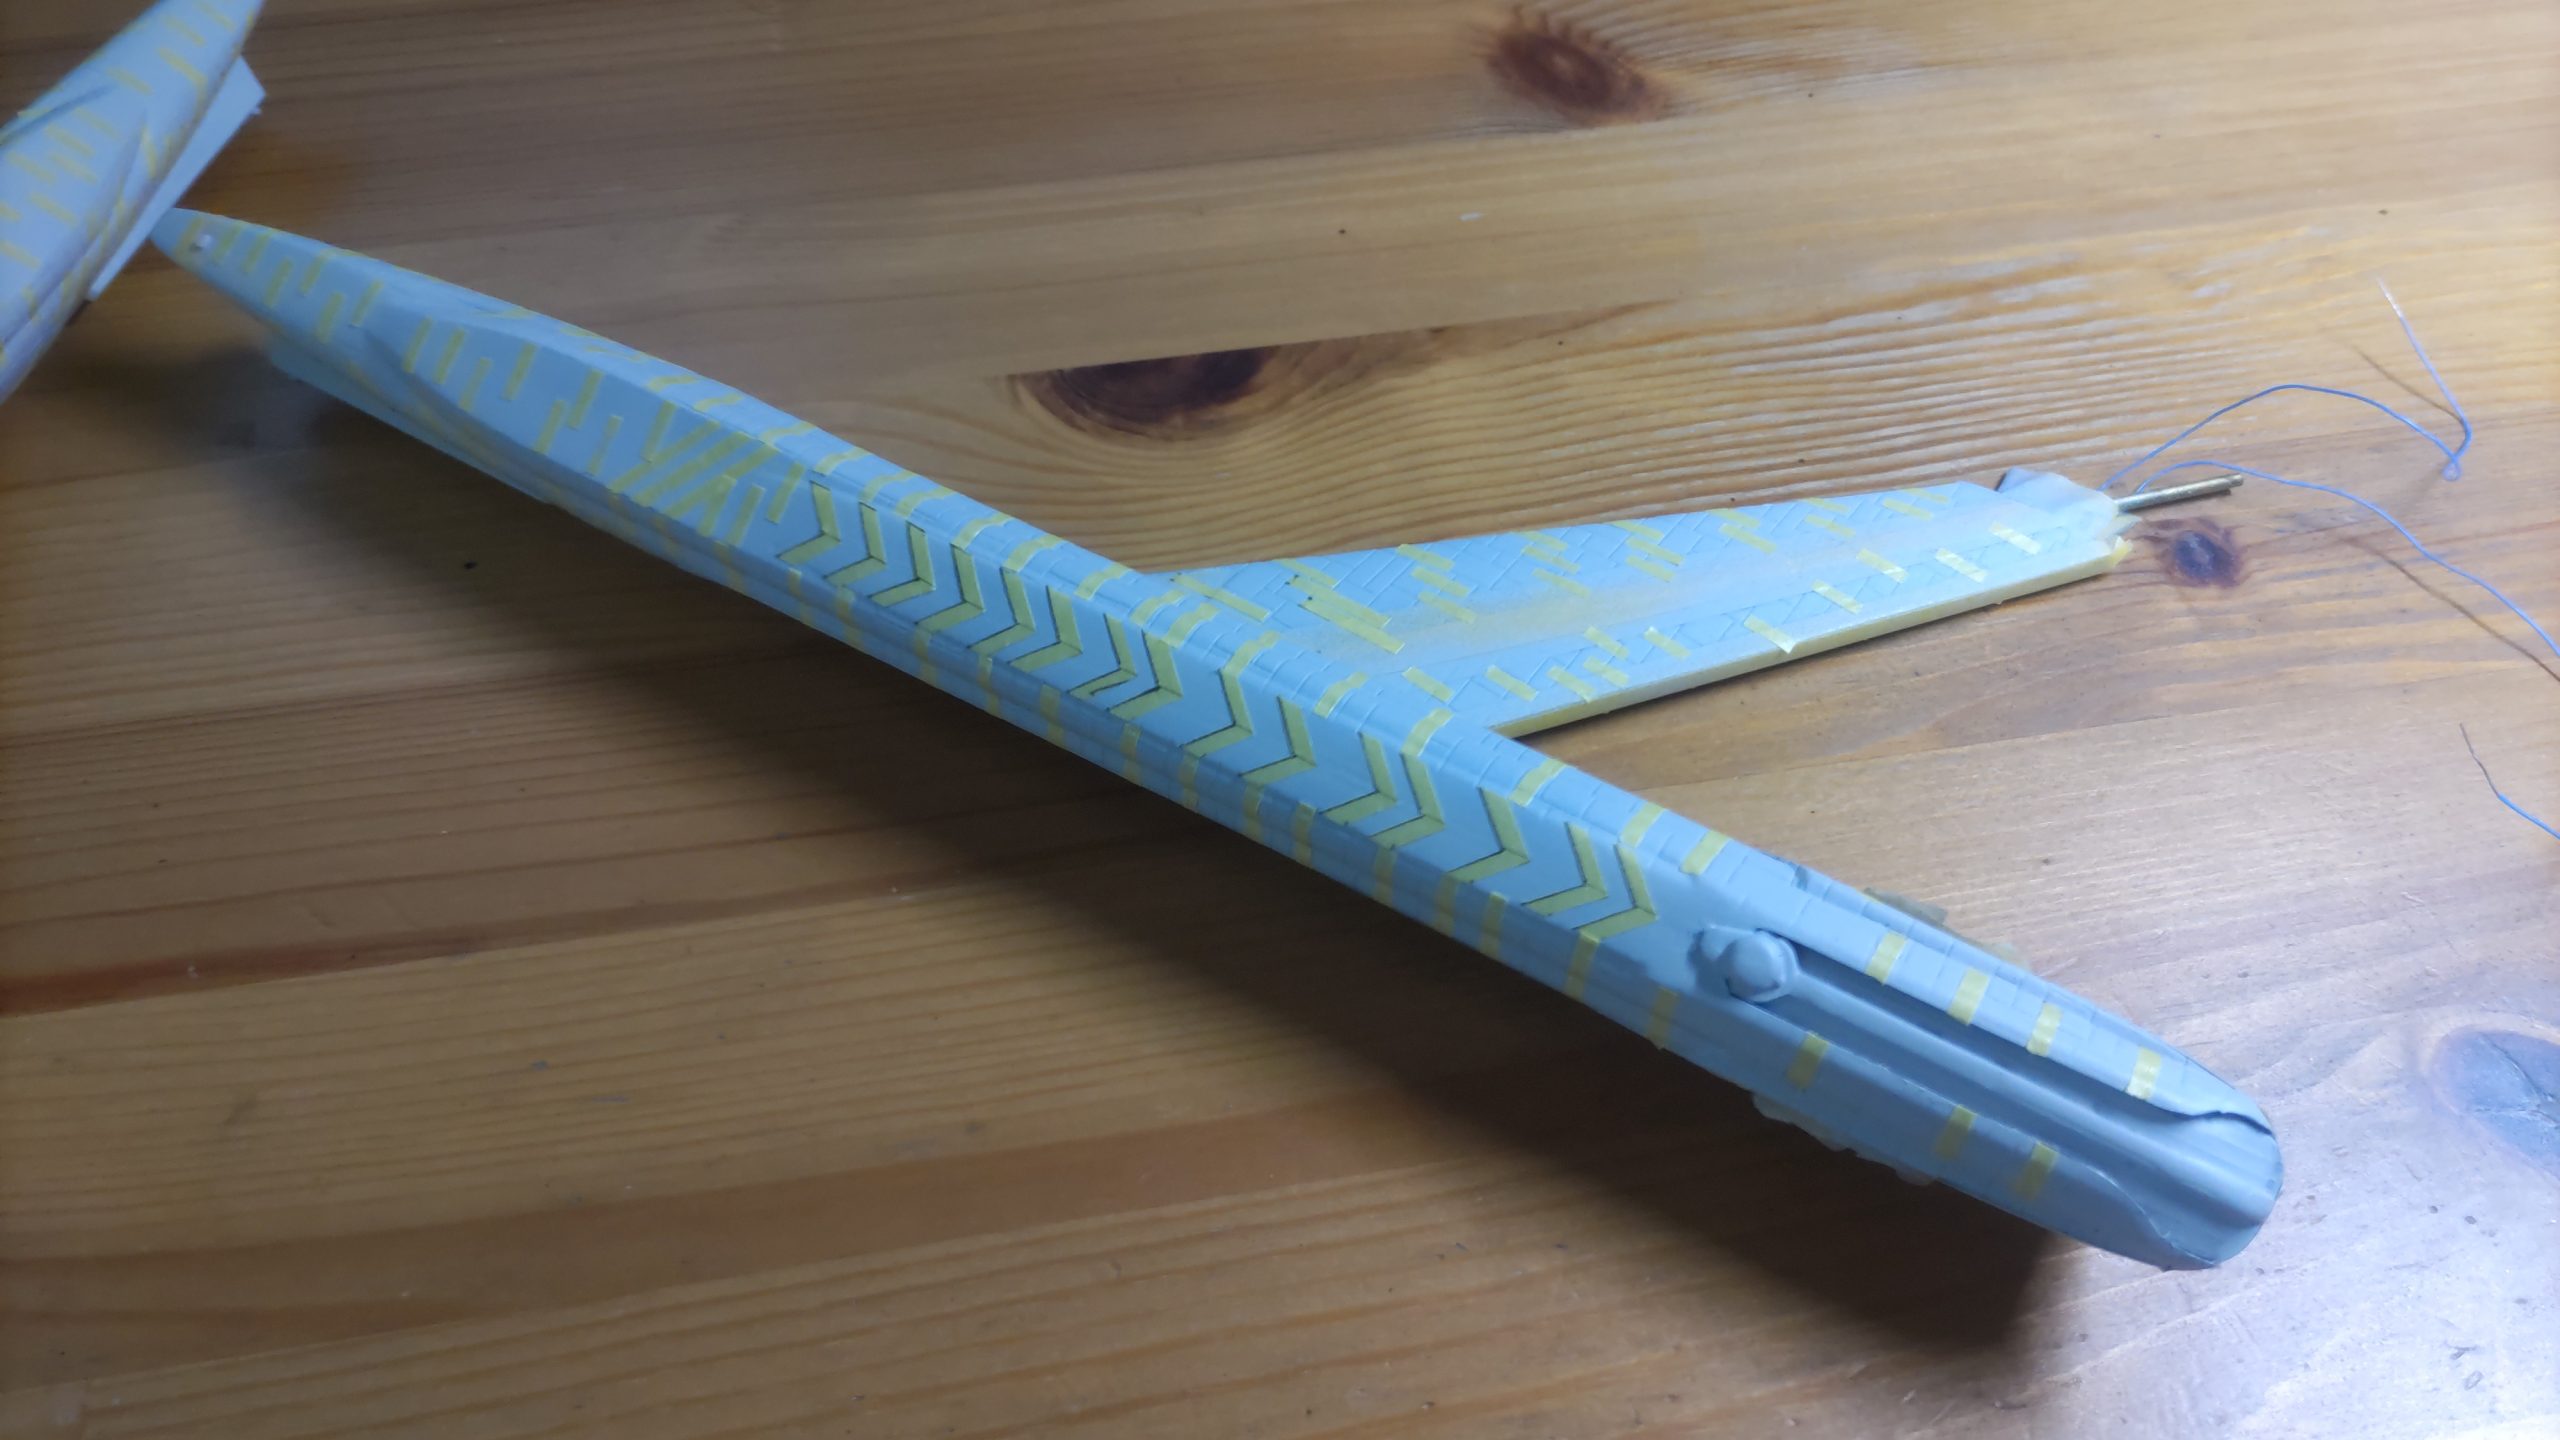
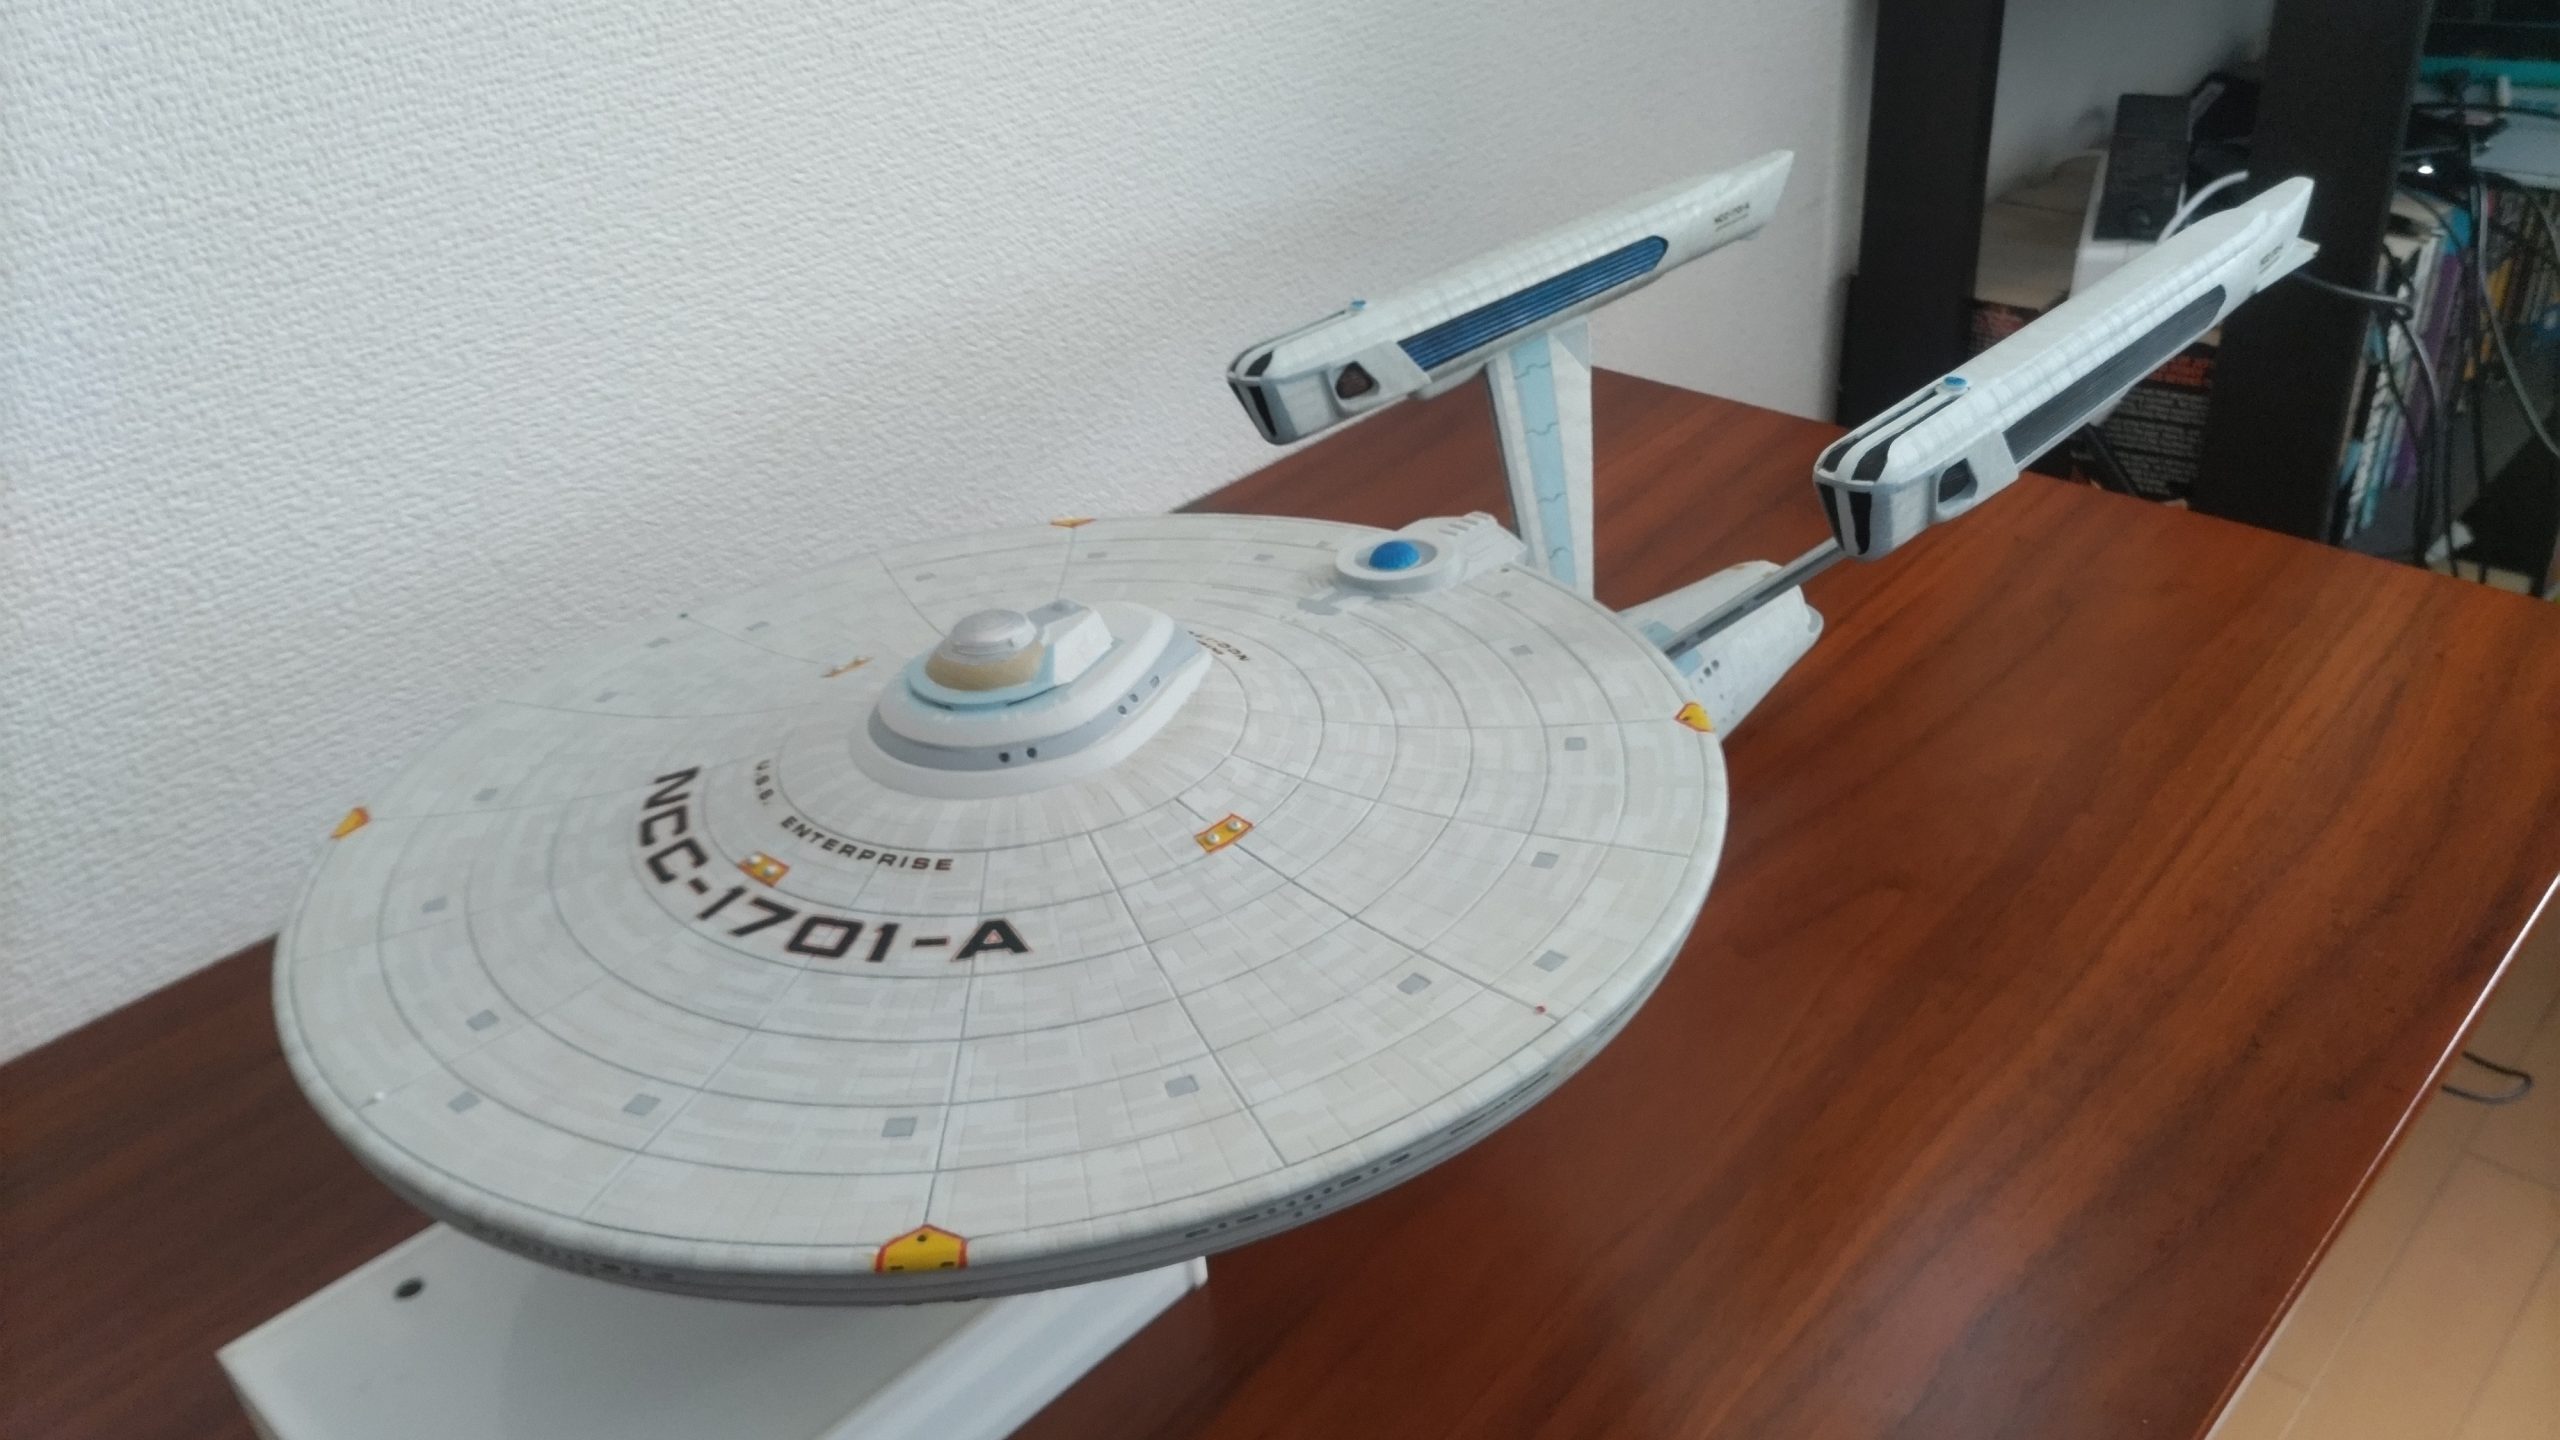
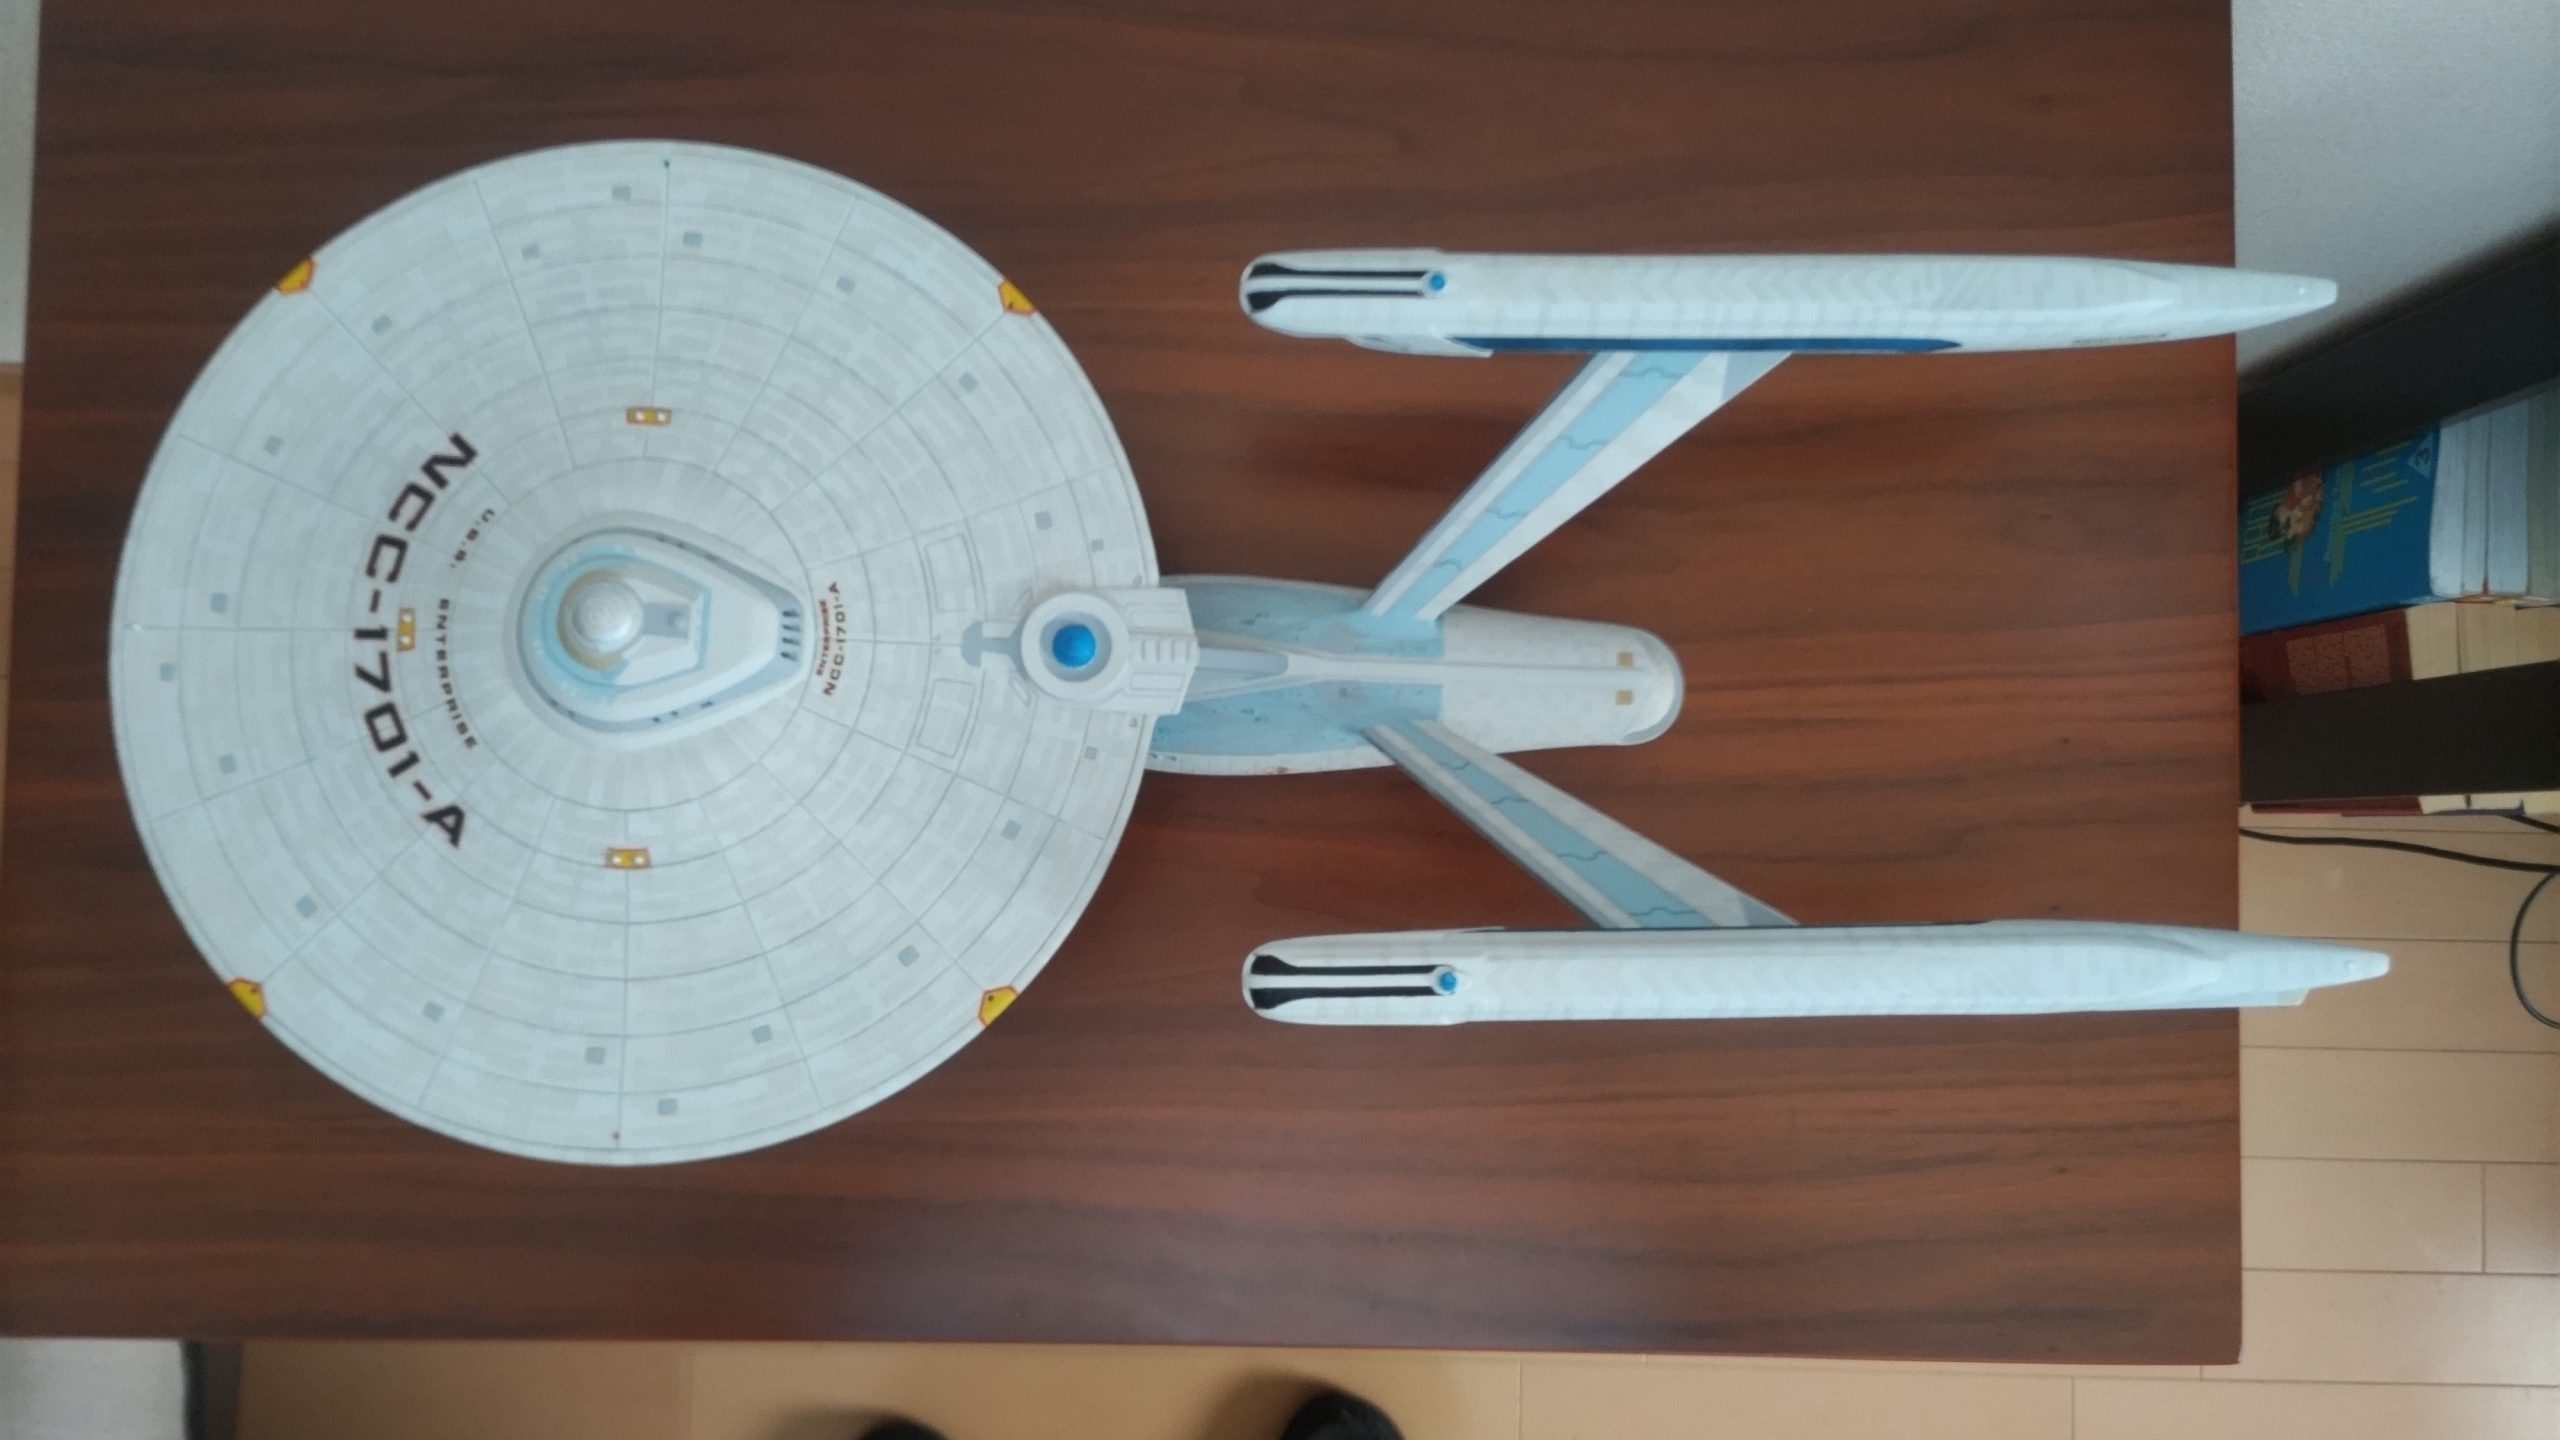
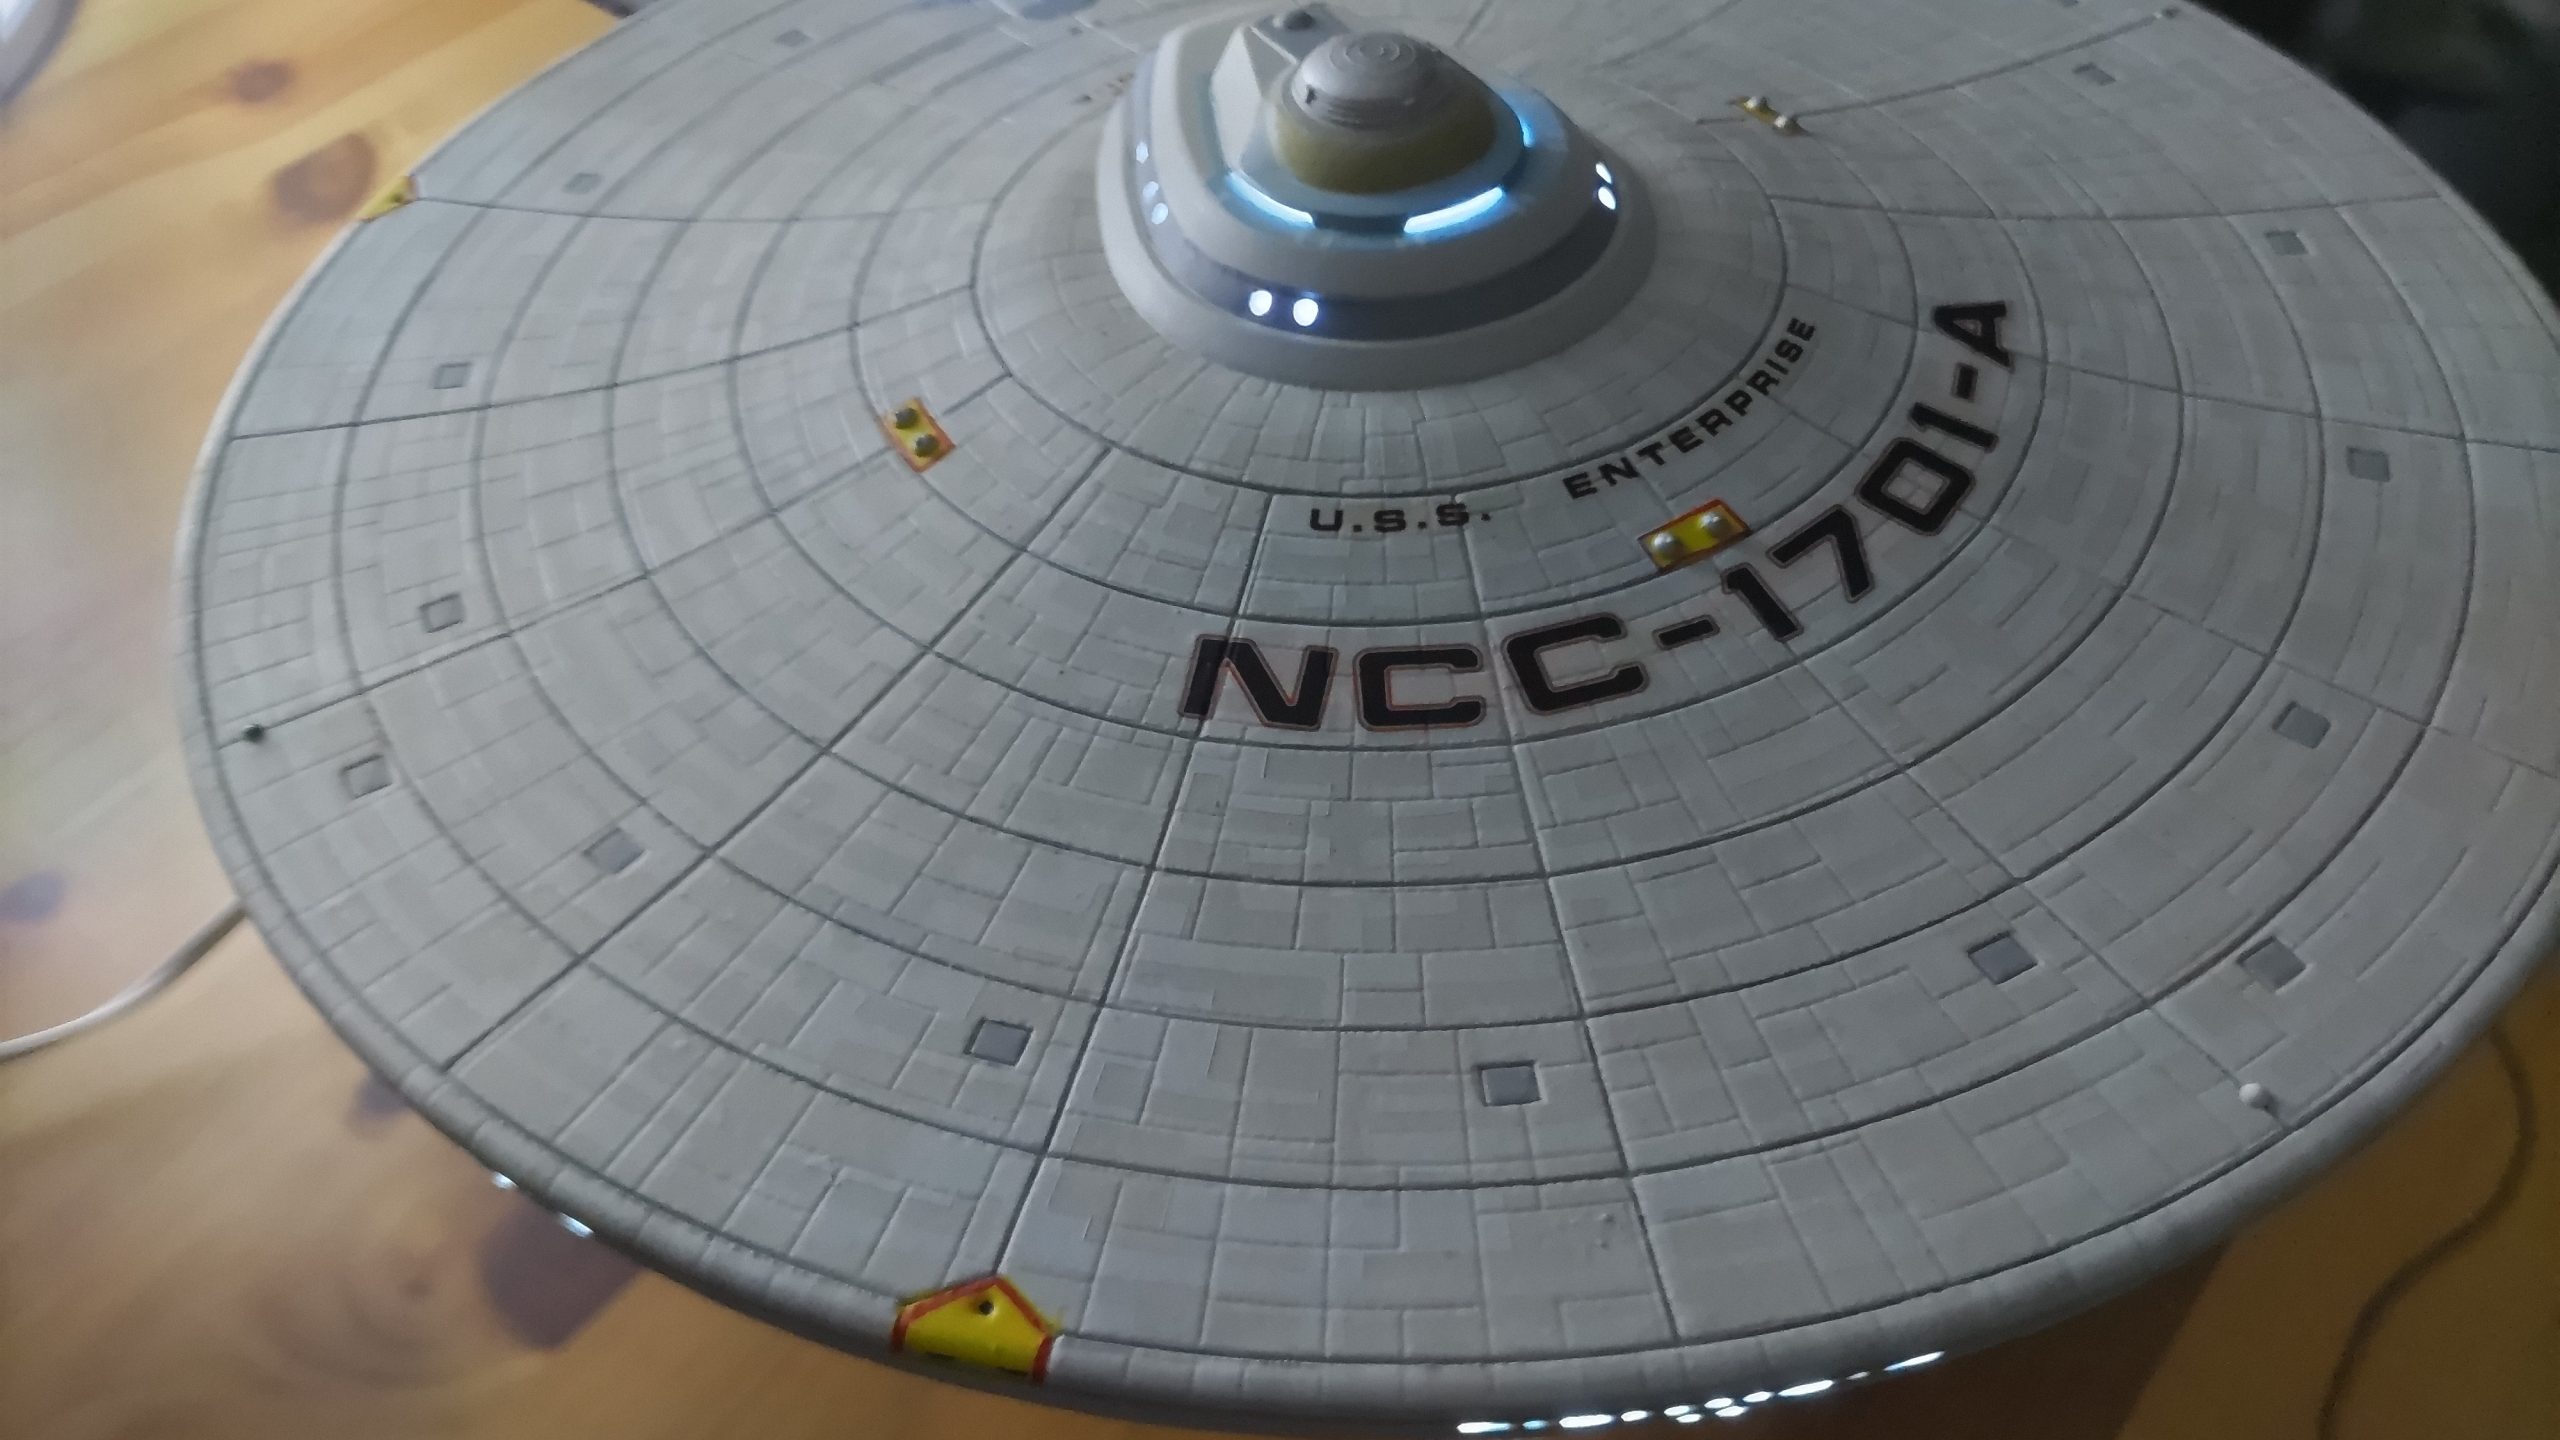
One of the big tricks with the Enterprise, and pretty much most Star Trek Federation ships, is the aztec patterns that are painted on. It’s a bit of razzle dazzle to add a sense of scale to the ships, a subtle rectangular like pattern across the whole ship. To tackle this, I started by masking off the parts that needed to keep the light gray primer as a accent color. Then I painted the rest of the ship with the darker of my two light gray colors, as the ‘highlight color’ of the aztecs. Then came a lot of tape masking. The main hull, pylons and nacelles are mostly done with patterns of hand cut 2mm and 3mm Tamiya tape.
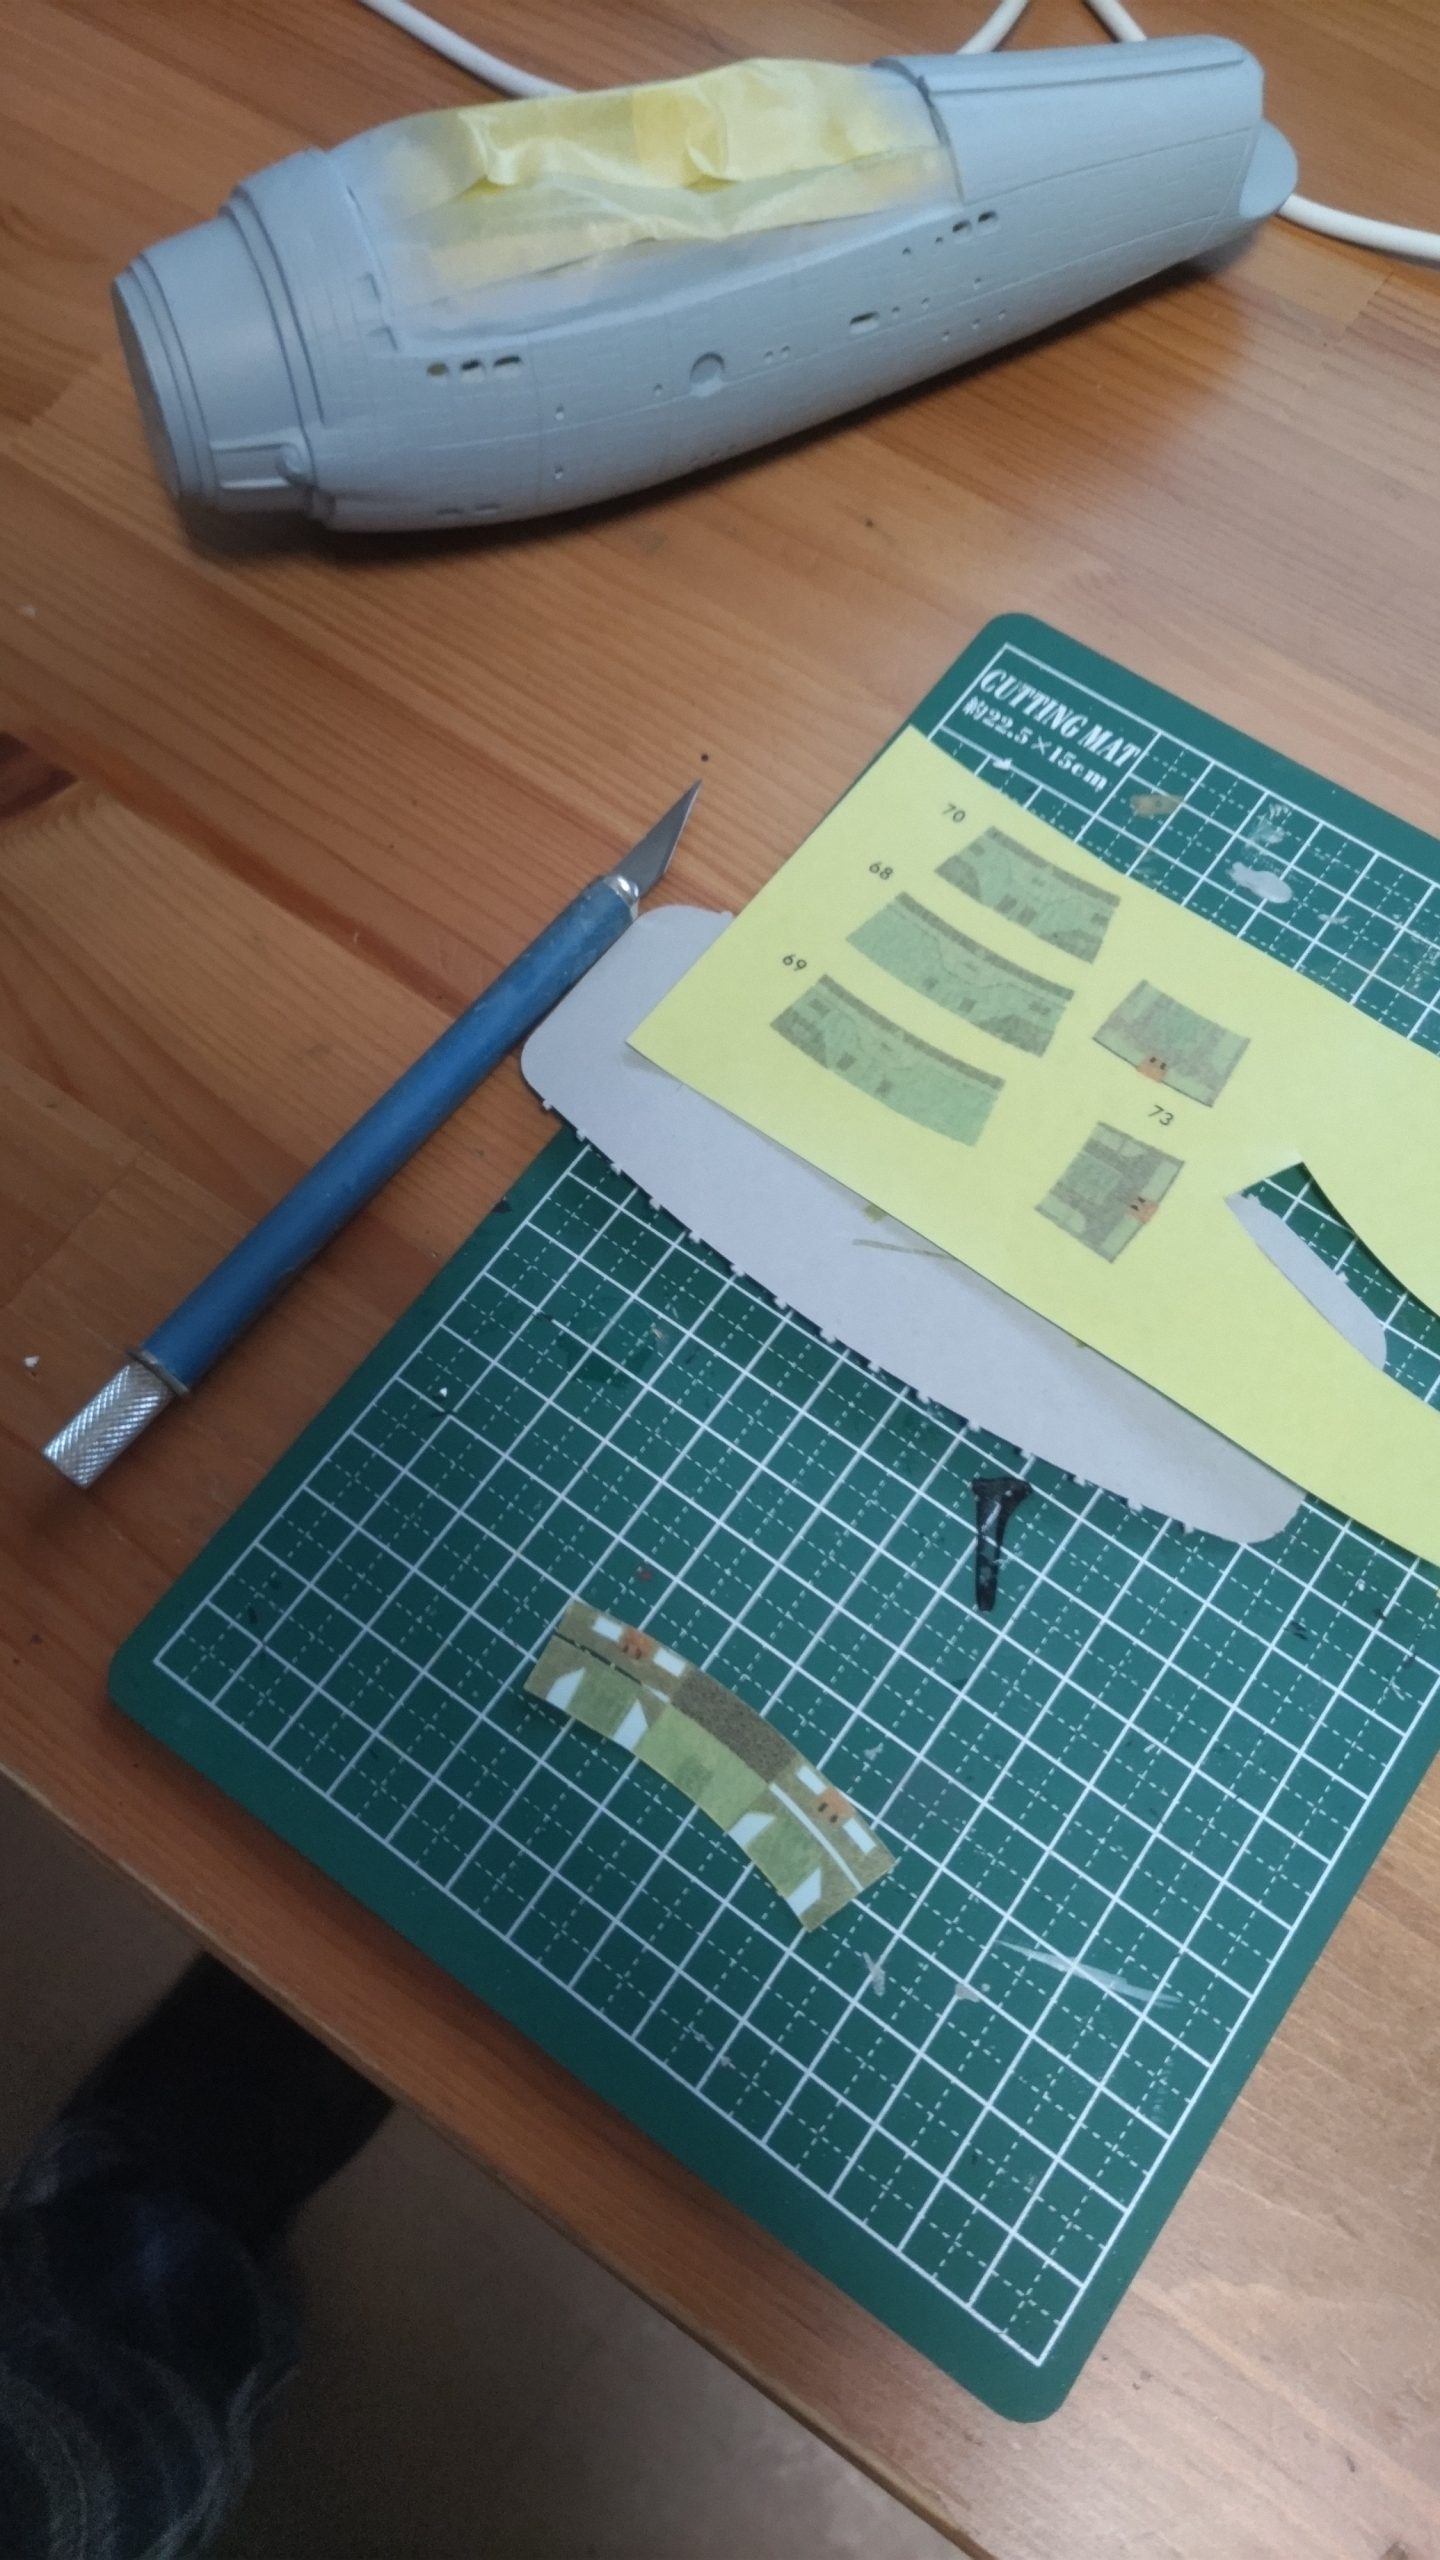
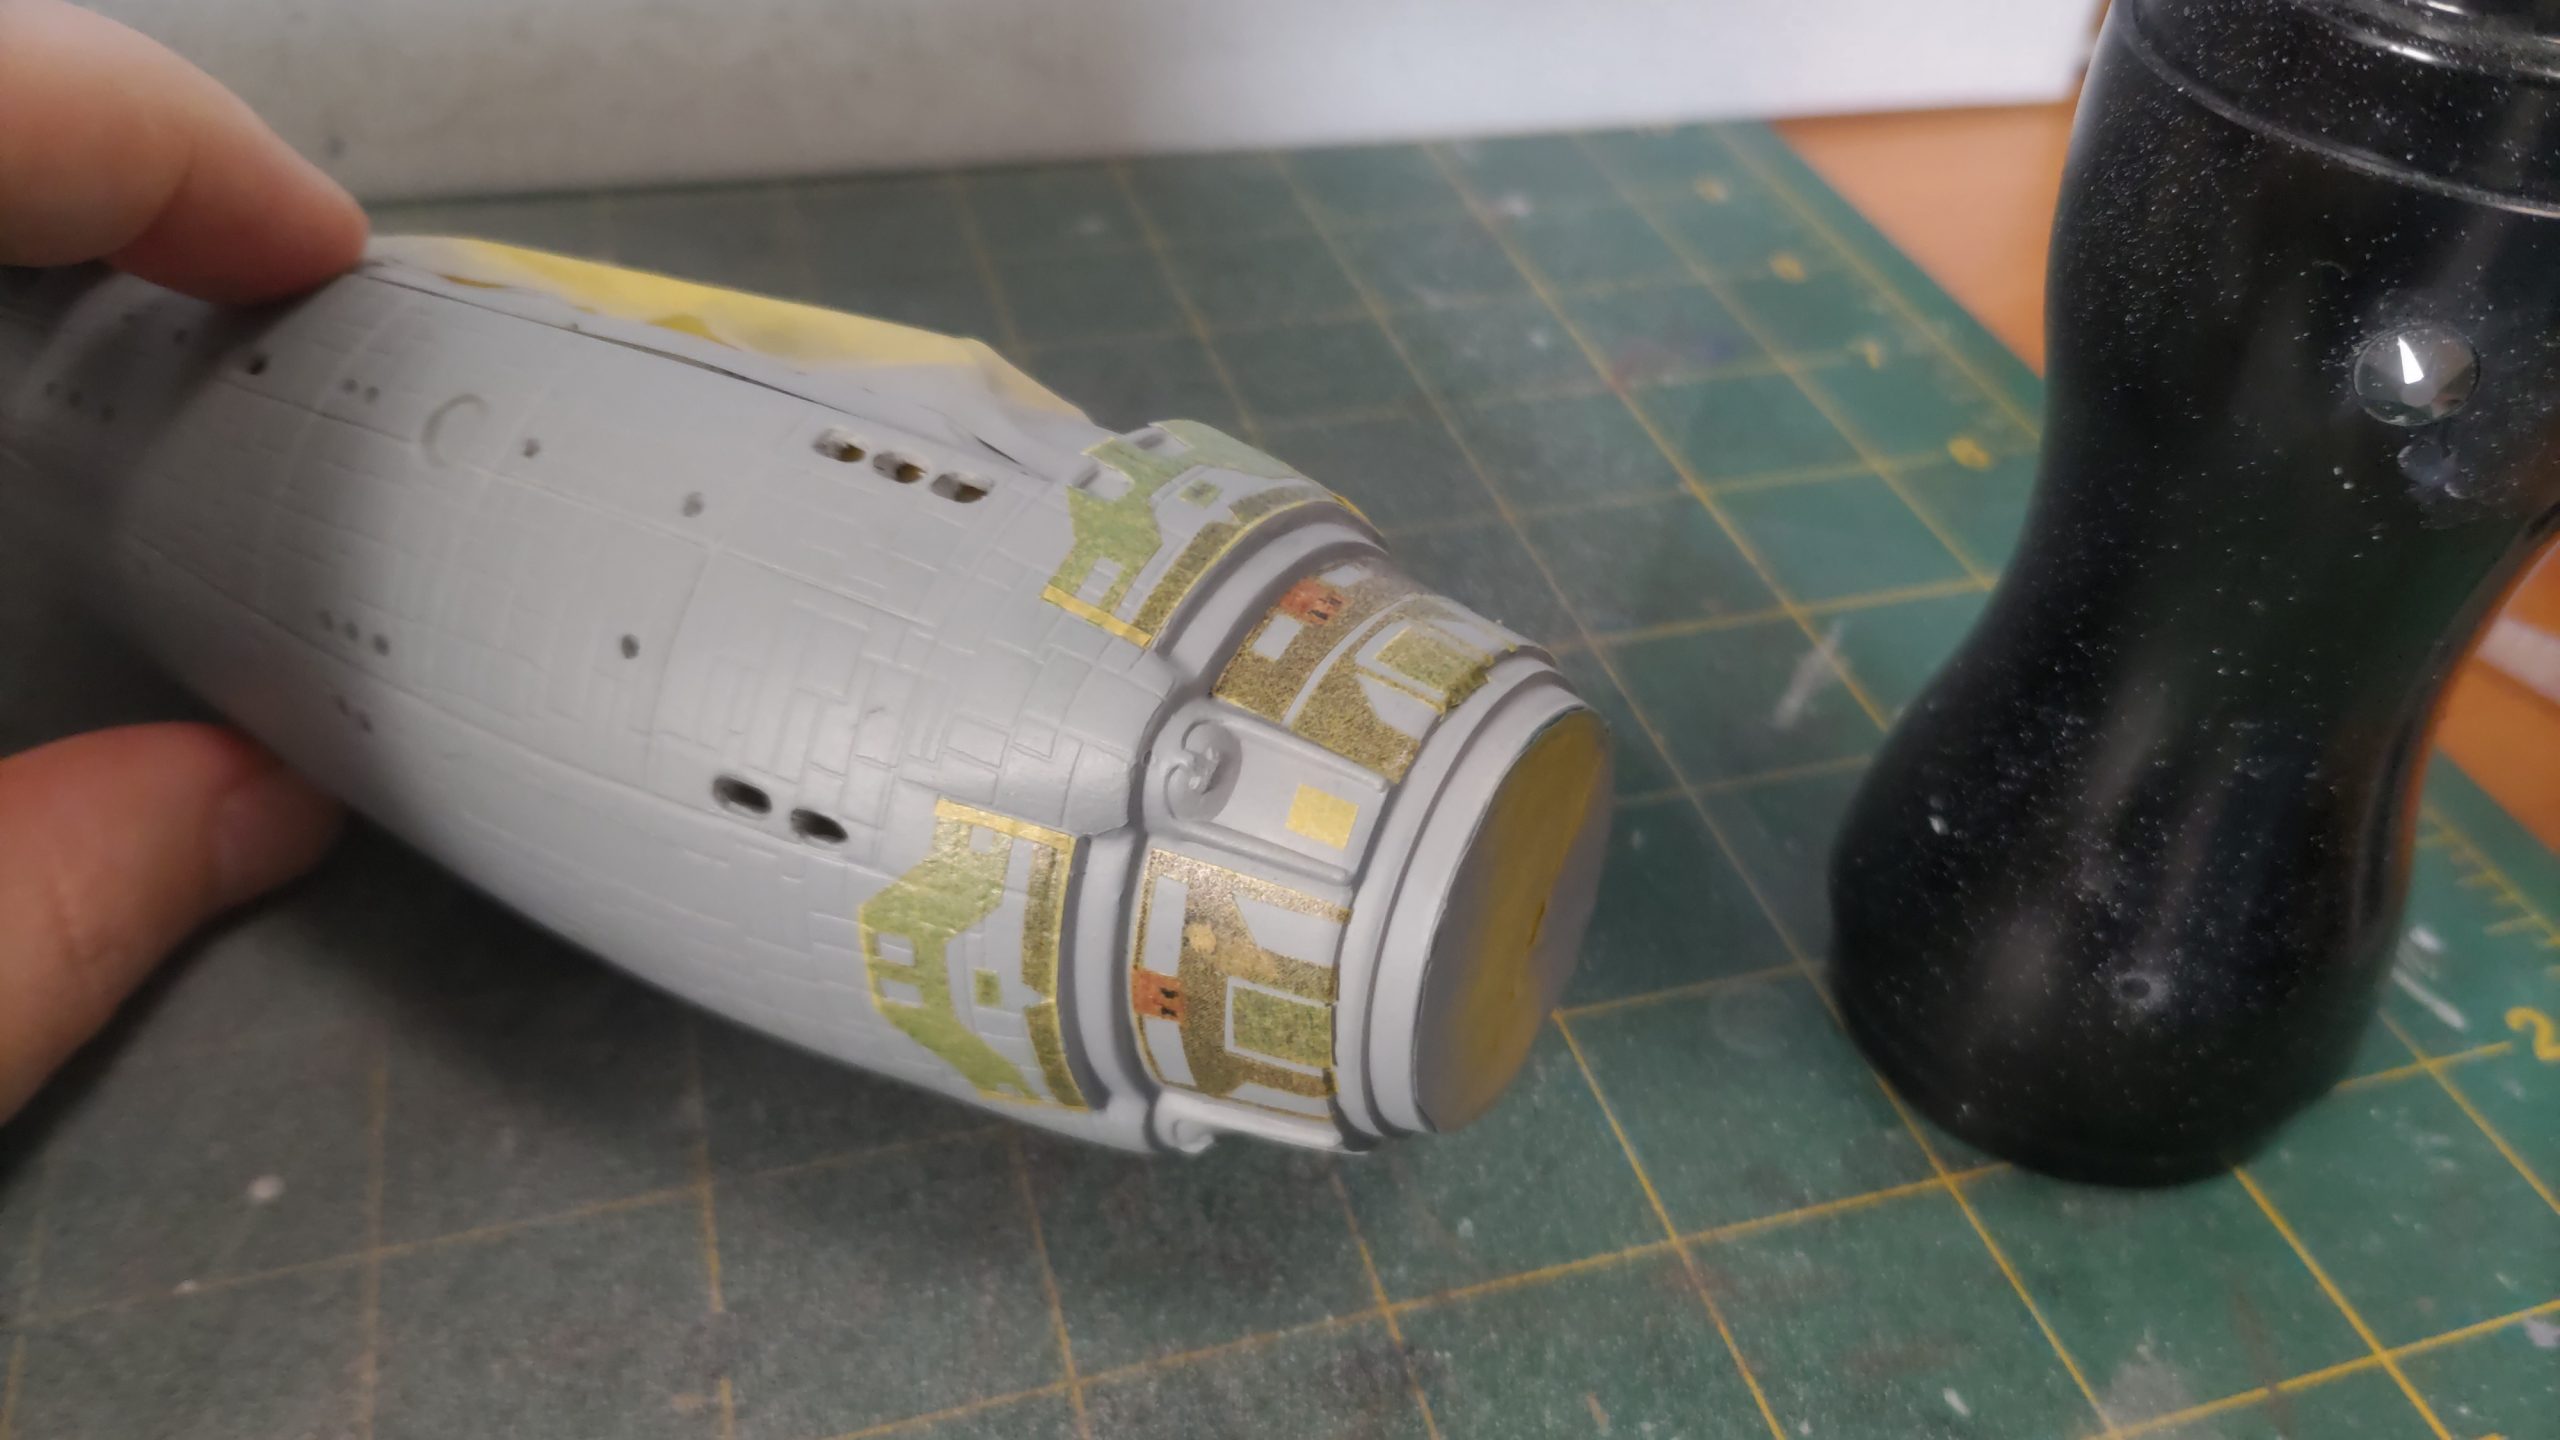
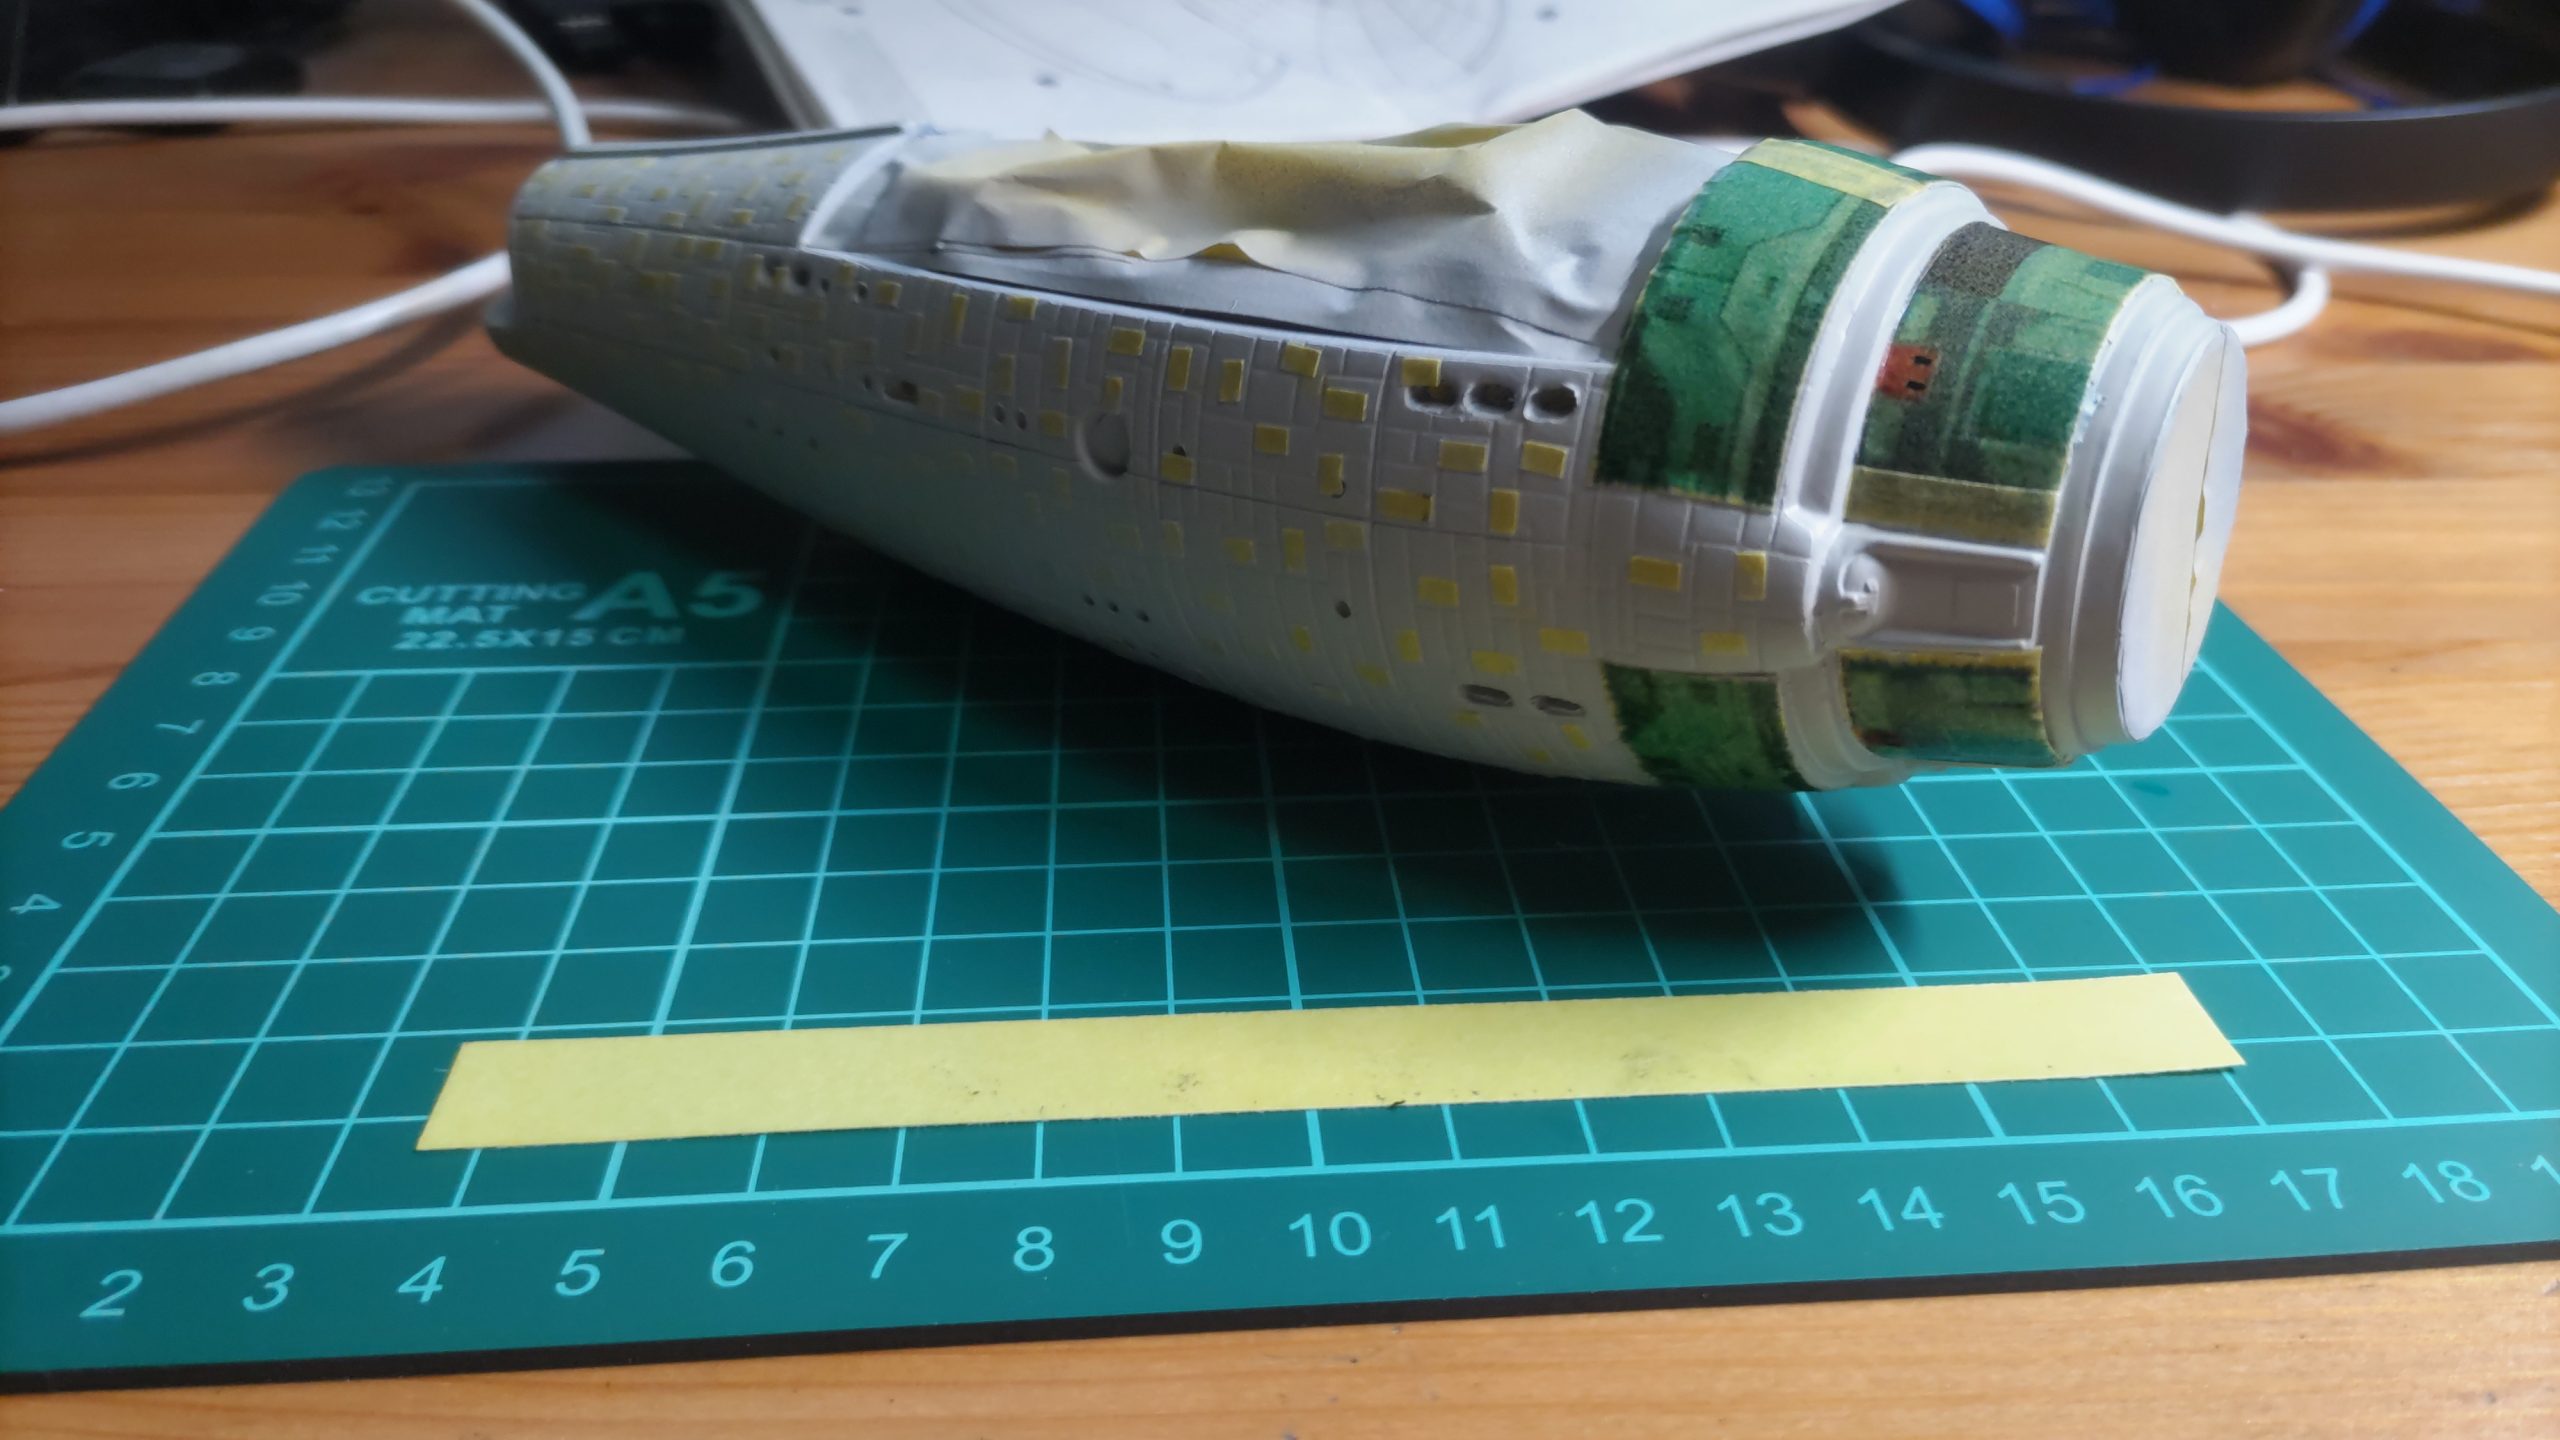
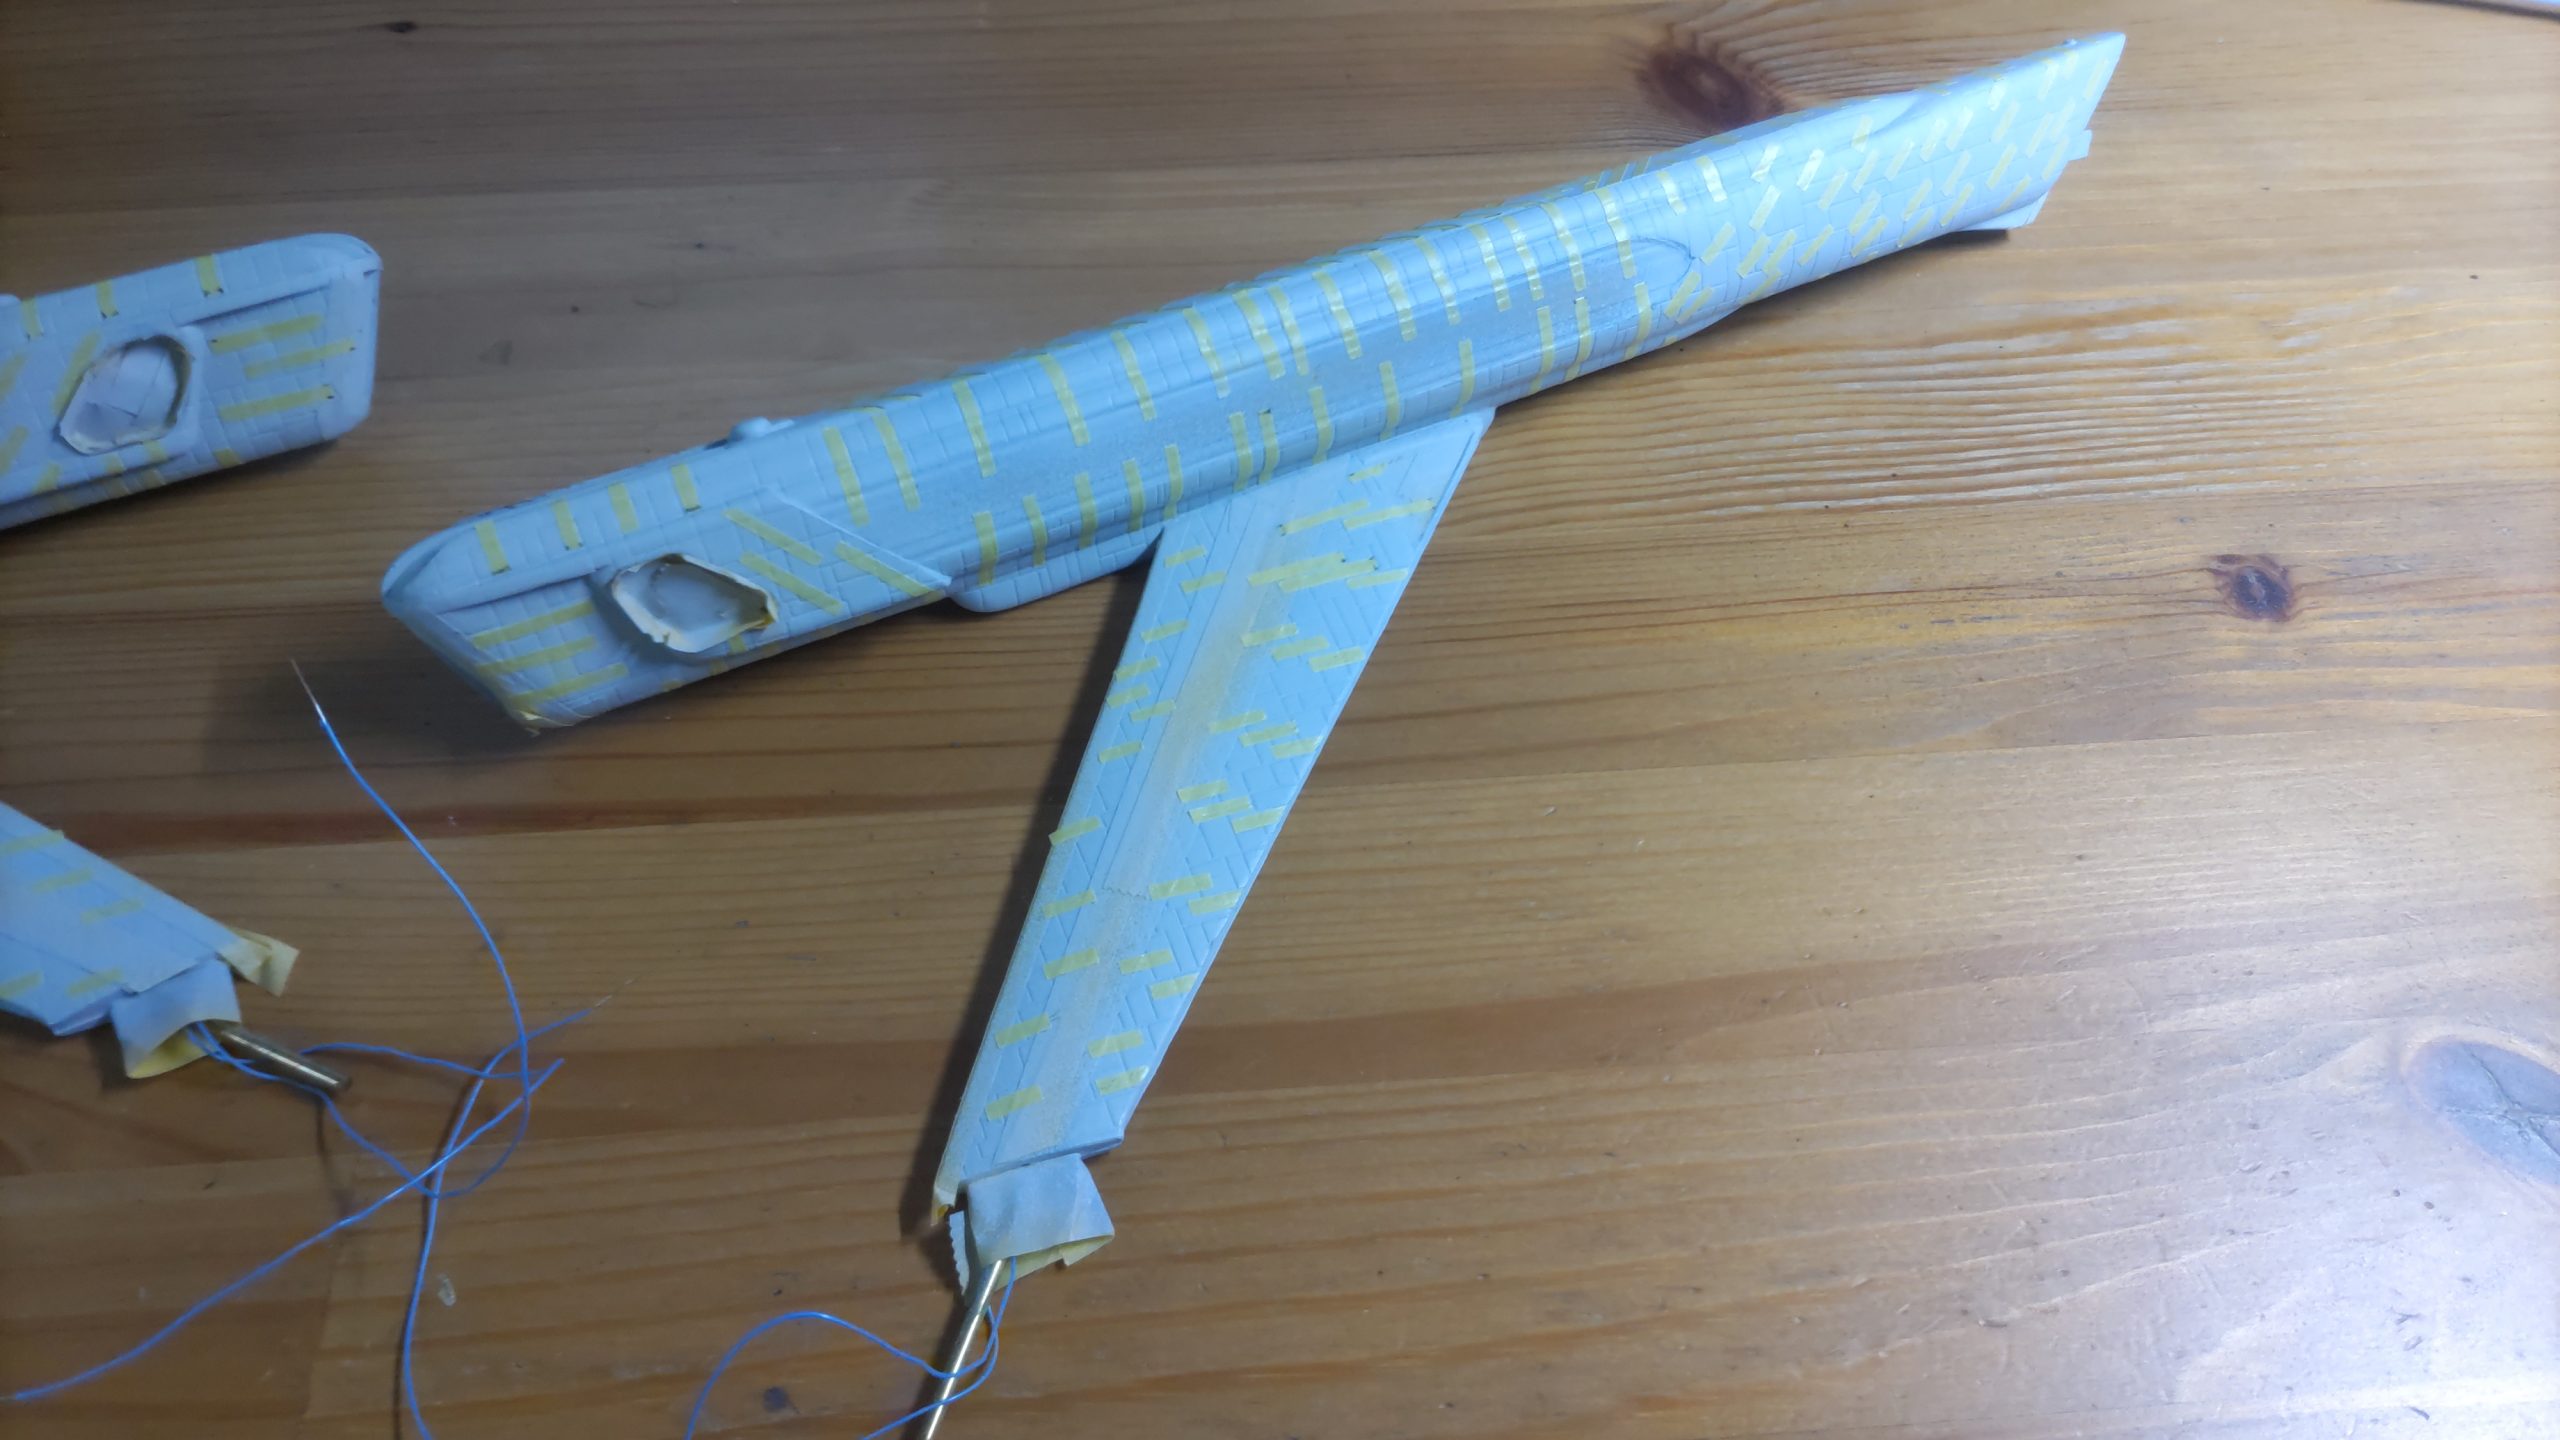
The strongback and nose of the engineering section have a different set of patterns. In all of those cases, I copied decals from the 1/1000 USS Enterprise refit model I have and then printed them out onto Tamiya sticker paper. I did have an issue with the ink from the printer not quite binding with the paper, even after having been left to dry for days. I fixed that by spraying a thin coat of gloss varnish over all of the sheets. It did bleed in some spots, but there was still enough of a pattern that I could use it to cut out the patterns.
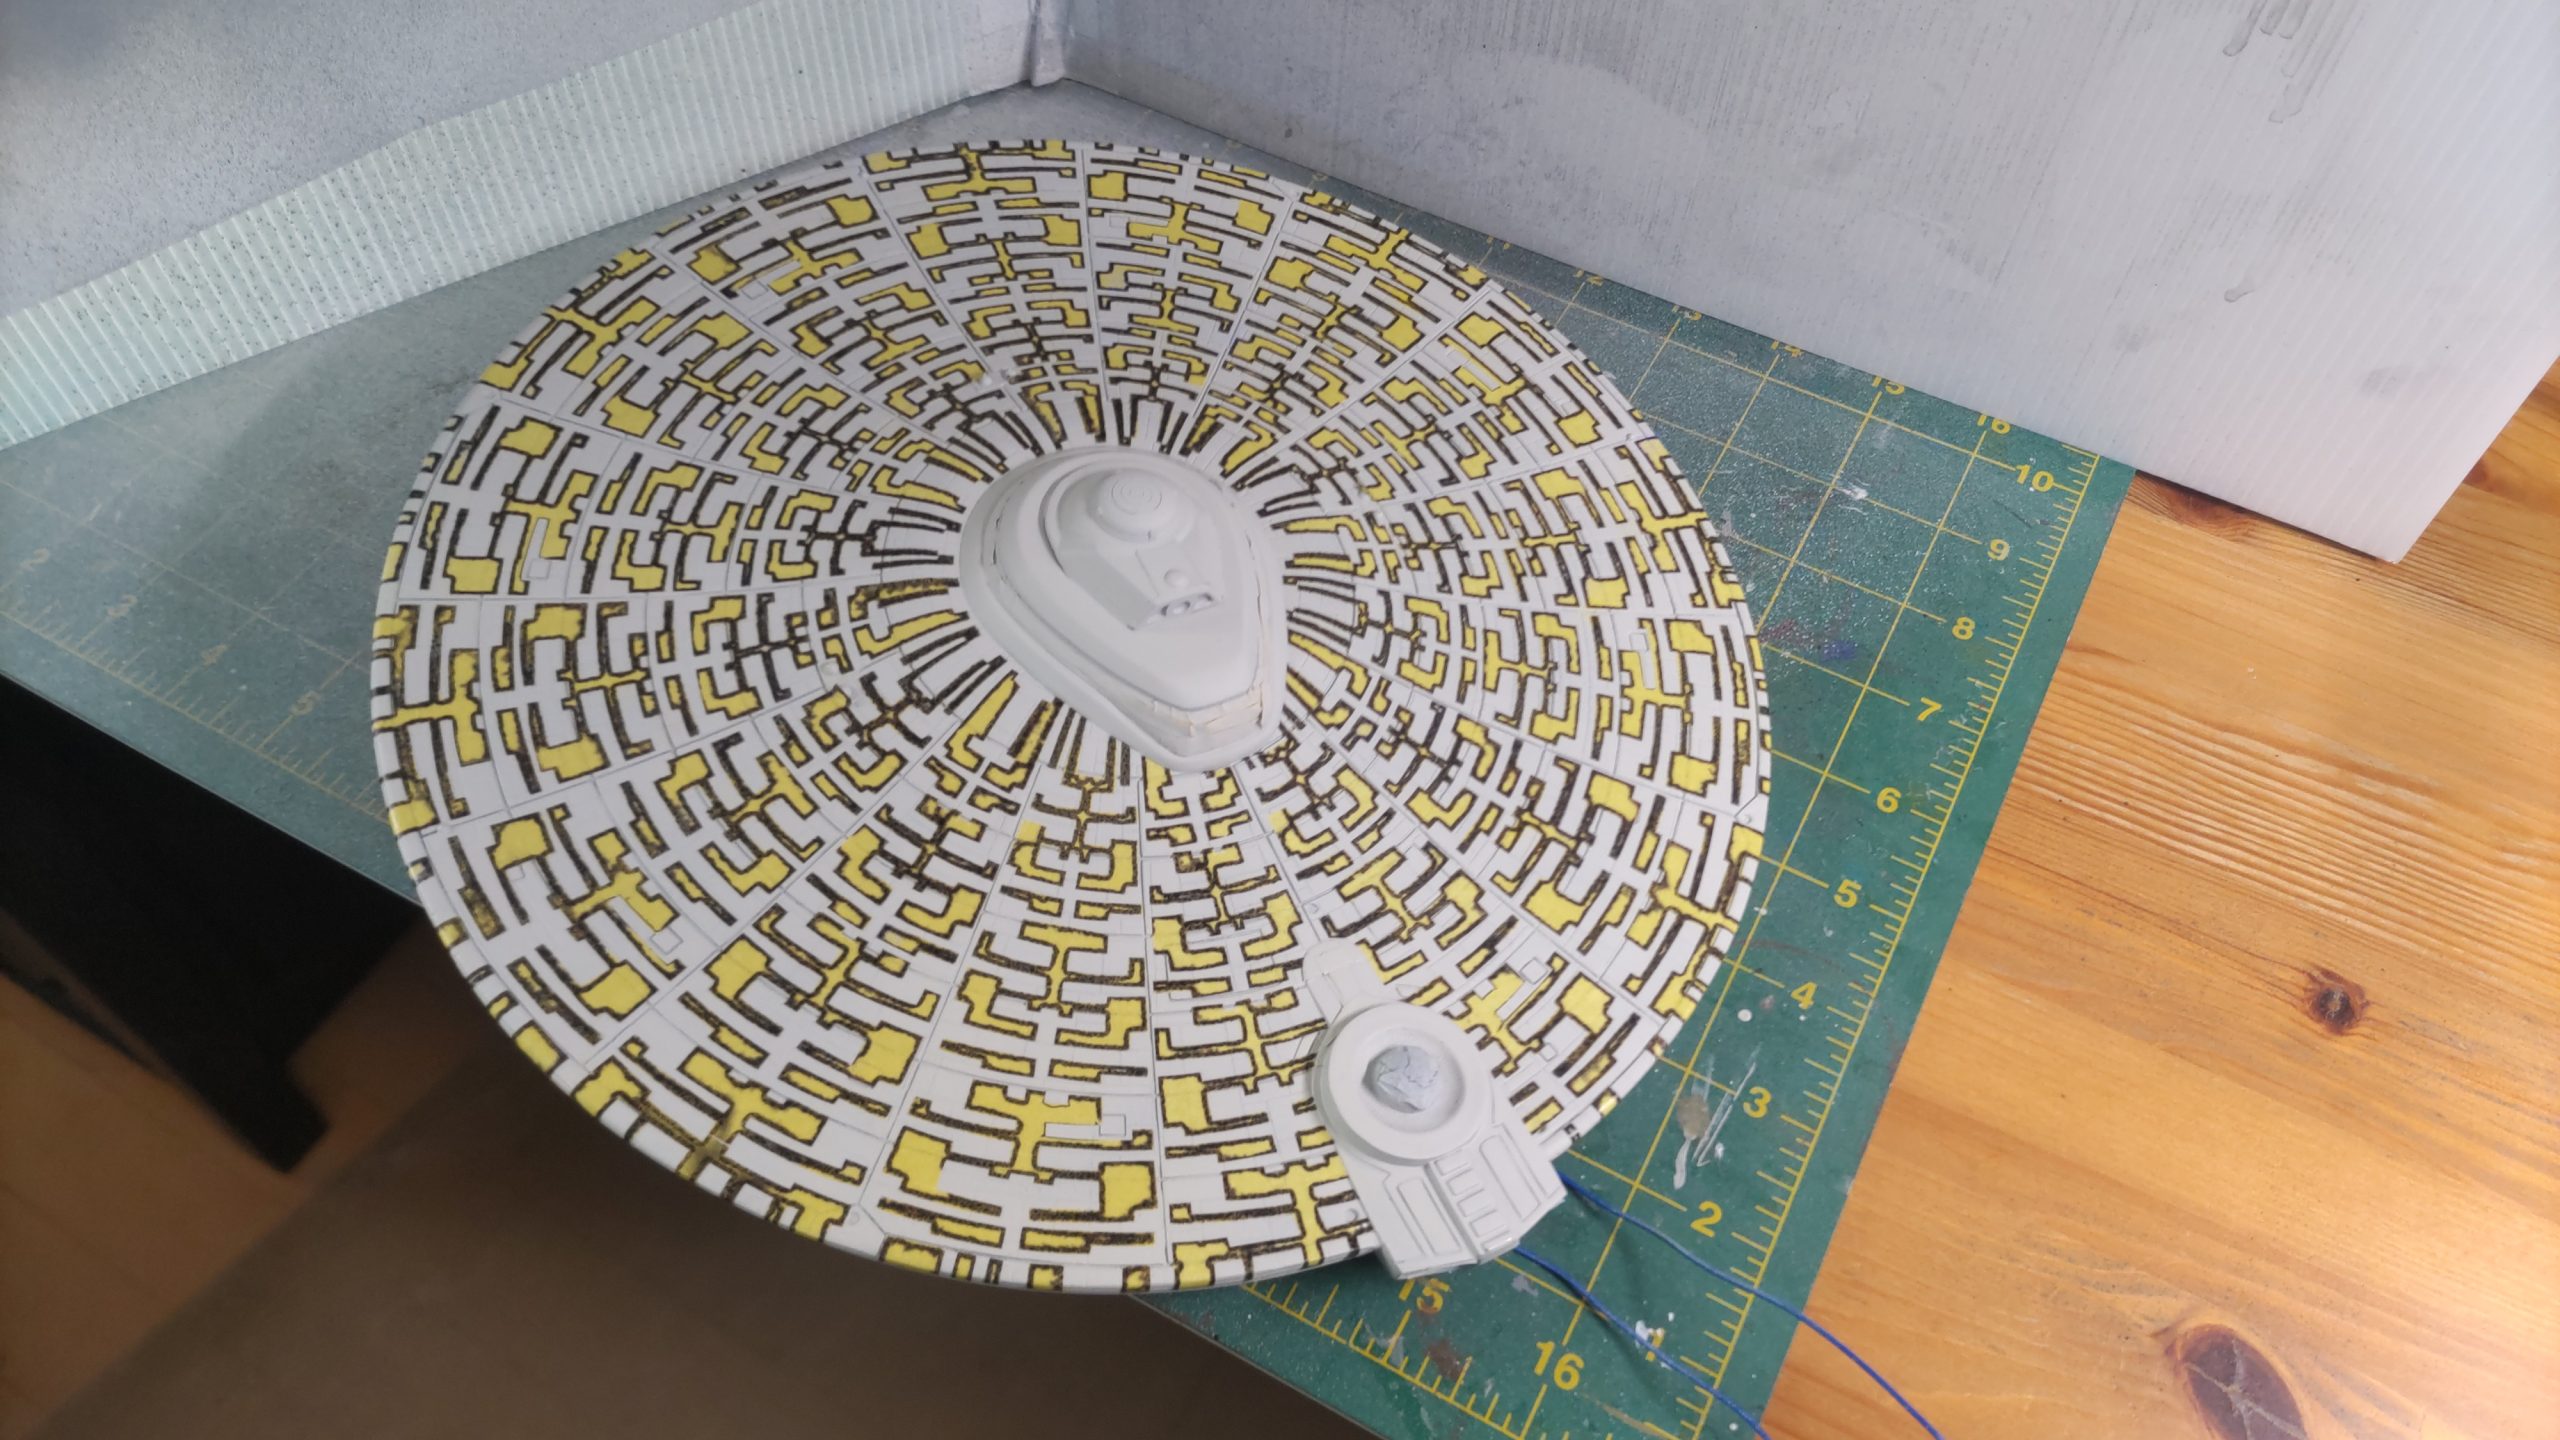
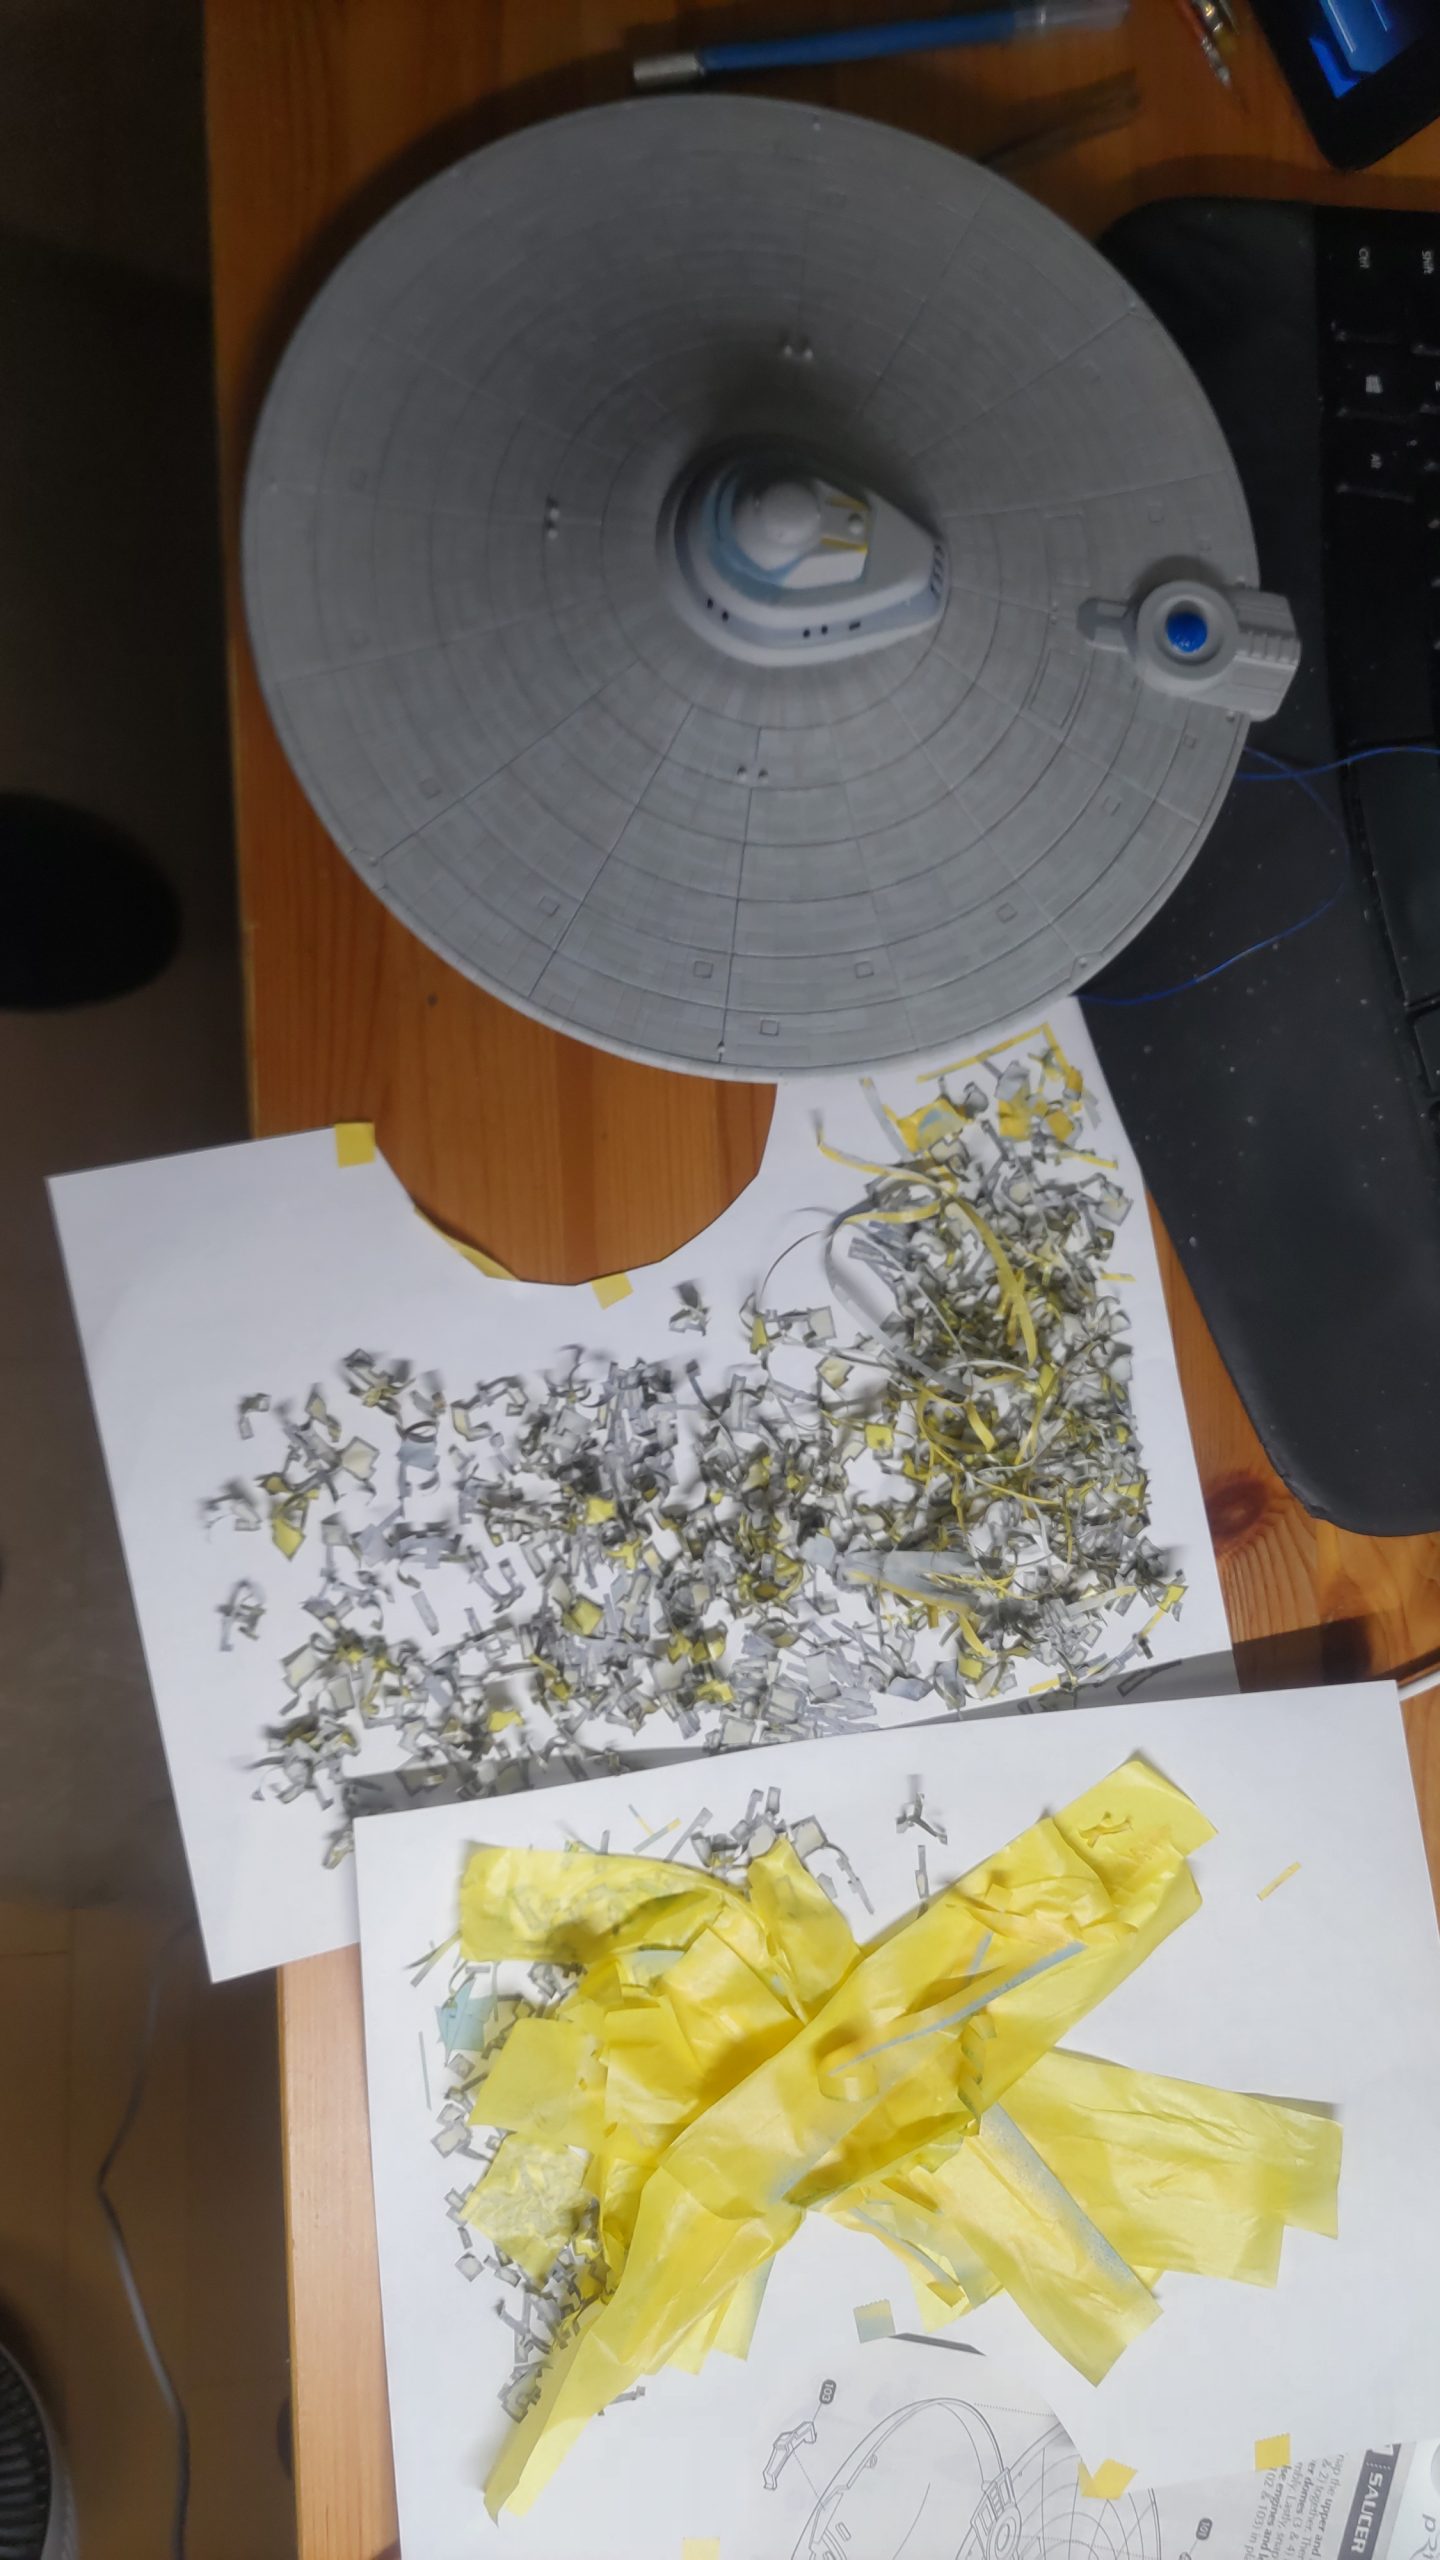
So, after that, a lot of cutting out of the patterns and applying them to the kit and a final coat of the lighter gray to finish off the work. There is little as satisfying as removing so much masking material and finally seeing the result of all that work come out just like you planned.


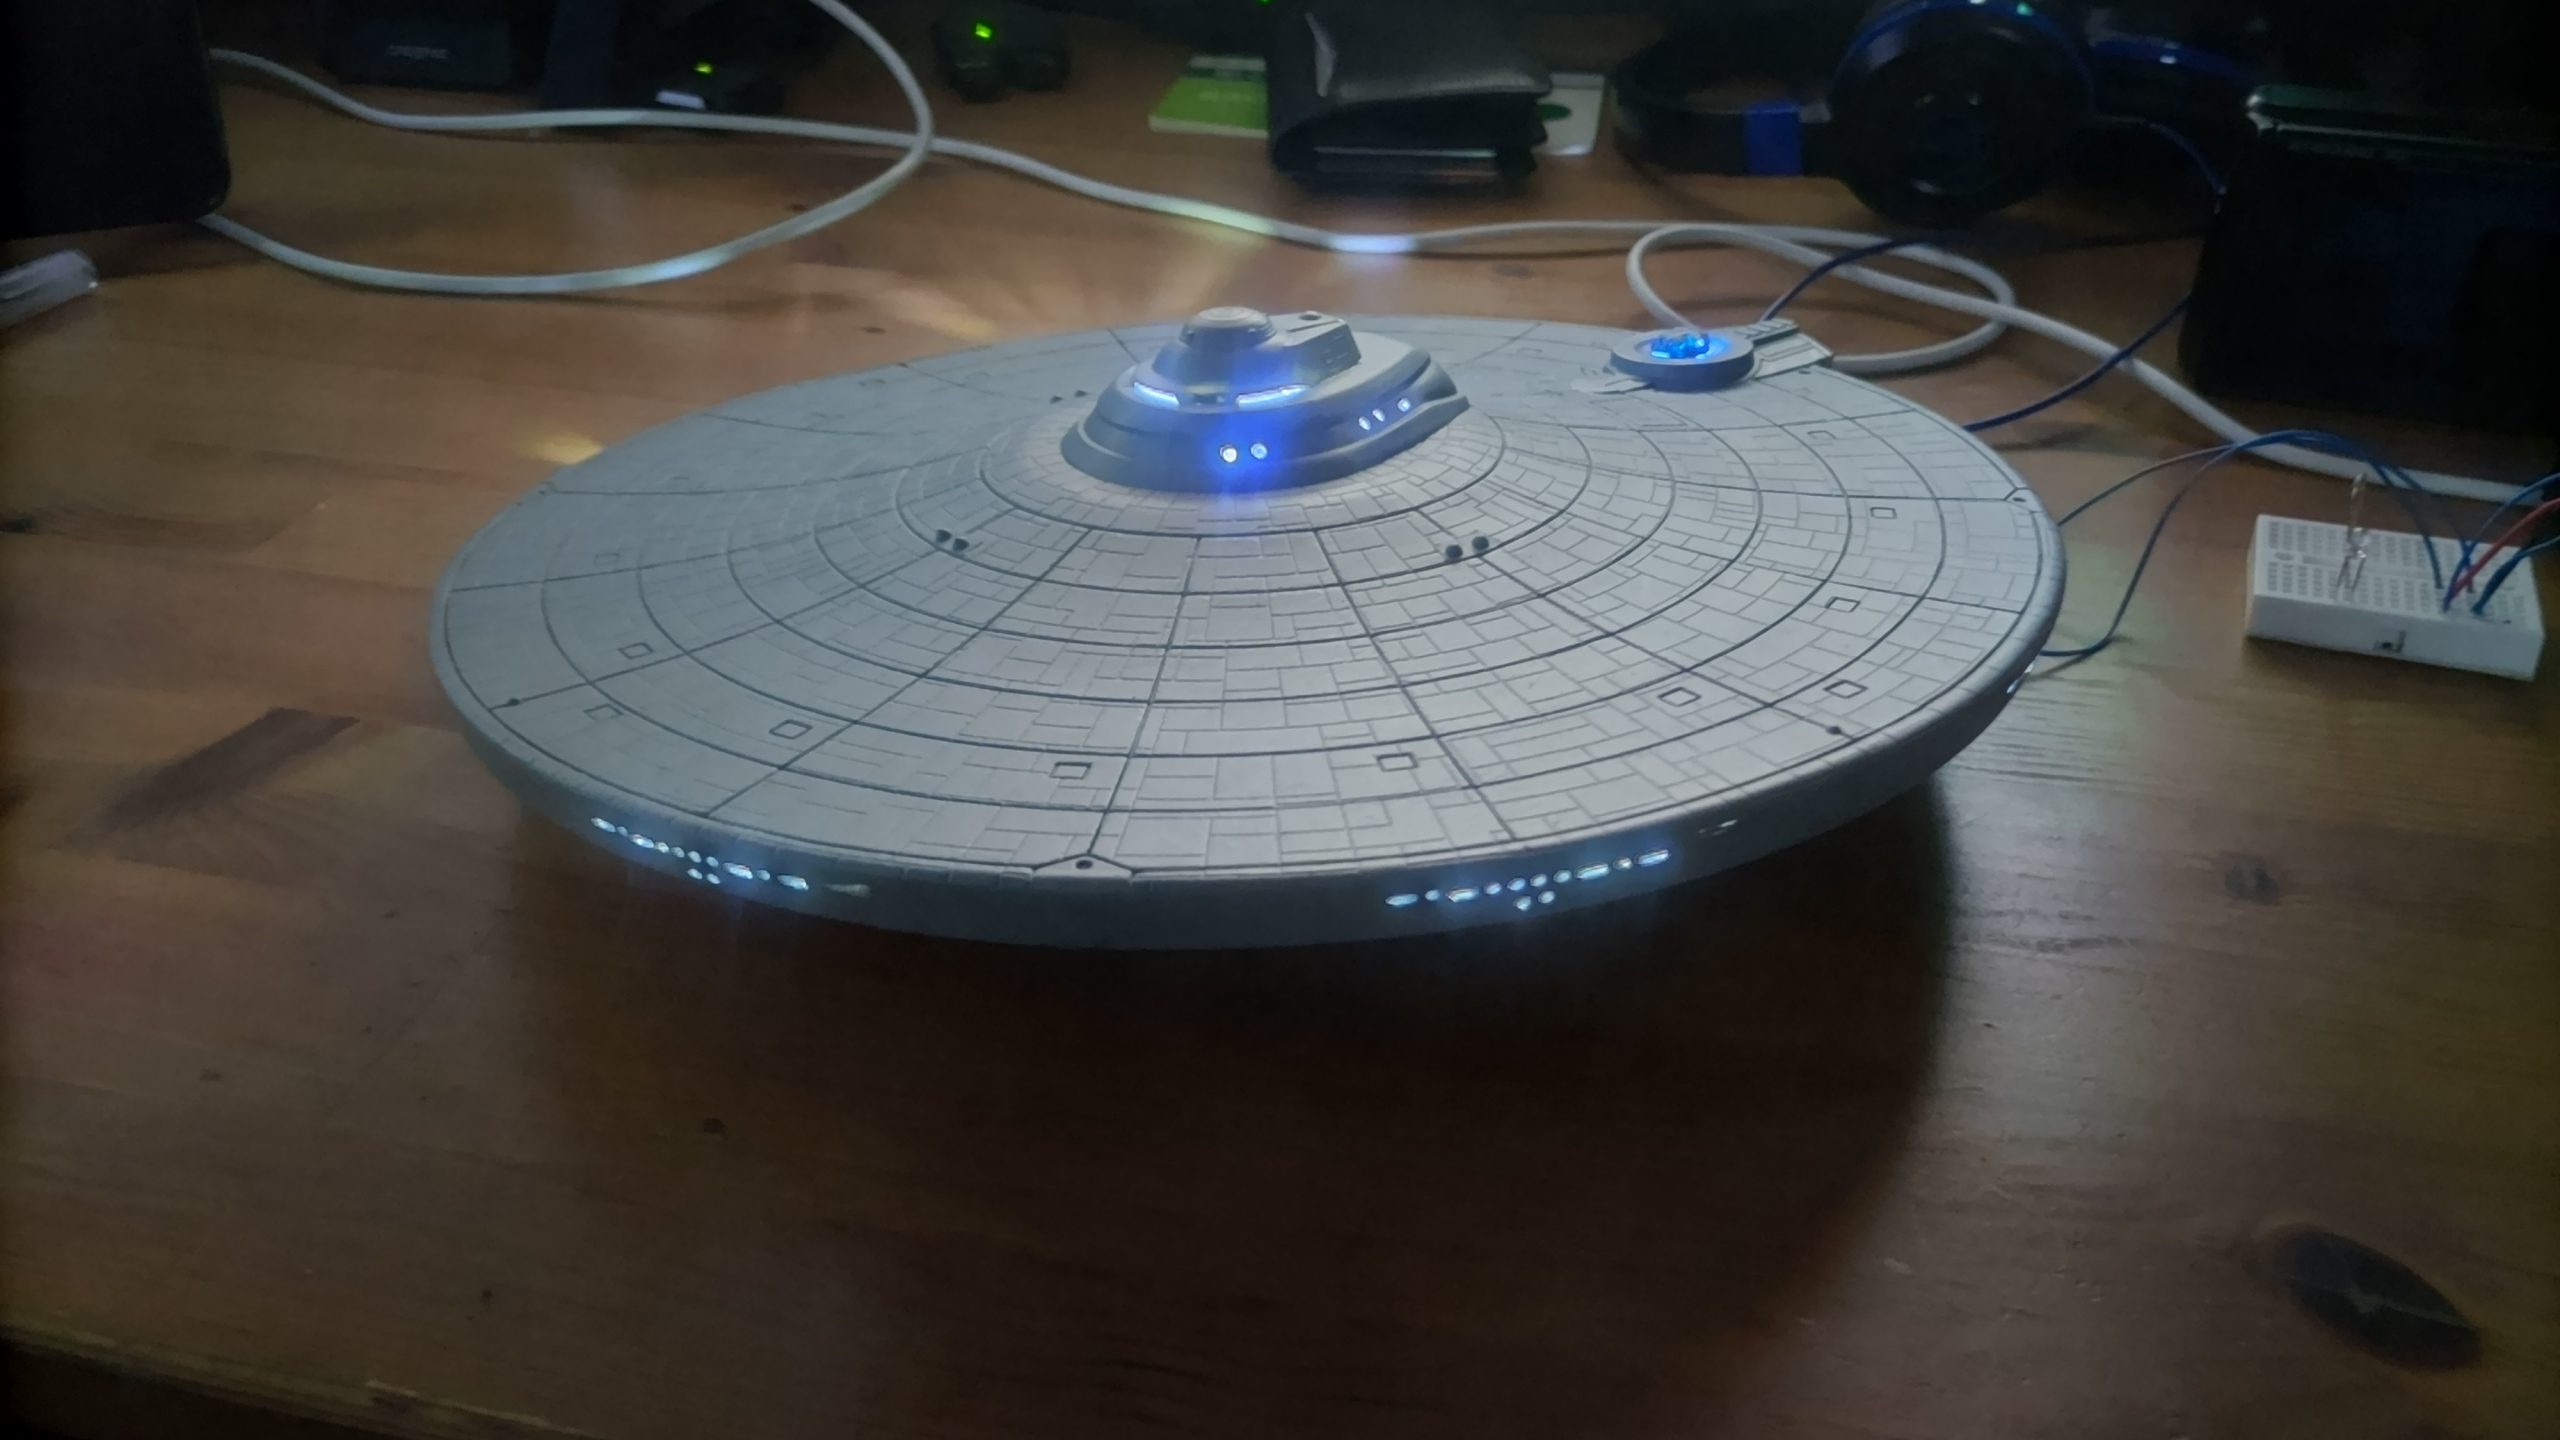
Final assembly and light testing
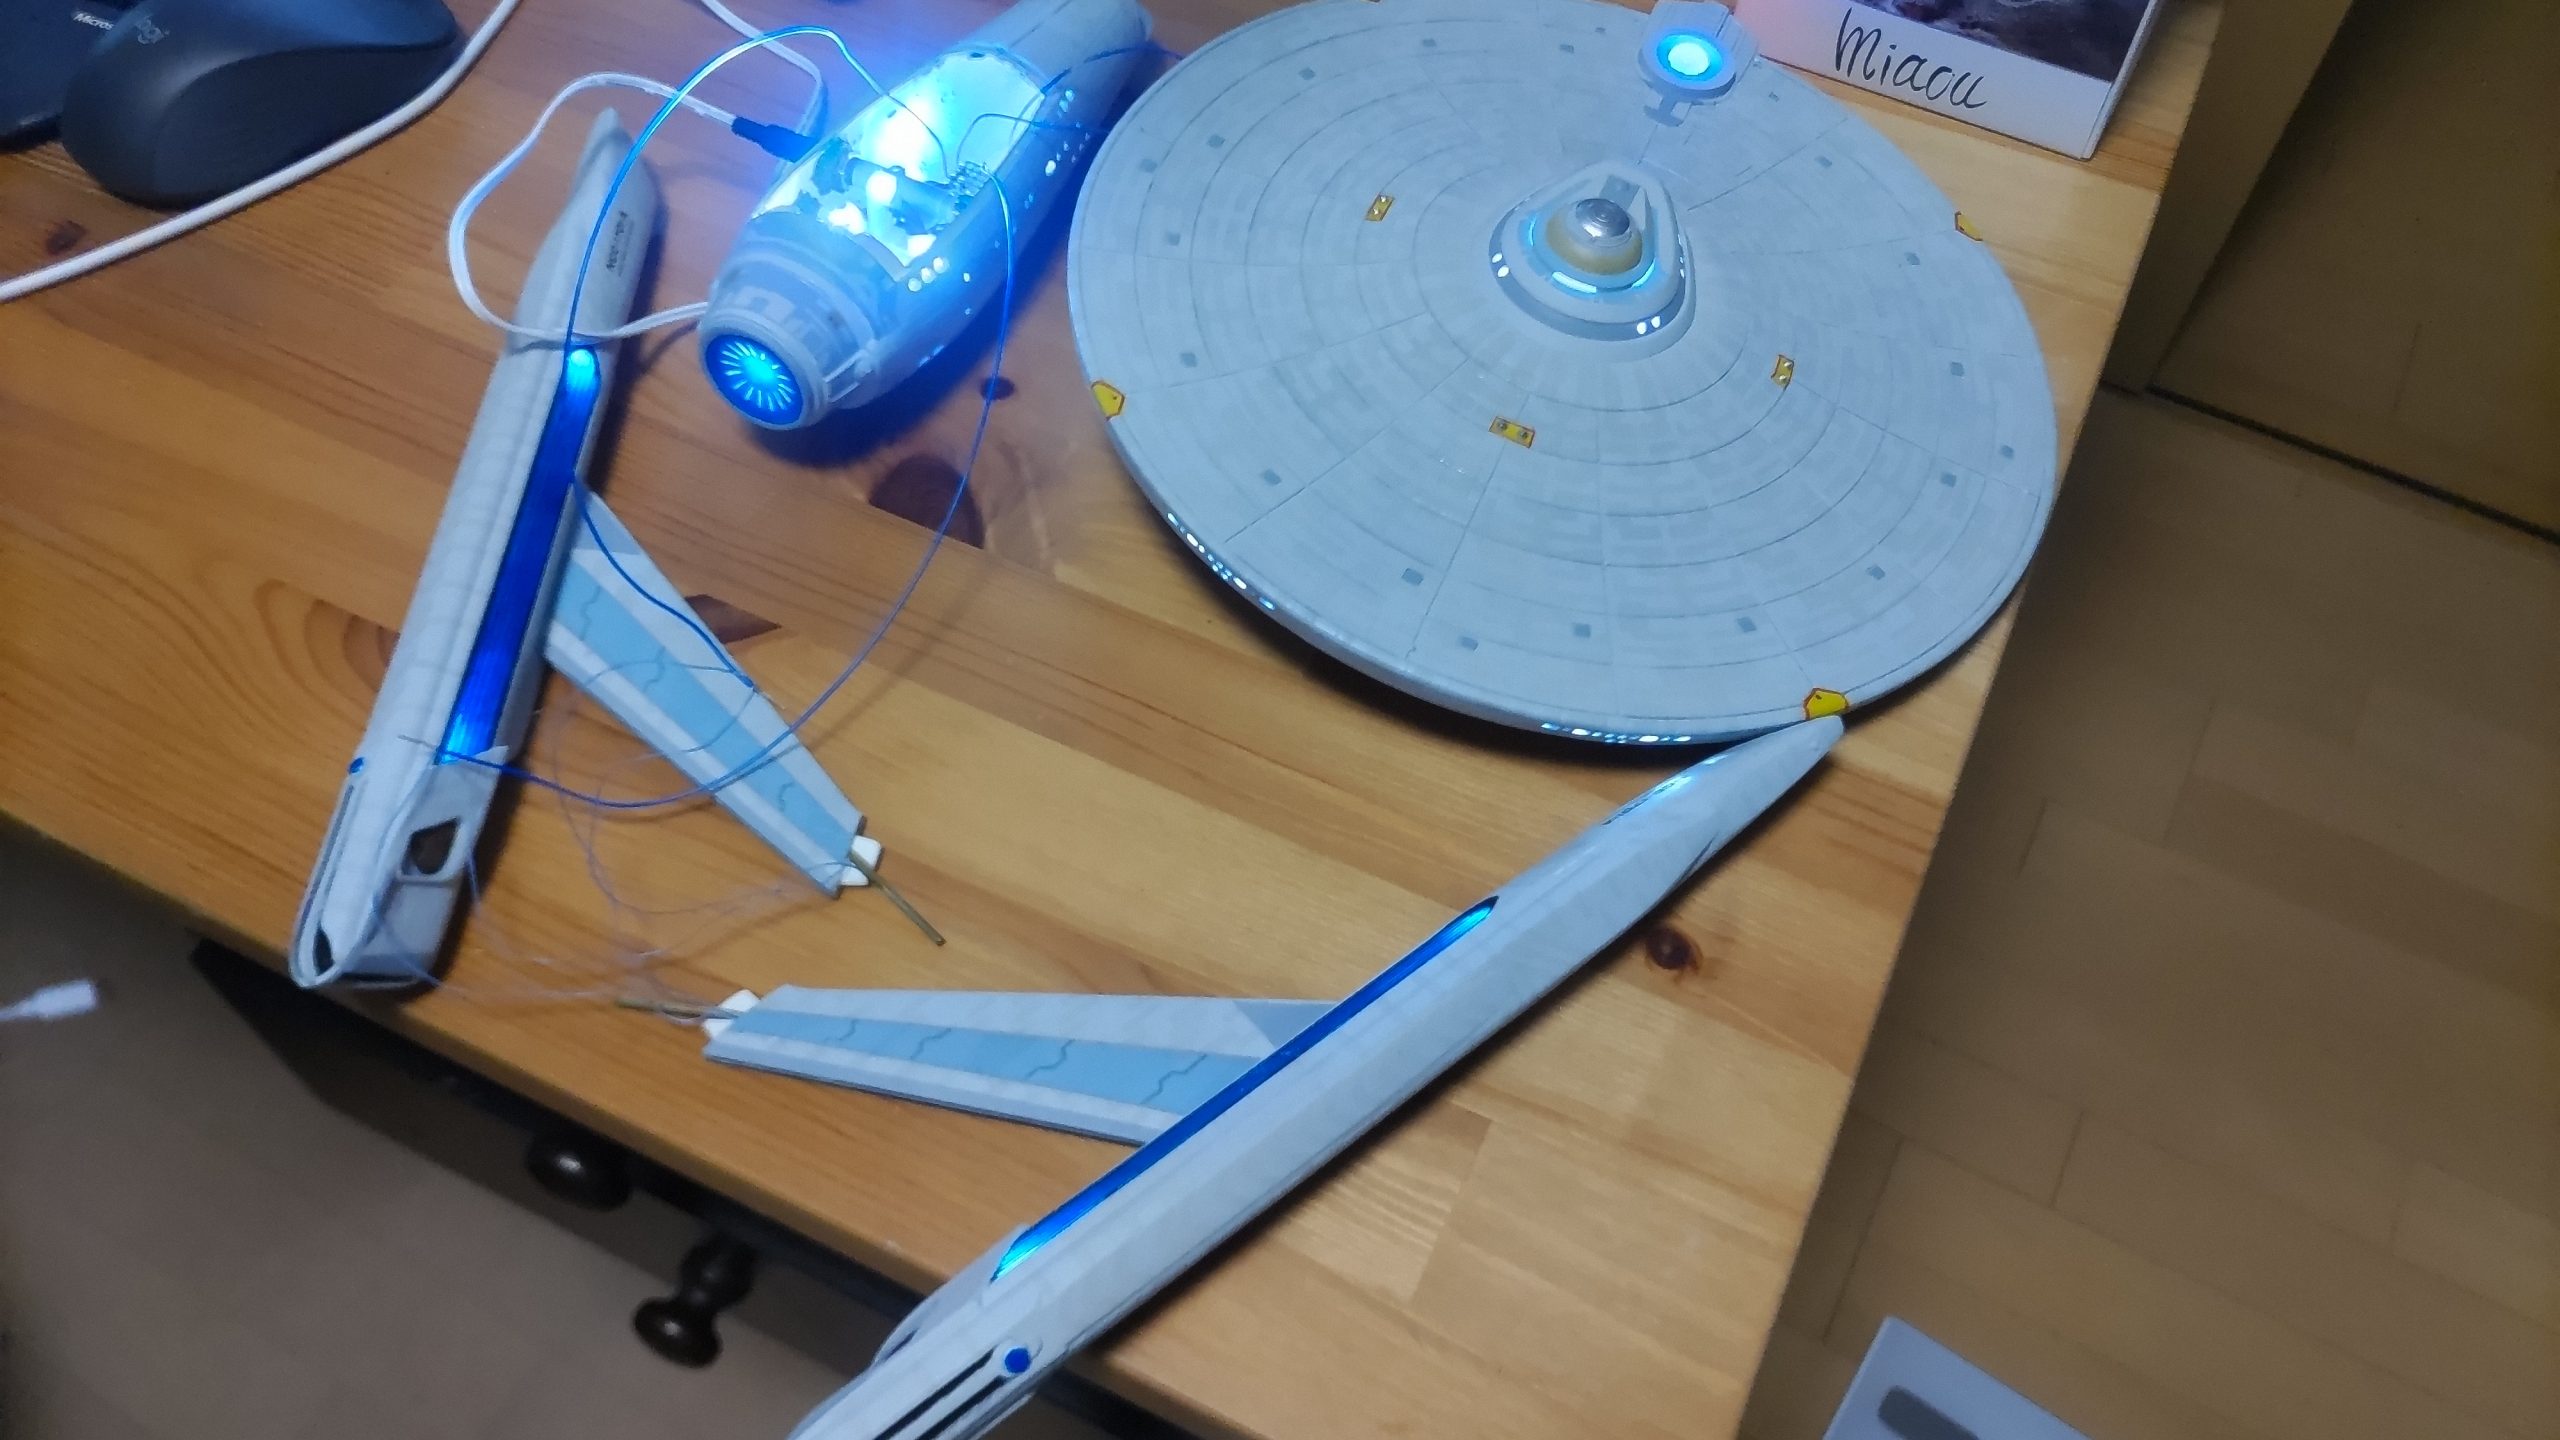
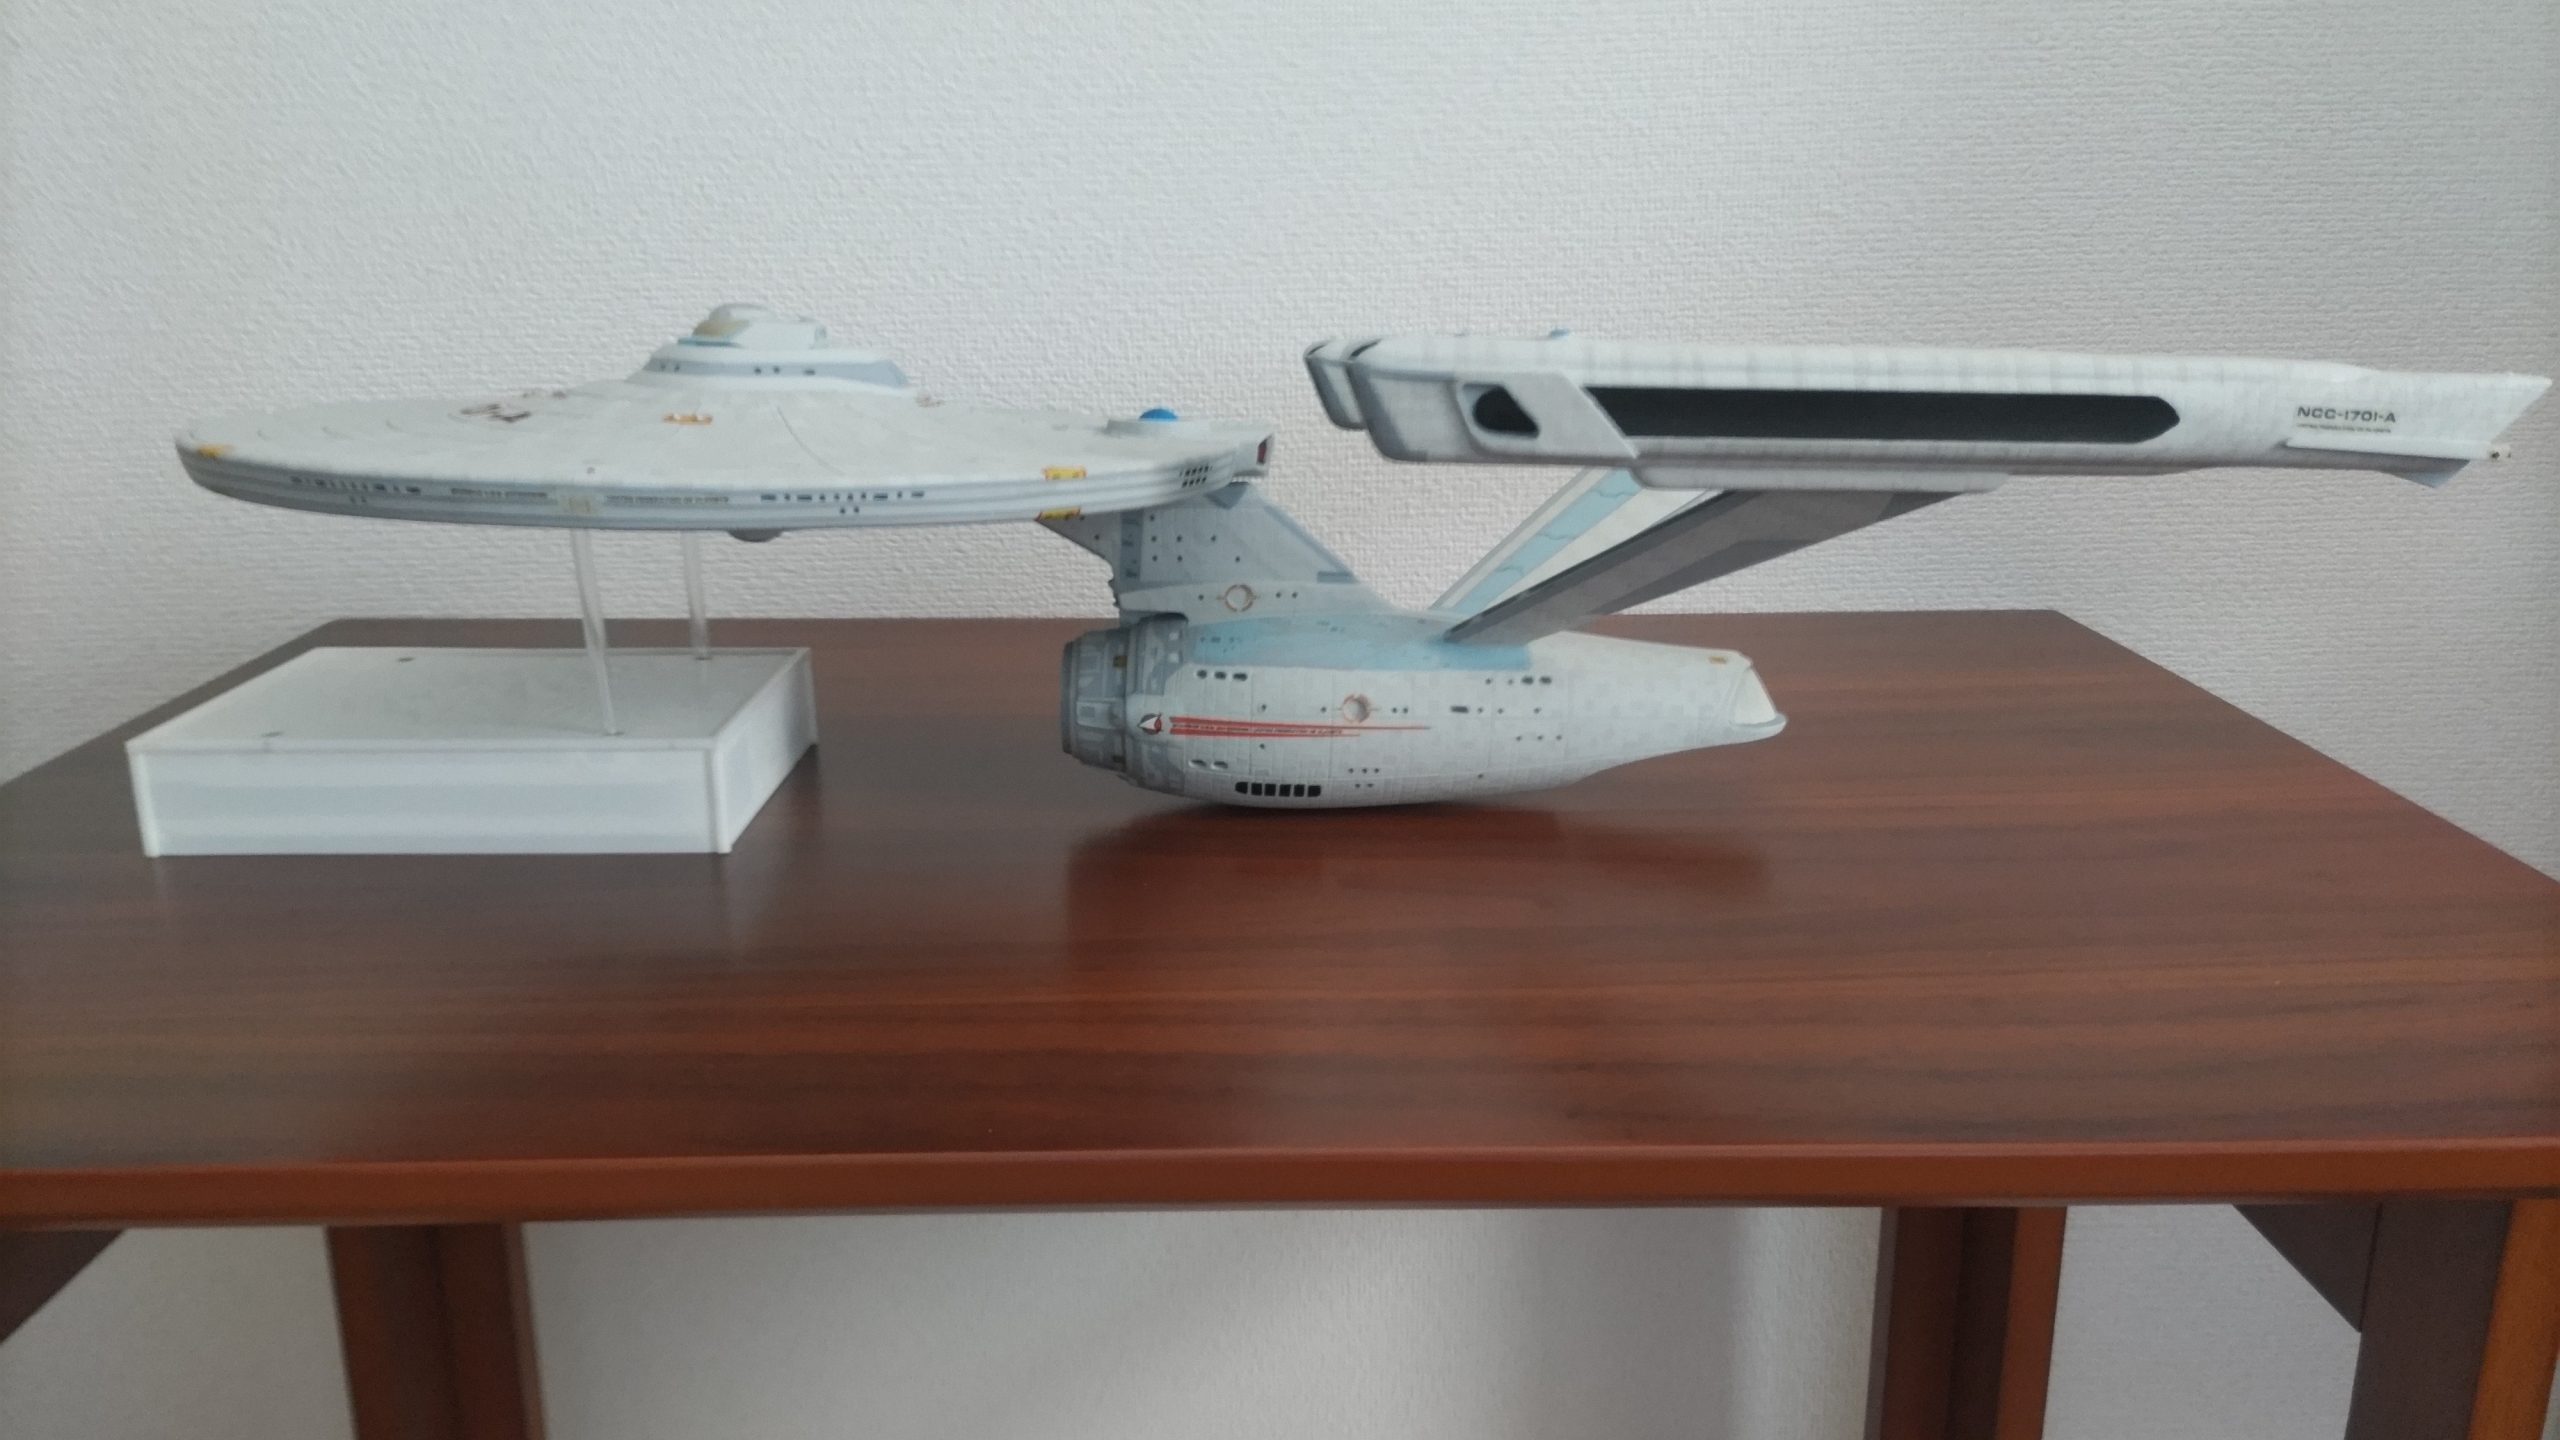
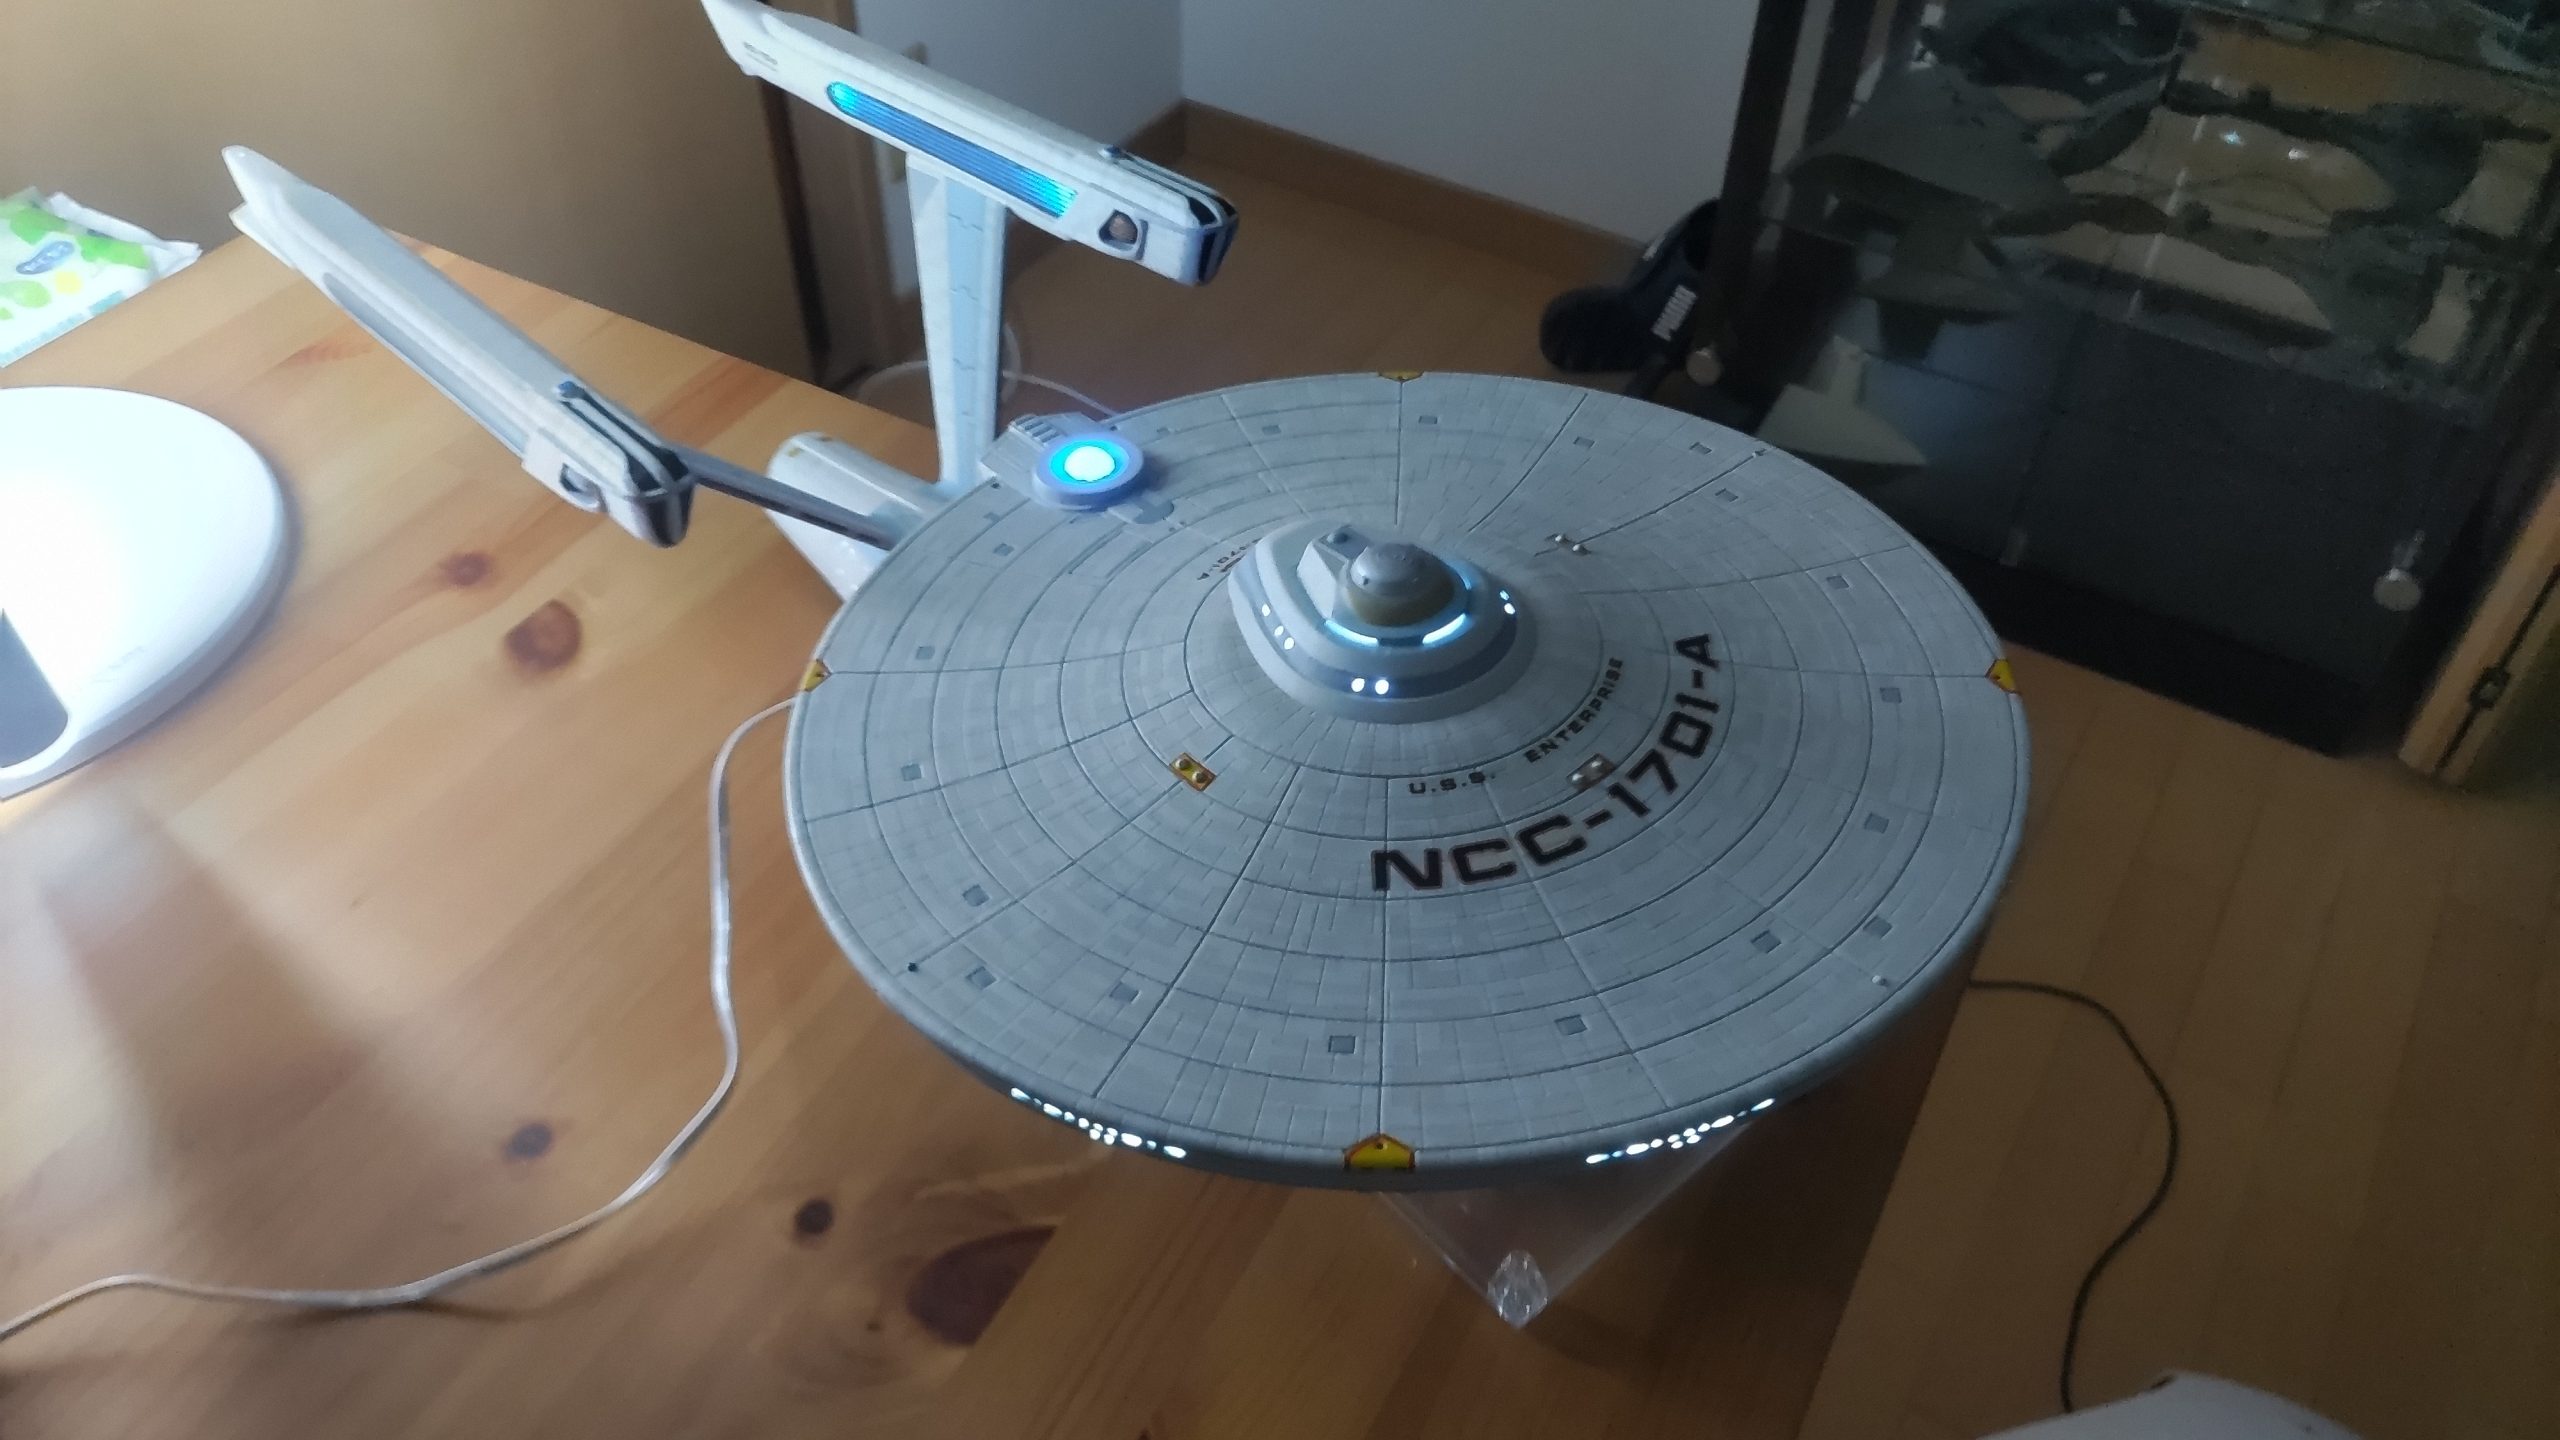
With most of the painting done, the scariest bit is the final assembly. Getting something wrong at this stage would be terrible, so it was a rather nervous few days putting the pylons onto the main hull and getting then onto the neck piece and finally the saucer.
At every stage, I needed to made sure to test the lighting, to double check that all the connections. Nothing worse than closing things up and getting it wrong.
Assembling them upside down actually helped get the alignment on the nacelles right. It also made it easier to do that final solder joint that held firmed up the nacelles so they shouldn’t break. Unfortunately, not everything came together perfect, I got the neck a few degrees off. It’s hard to notice, but I can still see it.
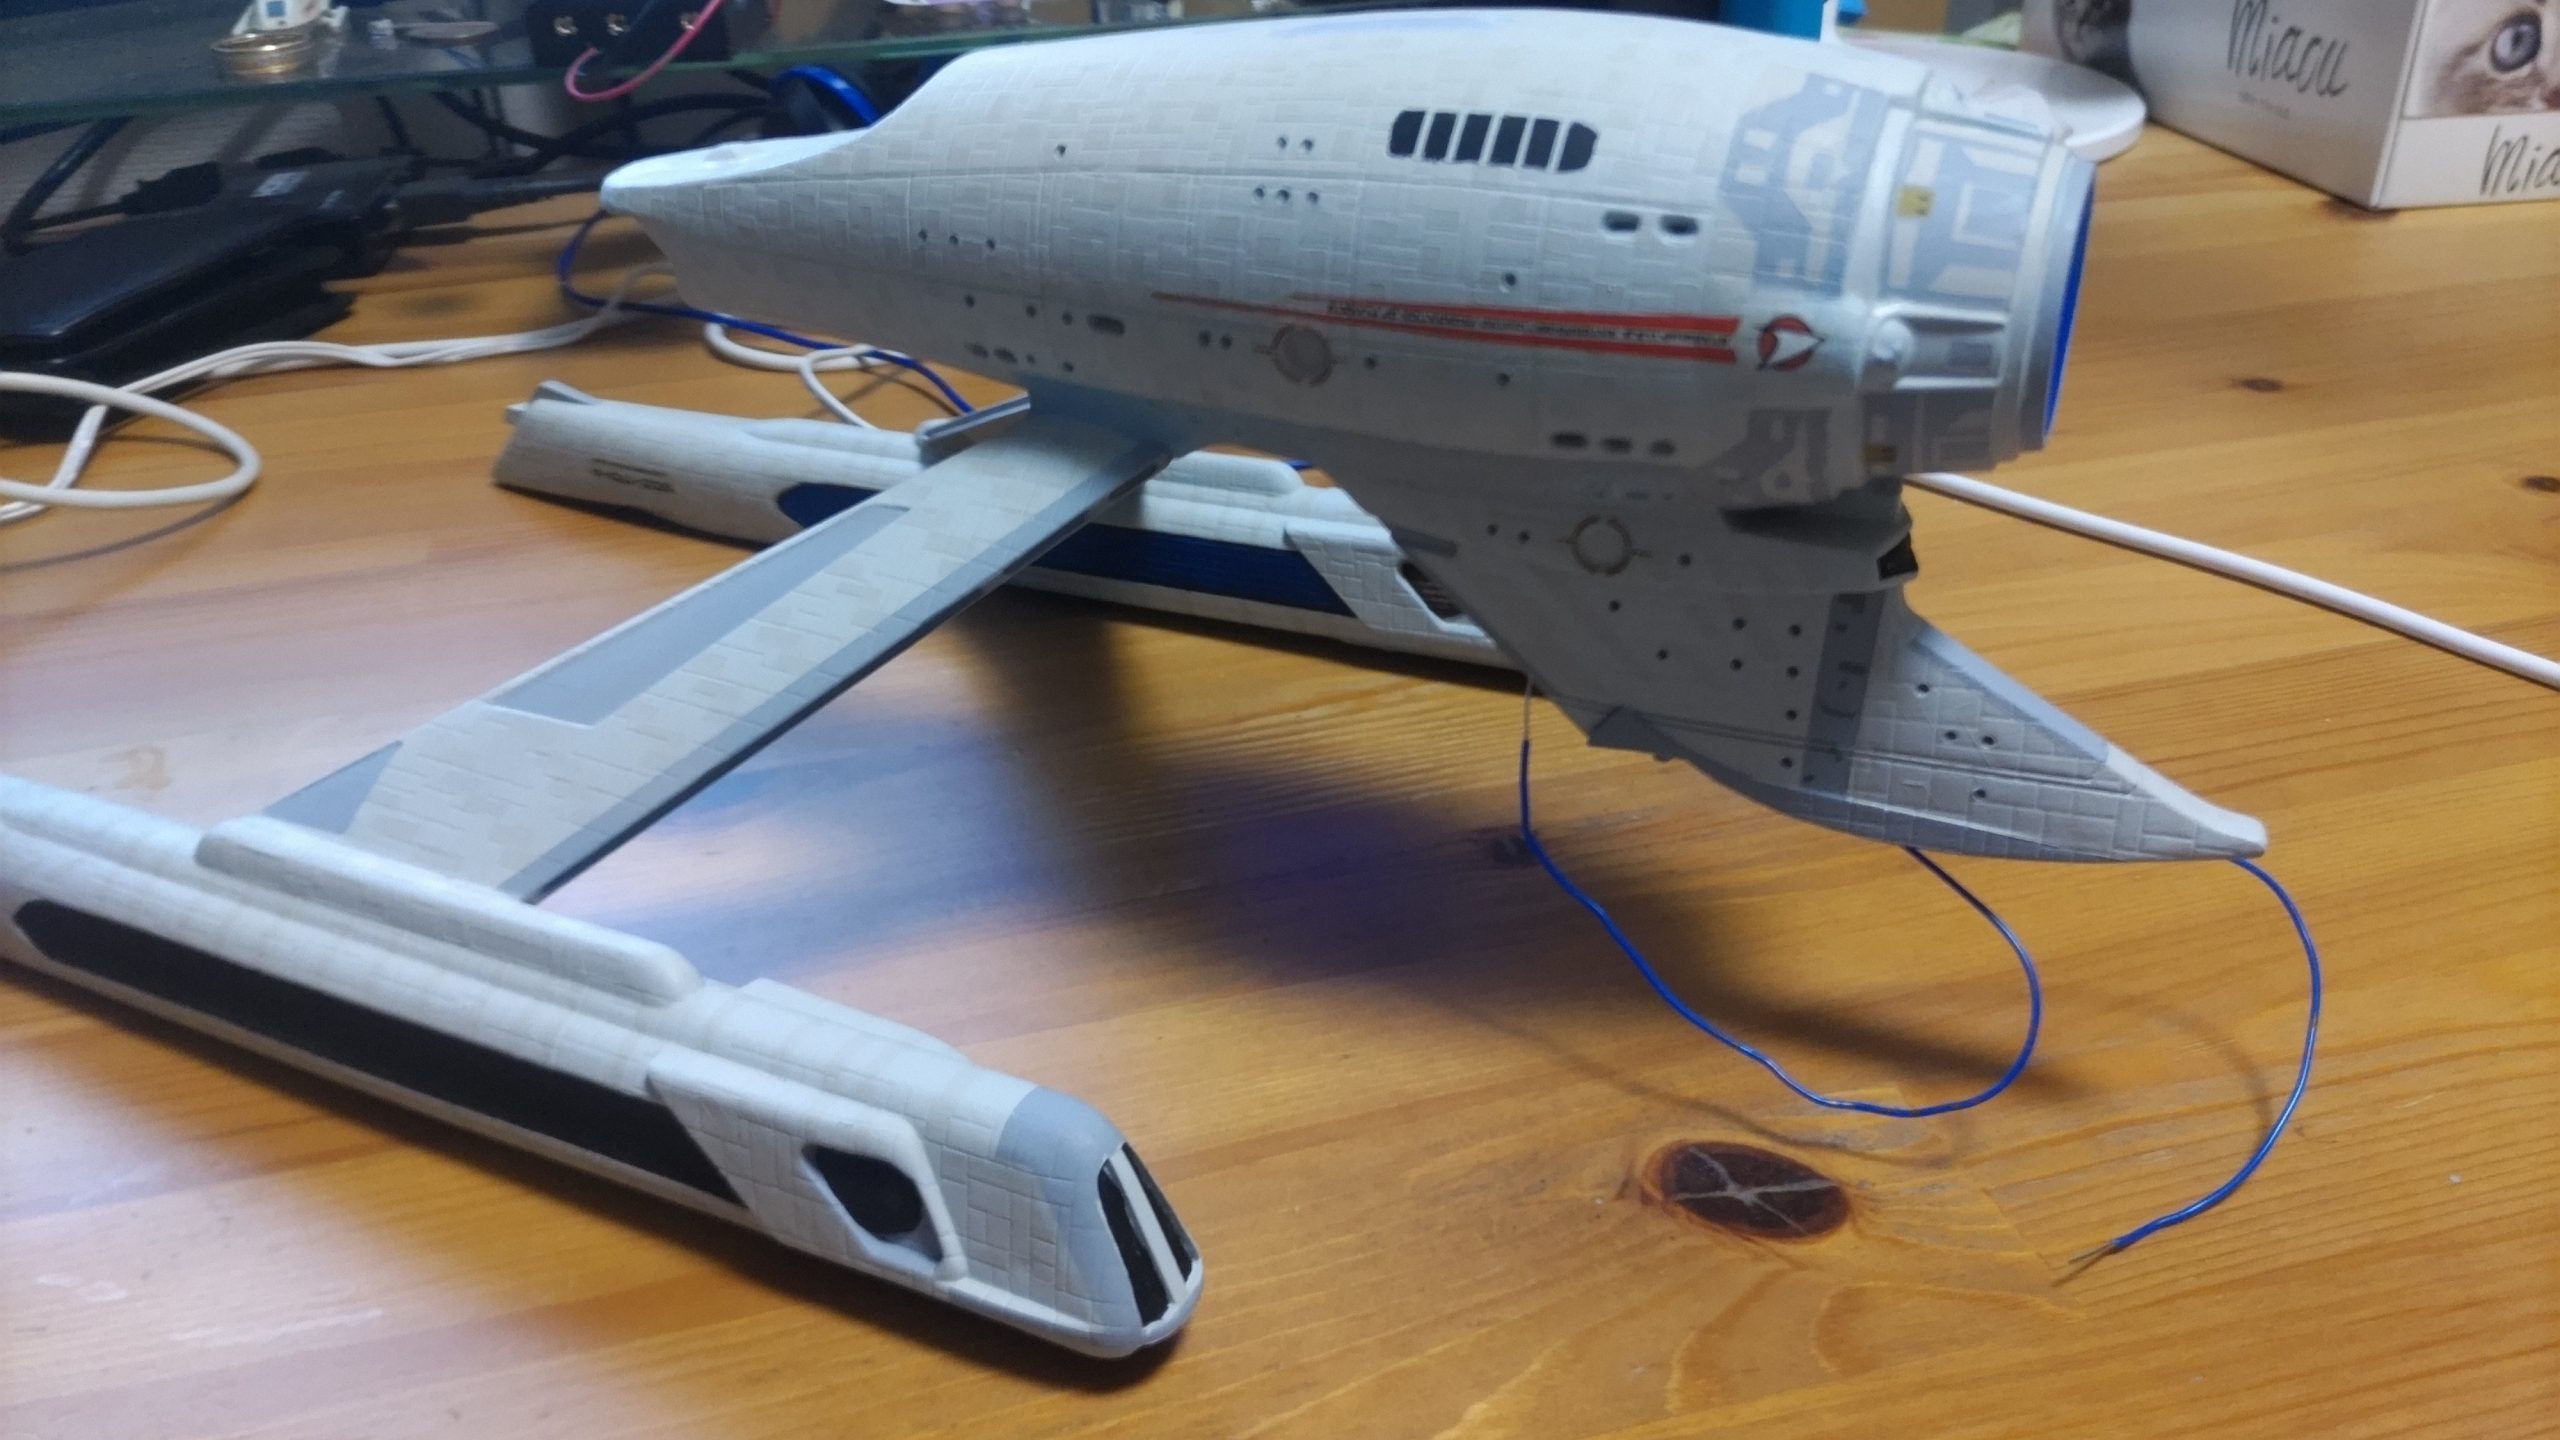
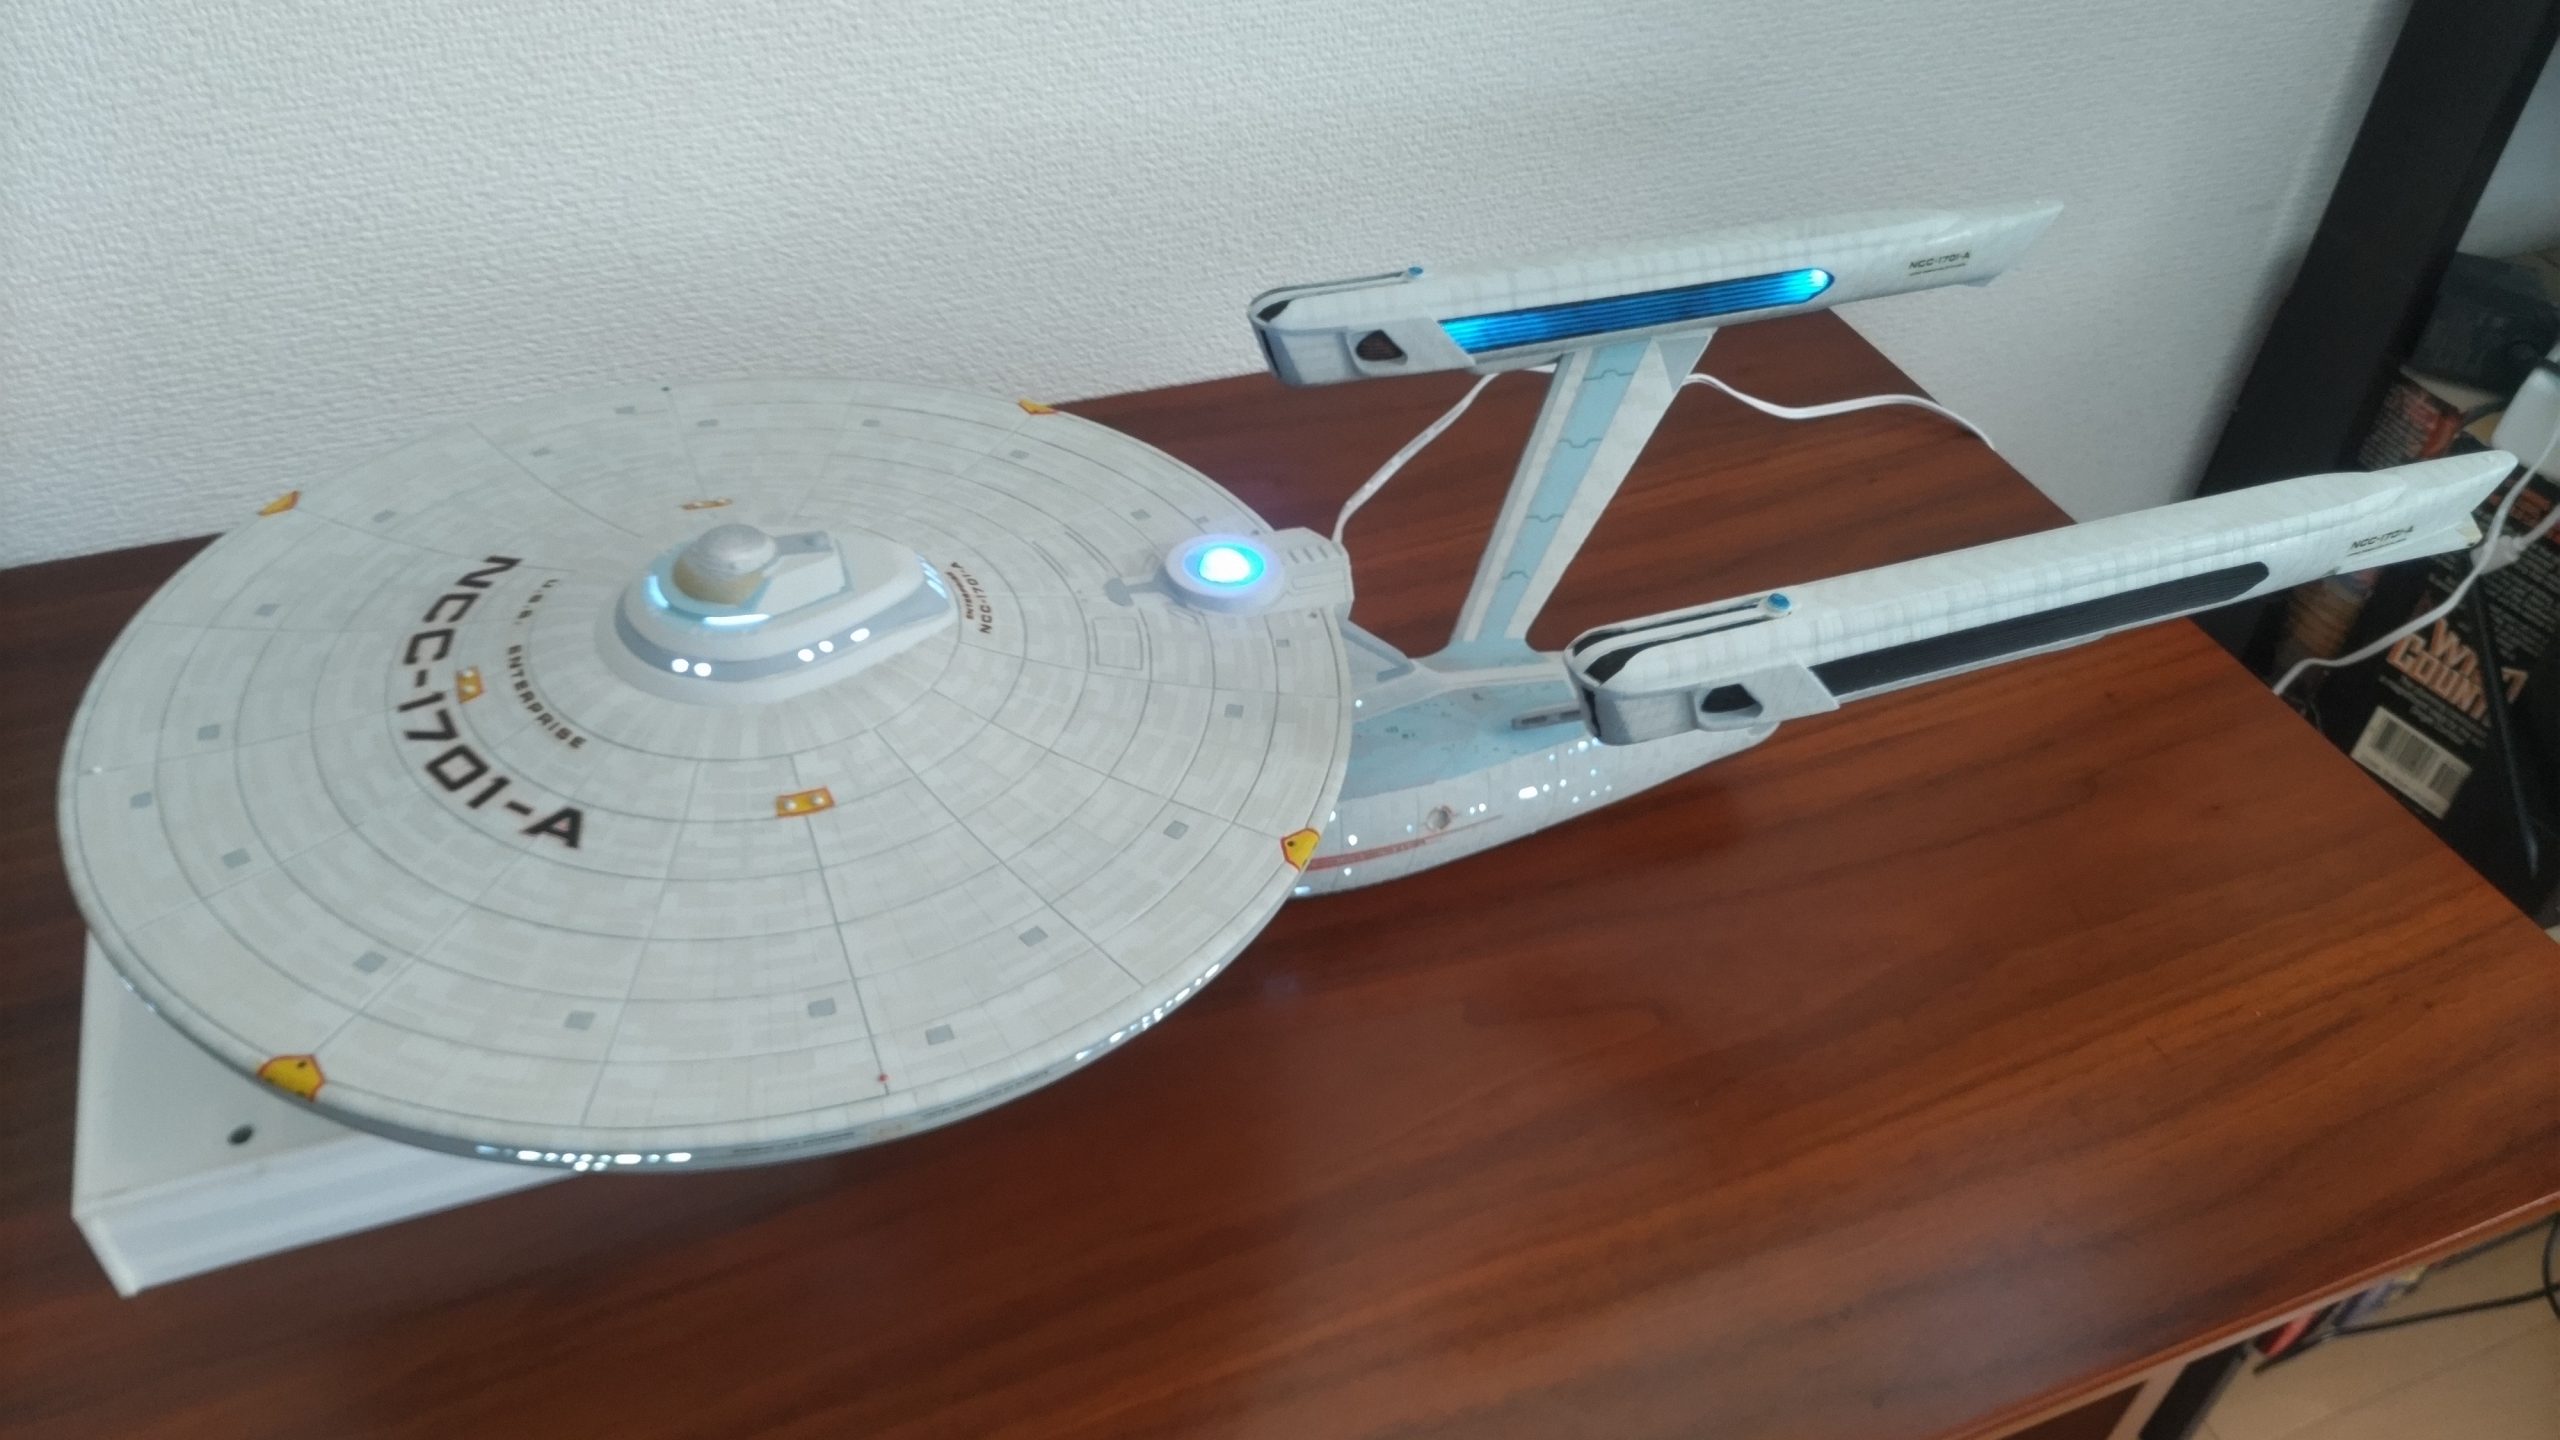
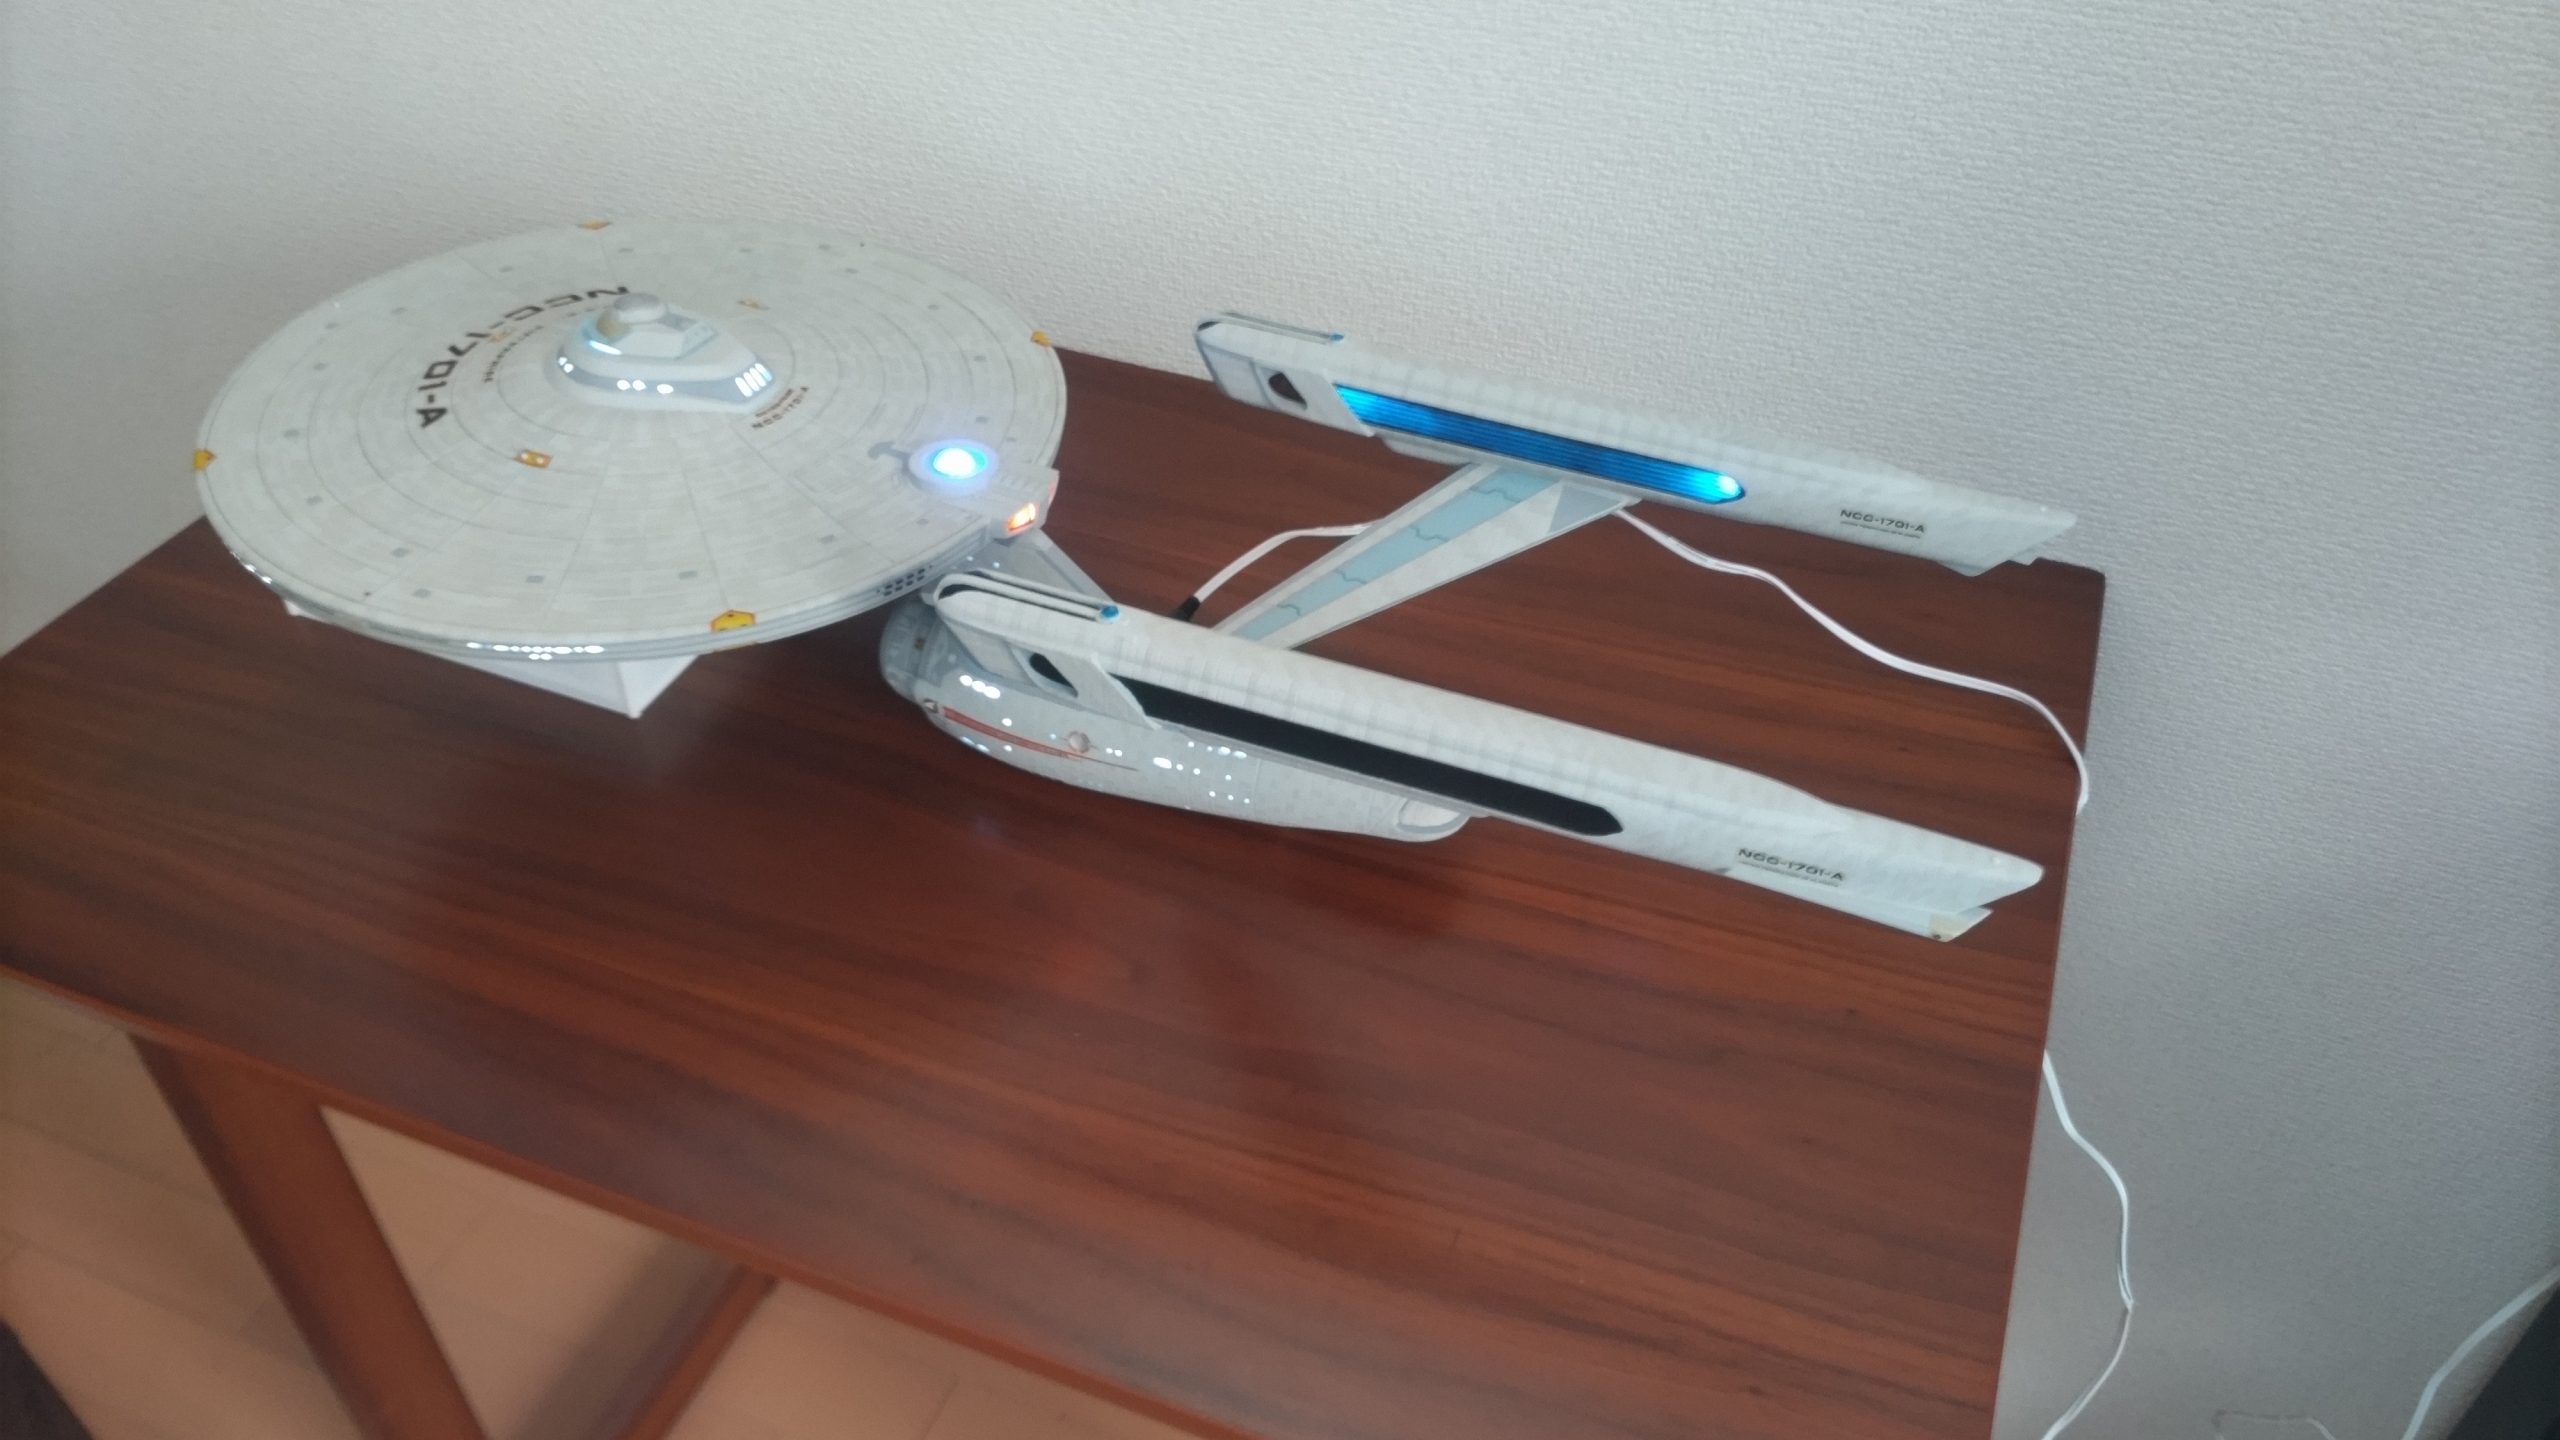
Thoughts on the final results
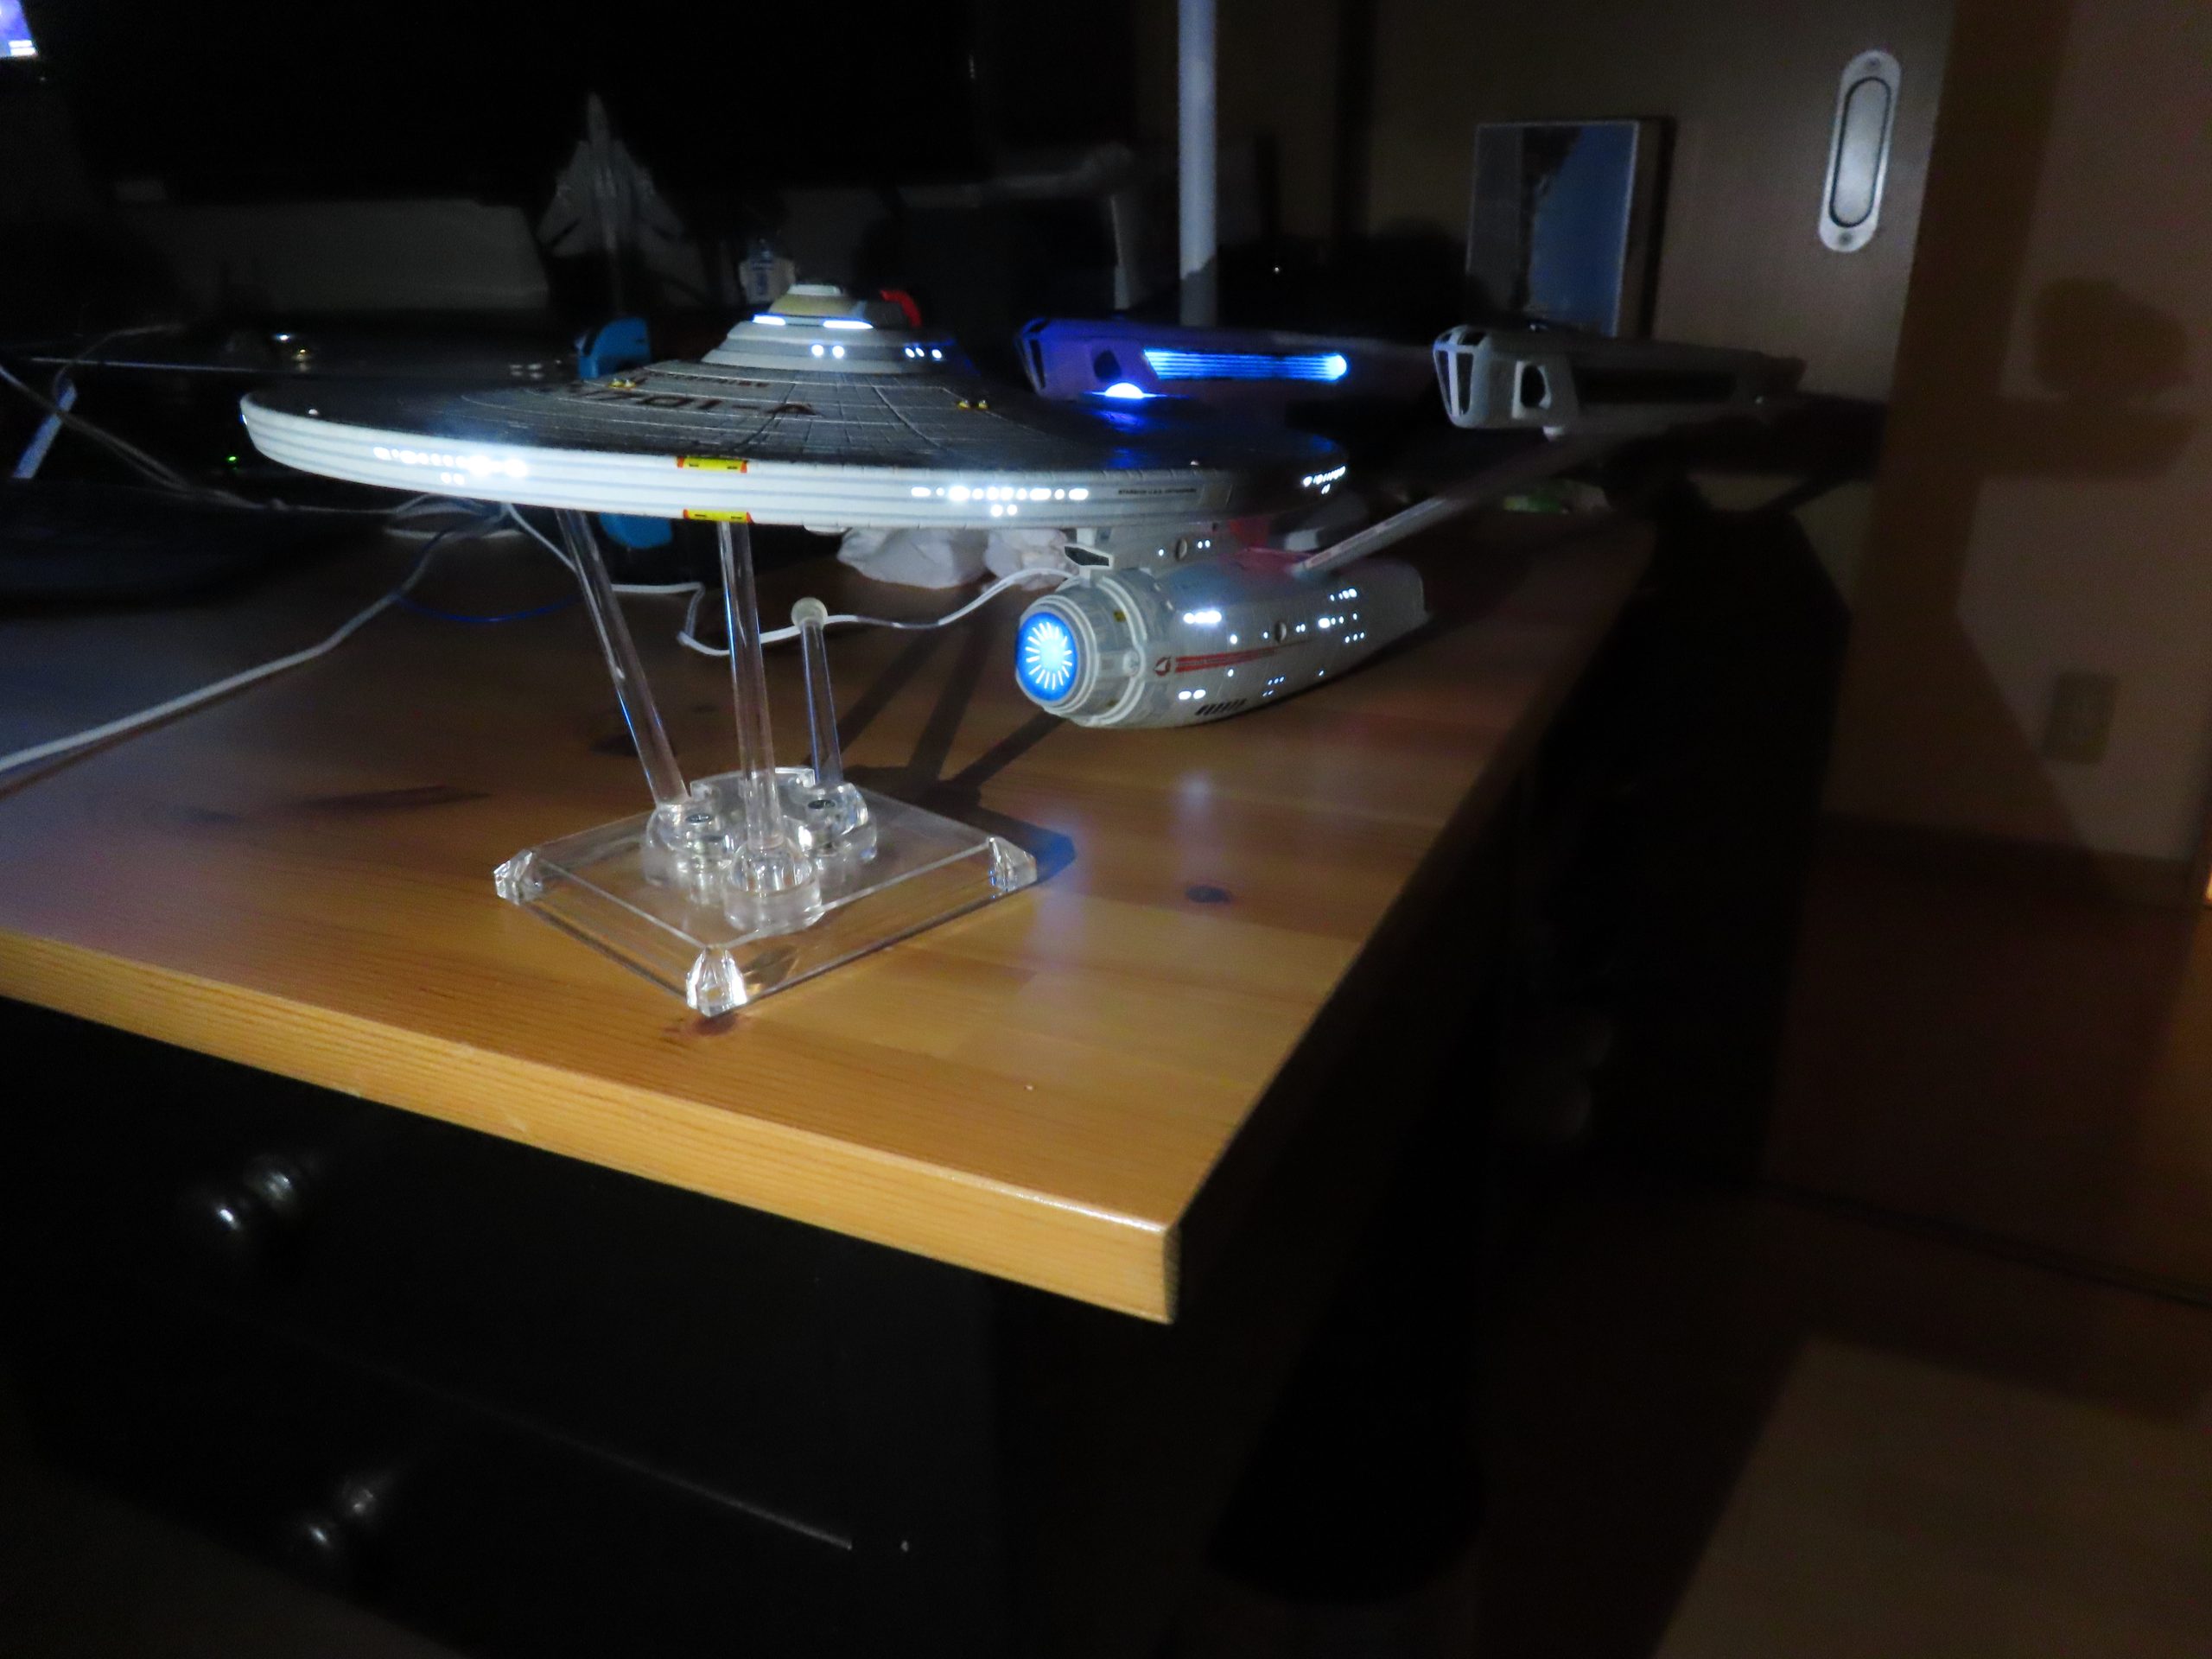
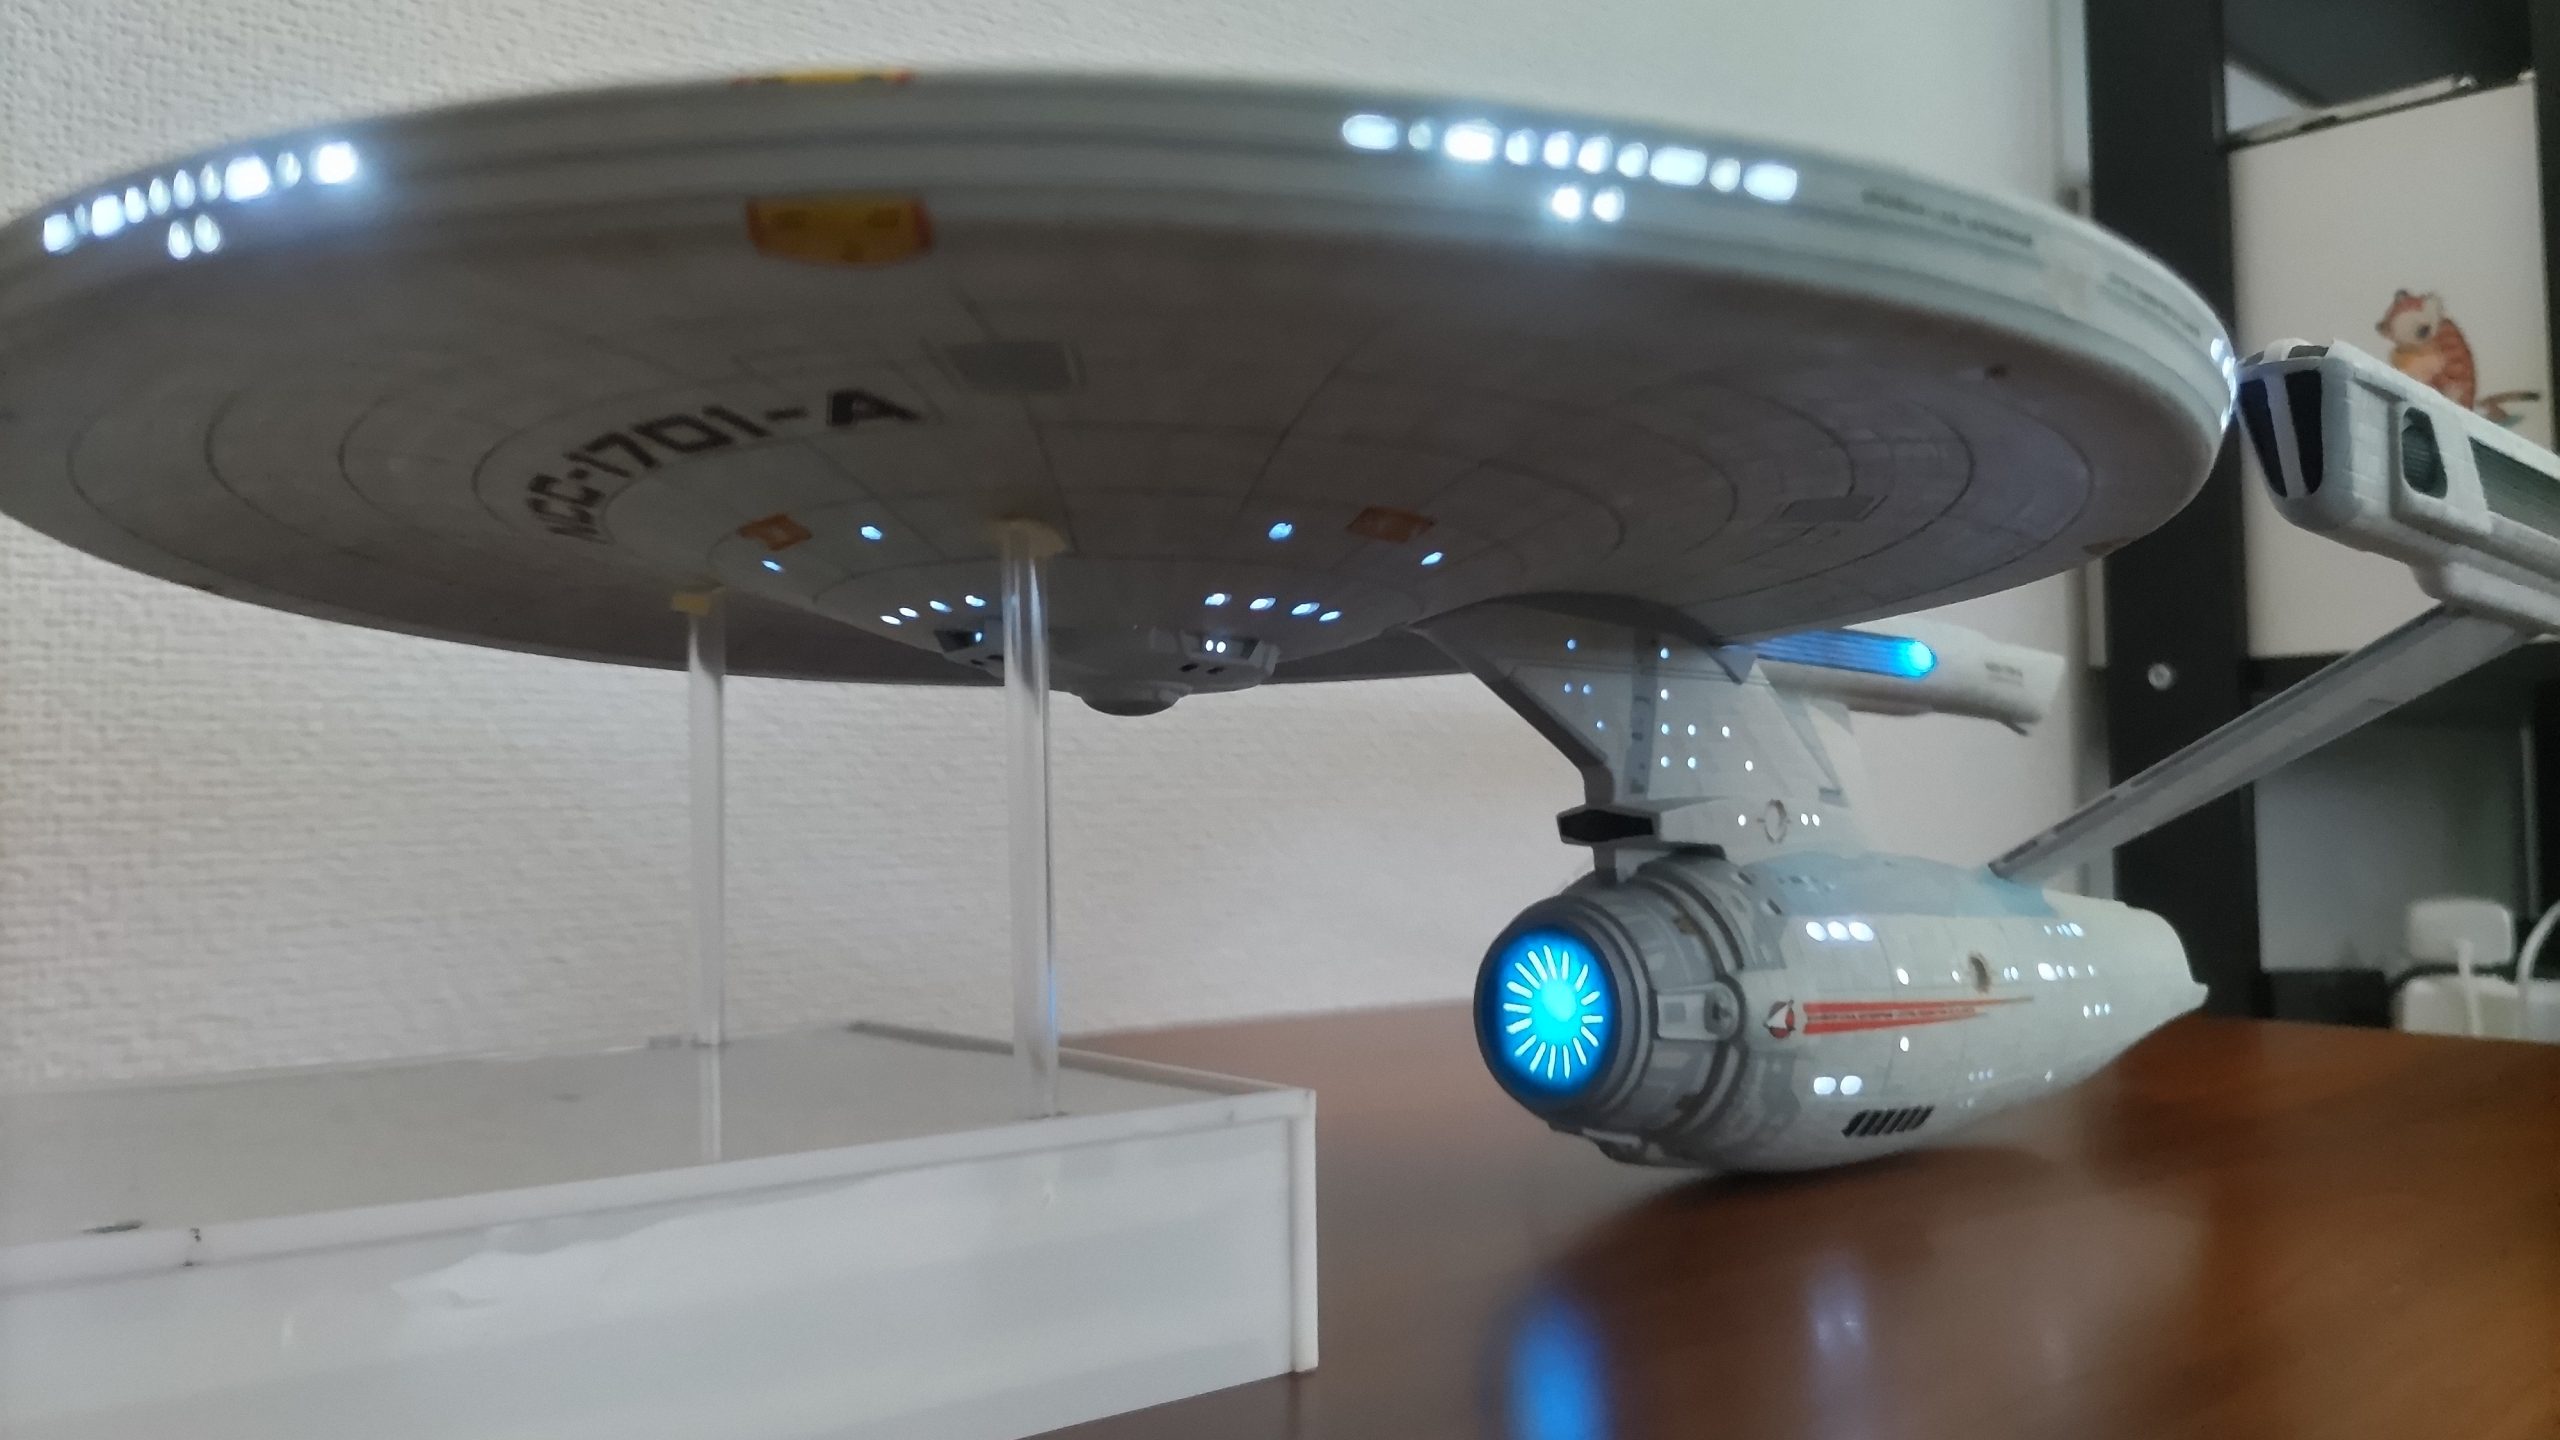
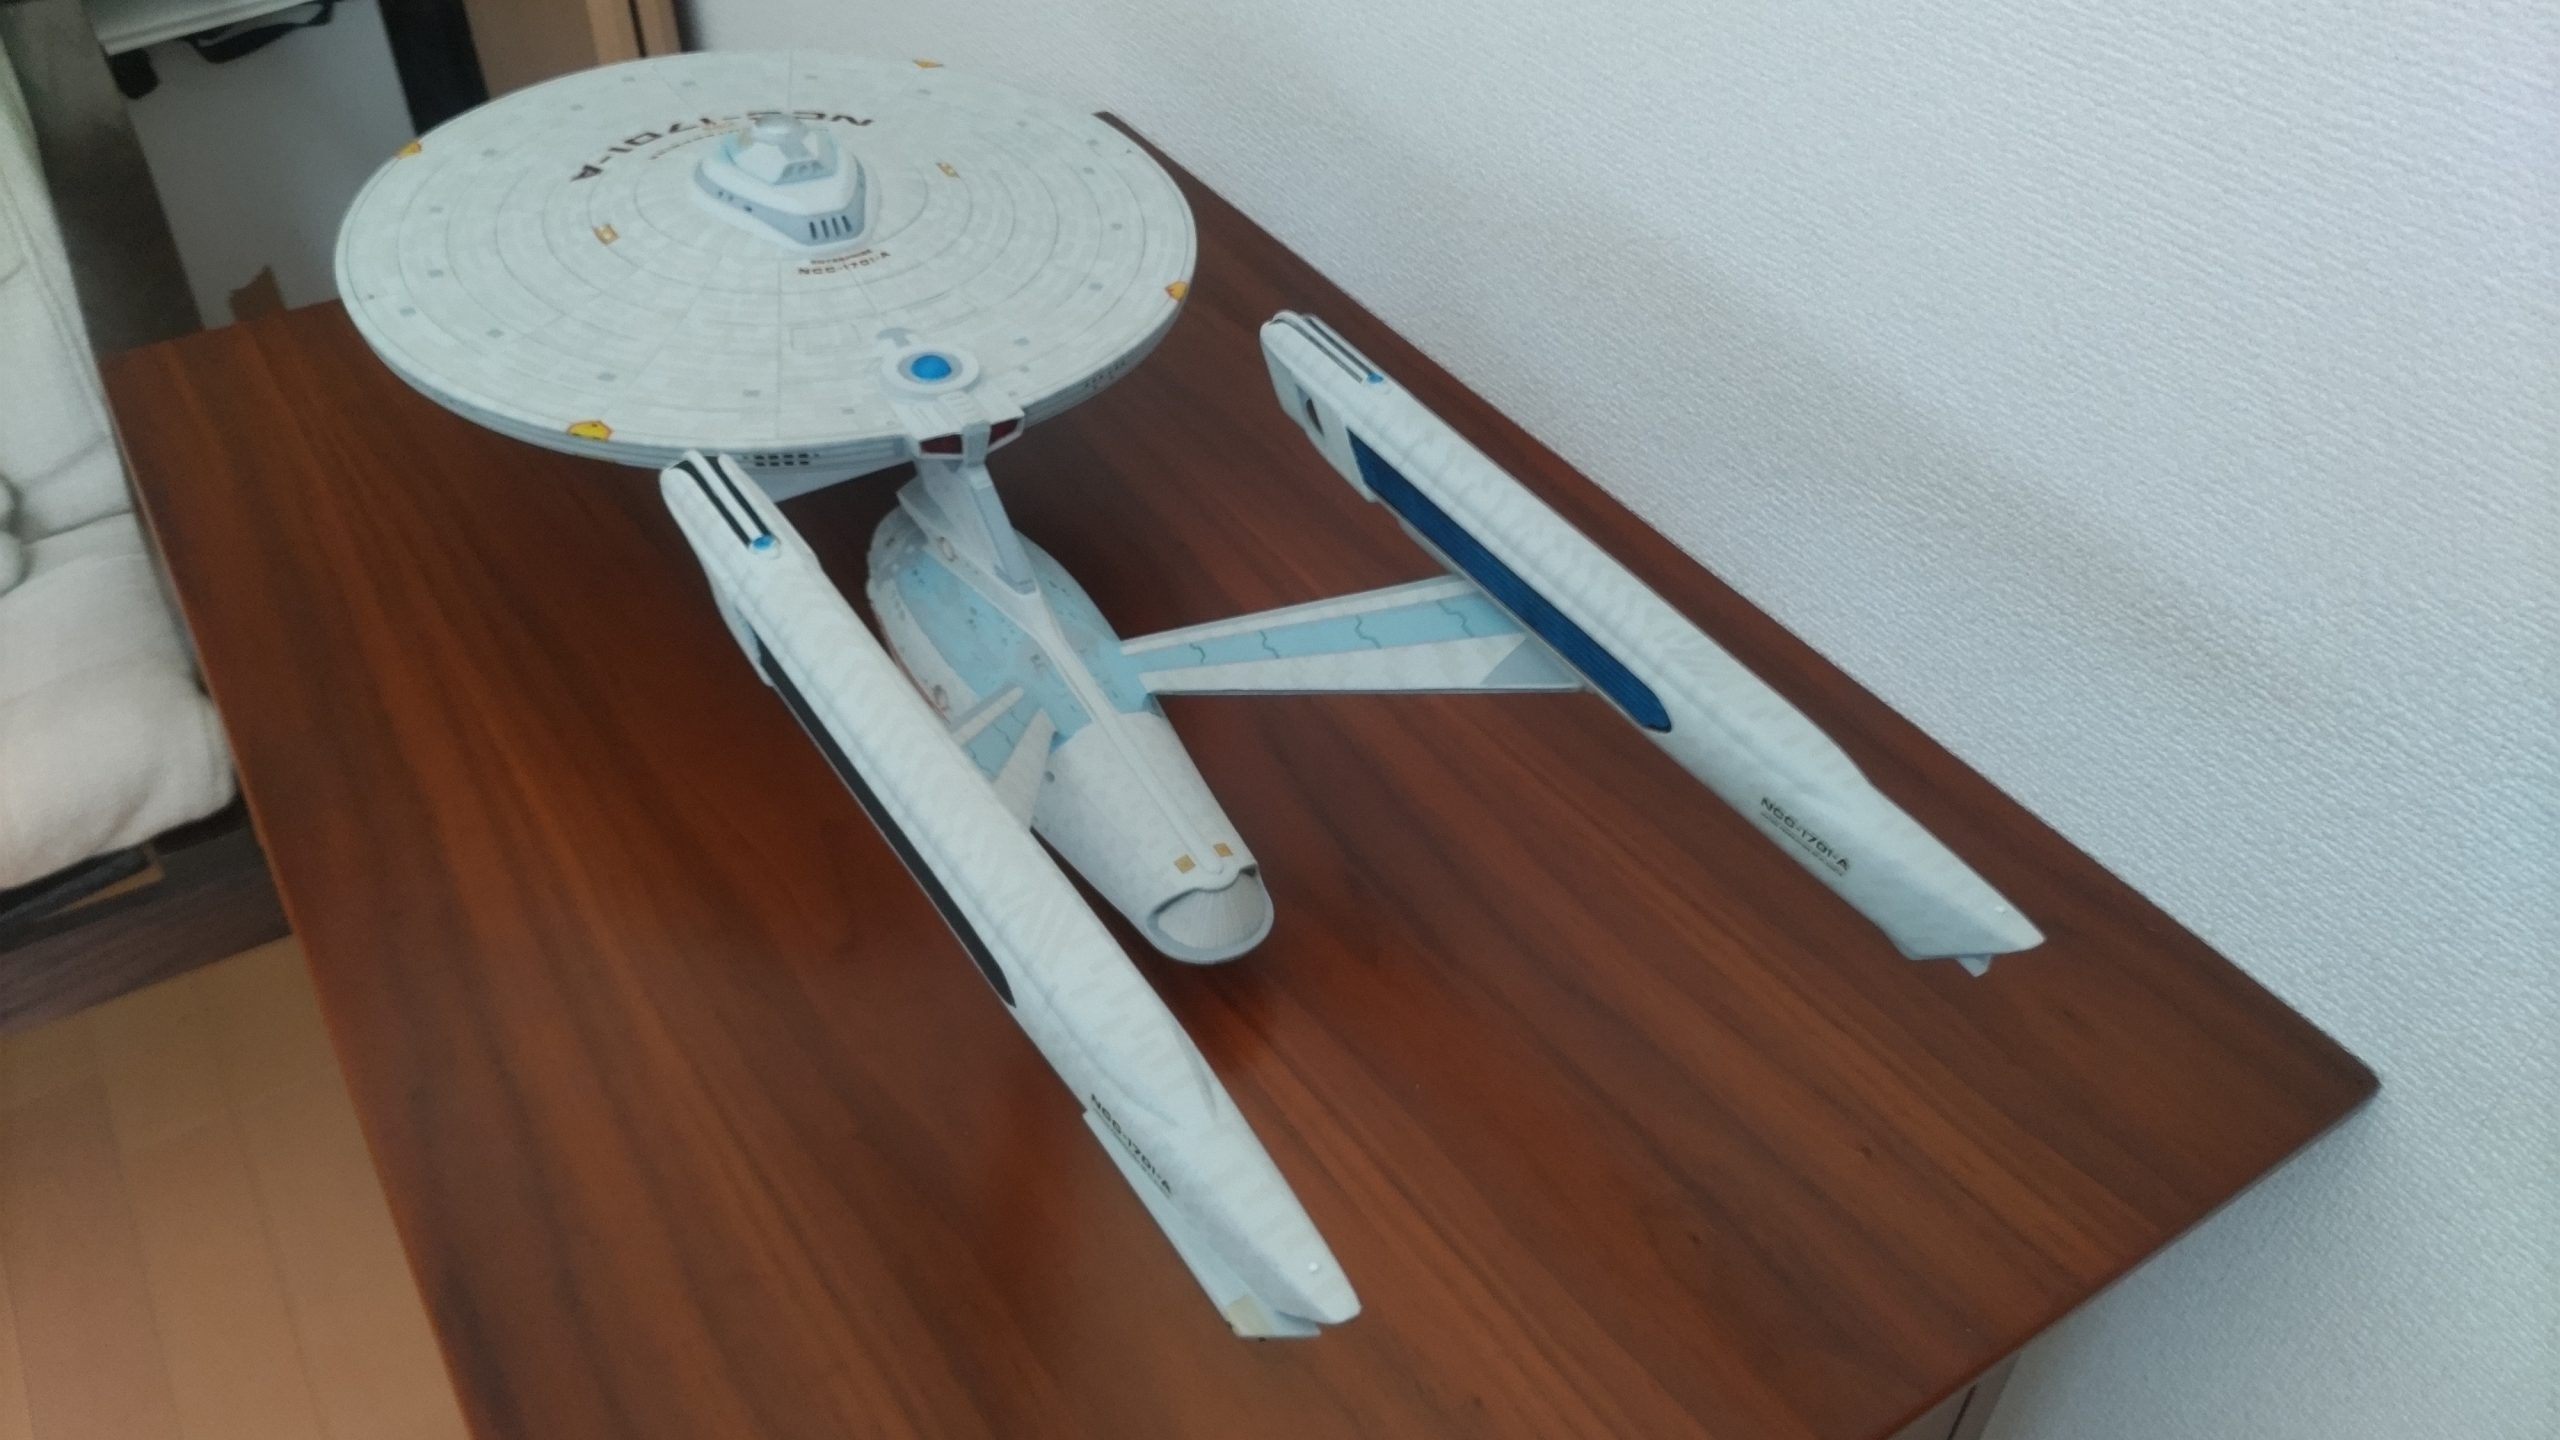
This is one of the biggest models I’ve every built, and I spent a lot of time trying out new things, including tricks with the lighting and airbrushing that I’d not done before. I learned a lot, and it was a lot of work. Despite a number of small issues and mistakes, I’m pretty satisfied with the final result. I’ll need a bit of a break before I go to tackle my smoothie version, but I look forward to improving on what I’ve learned before I jump into that adventure.
For now, I’m just going to enjoy seeing it hang in my favorite hangout for pizza, interesting conversations and live music, Pop Pizza, in Kyoto Japan.


Recent Comments